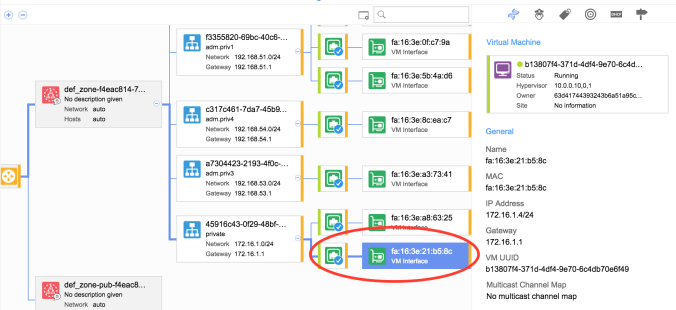
RDO Newton with nuage

Great ‘how-to’ about integrate Nuage into OpenStack. Thanks Scott

scotts tech blog

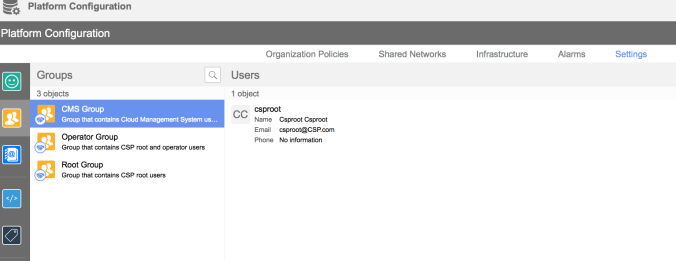
In this post we’ll learn how to install OpenStack RDO (Newton) and integrate it with nuage. As a perquisite the Nuage VCS components must have already been installed and setup. The only requirements between the OpenStack controller and the VSD is that the root (or whatever user you plan to utilize for API access between the OpenStack Contoller and the VSD) be placed within the CMS User Group which is found under:

Platform Configuration” –> “Settings” –> “User Group

Outline of things to do

  • Prepare the OpenStack Controller
  • Prepare the answers file
  • Prepare the OpenStack Compute Nodes
  • Run the PackStack answers file
  • Clone the bash scripts and run

RDO (PackStack) Newton installation with Nuage VCS 4.0R8

Preparing your OpenStack (PackStack) Controller

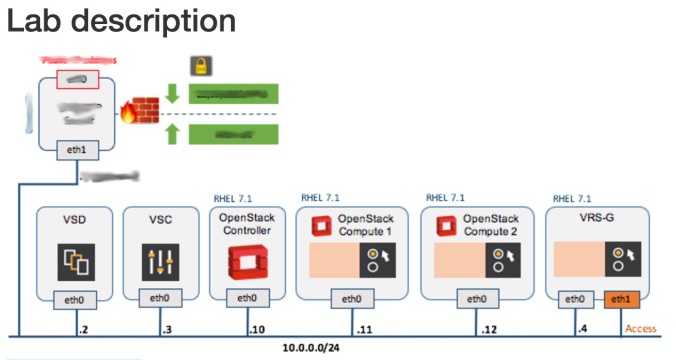
LAB Setup to deploy RDO OpenStack Newton with the following requirements
1 OpenStack Controller
2 Nova Compute Nodes
NFS Server (Nuage images/rpm repo)

OpenStack Controller (Virtual Machine)
4 vCPU, 8G…

View original post 382 more words

OpenStack liberty- Remove elements like duplicated hypervisors or unwanted ports

When your are experimenting with openstack, It’s usual have failures. This post shows how to remove these unwanted ports or duplicated compute nodes.

Removing Duplicated Compute Nodes

I’ve used this trick several times. Cause my Nested OpenStack Nuage lab (and my several installations). I had to remove duplicated nova computes using this procedure.

First, let’s check out our hypervisors.


[root@ocs01 ~]# . keystonerc_admin 
[root@ocs01 ~(keystone_admin)]# nova hypervisor-list
+----+---------------------+-------+---------+
| ID | Hypervisor hostname | State | Status  |
+----+---------------------+-------+---------+
| 1  | nova01              | down  | enabled |
| 3  | nova01              | up    | enabled |
+----+---------------------+-------+---------+

Now, We’ll check out our database and see what we have:


[root@ocs01 ~(keystone_admin)]# mysql -u root
Welcome to the MariaDB monitor.  Commands end with ; or \g.
Your MariaDB connection id is 17
Server version: 5.5.40-MariaDB-wsrep MariaDB Server, wsrep_25.11.r4026

Copyright (c) 2000, 2015, Oracle, MariaDB Corporation Ab and others.

Type 'help;' or '\h' for help. Type '\c' to clear the current input statement.

MariaDB [(none)]> use nova
Reading table information for completion of table and column names
You can turn off this feature to get a quicker startup with -A

Database changed
MariaDB [nova]> ;
ERROR: No query specified

MariaDB [nova]> SELECT id, created_at, updated_at, hypervisor_hostname FROM compute_nodes;
+----+---------------------+---------------------+---------------------+
| id | created_at          | updated_at          | hypervisor_hostname |
+----+---------------------+---------------------+---------------------+
|  1 | 2016-05-19 14:23:52 | 2016-05-19 19:16:56 | nova01              |
|  2 | 2016-05-19 19:30:00 | 2016-05-19 20:52:29 | nova01.novalocal    |
|  3 | 2016-05-23 17:27:07 | 2016-05-23 18:15:51 | nova01              |
+----+---------------------+---------------------+---------------------+
3 rows in set (0.00 sec)
MariaDB [nova]> exit
Bye

Let’s check the service list.


[root@ocs01 ~(keystone_admin)]# nova service-list
+----+------------------+------------------+----------+---------+-------+----------------------------+-----------------+
| Id | Binary           | Host             | Zone     | Status  | State | Updated_at                 | Disabled Reason |
+----+------------------+------------------+----------+---------+-------+----------------------------+-----------------+
| 1  | nova-consoleauth | osc01.nuage.lab  | internal | enabled | down  | 2016-05-19T19:17:46.000000 | -               |
| 2  | nova-scheduler   | osc01.nuage.lab  | internal | enabled | down  | 2016-05-19T19:17:46.000000 | -               |
| 3  | nova-conductor   | osc01.nuage.lab  | internal | enabled | down  | 2016-05-19T19:17:54.000000 | -               |
| 4  | nova-cert        | osc01.nuage.lab  | internal | enabled | down  | 2016-05-19T19:17:46.000000 | -               |
| 5  | nova-compute     | nova01           | nova     | enabled | down  | 2016-05-19T19:17:52.000000 | -               |
| 6  | nova-cert        | ocs01.novalocal  | internal | enabled | up    | 2016-05-23T18:16:53.000000 | -               |
| 7  | nova-conductor   | ocs01.novalocal  | internal | enabled | up    | 2016-05-23T18:16:53.000000 | -               |
| 8  | nova-consoleauth | ocs01.novalocal  | internal | enabled | up    | 2016-05-23T18:16:53.000000 | -               |
| 9  | nova-scheduler   | ocs01.novalocal  | internal | enabled | up    | 2016-05-23T18:16:53.000000 | -               |
| 10 | nova-compute     | nova01.novalocal | nova     | enabled | up    | 2016-05-23T18:17:01.000000 | -               |
+----+------------------+------------------+----------+---------+-------+----------------------------+-----------------+

We’ll remove the hypervisor from compute_nodes and services tables as following:


[root@ocs01 ~(keystone_admin)]# mysql -u root
Welcome to the MariaDB monitor.  Commands end with ; or \g.
Your MariaDB connection id is 18
Server version: 5.5.40-MariaDB-wsrep MariaDB Server, wsrep_25.11.r4026

Copyright (c) 2000, 2015, Oracle, MariaDB Corporation Ab and others.

Type 'help;' or '\h' for help. Type '\c' to clear the current input statement.

MariaDB [(none)]> use nova;
Reading table information for completion of table and column names
You can turn off this feature to get a quicker startup with -A

Database changed

MariaDB [nova]> DELETE FROM compute_nodes WHERE id='1';
Query OK, 1 row affected (0.05 sec)

MariaDB [nova]> DELETE FROM compute_nodes WHERE id='2';
Query OK, 1 row affected (0.07 sec)

MariaDB [nova]> DELETE FROM services WHERE host='nova01';
Query OK, 1 row affected (0.01 sec)

MariaDB [nova]> exit
Bye

Let’s check if we’ve got this fixed.


[root@ocs01 ~(keystone_admin)]# nova service-list
+----+------------------+------------------+----------+---------+-------+----------------------------+-----------------+
| Id | Binary           | Host             | Zone     | Status  | State | Updated_at                 | Disabled Reason |
+----+------------------+------------------+----------+---------+-------+----------------------------+-----------------+
| 1  | nova-consoleauth | osc01.nuage.lab  | internal | enabled | down  | 2016-05-19T19:17:46.000000 | -               |
| 2  | nova-scheduler   | osc01.nuage.lab  | internal | enabled | down  | 2016-05-19T19:17:46.000000 | -               |
| 3  | nova-conductor   | osc01.nuage.lab  | internal | enabled | down  | 2016-05-19T19:17:54.000000 | -               |
| 4  | nova-cert        | osc01.nuage.lab  | internal | enabled | down  | 2016-05-19T19:17:46.000000 | -               |
| 6  | nova-cert        | ocs01.novalocal  | internal | enabled | up    | 2016-05-23T18:19:43.000000 | -               |
| 7  | nova-conductor   | ocs01.novalocal  | internal | enabled | up    | 2016-05-23T18:19:43.000000 | -               |
| 8  | nova-consoleauth | ocs01.novalocal  | internal | enabled | up    | 2016-05-23T18:19:43.000000 | -               |
| 9  | nova-scheduler   | ocs01.novalocal  | internal | enabled | up    | 2016-05-23T18:19:43.000000 | -               |
| 10 | nova-compute     | nova01.novalocal | nova     | enabled | up    | 2016-05-23T18:19:41.000000 | -               |
+----+------------------+------------------+----------+---------+-------+----------------------------+-----------------+
[root@ocs01 ~(keystone_admin)]# nova hypervisor-list
+----+---------------------+-------+---------+
| ID | Hypervisor hostname | State | Status  |
+----+---------------------+-------+---------+
| 3  | nova01              | up    | enabled |
+----+---------------------+-------+---------+

Removing unwanted ports

You can have issues with your vports sometimes. Well, happened to me when I’ve got issues with the configuration of my Nuage plugin. After you fixed, you will have issues with some ports, and you will have to remove them from VSD and also from neutron database.

Here we have a way to do it from neutron. Let’s check what port we need to remove:


[root@ocs01 neutron(keystone_chain)]# neutron port-list
+--------------------------------------+------+-------------------+-----------------------------------------------------------------------------------+
| id                                   | name | mac_address       | fixed_ips                                                                         |
+--------------------------------------+------+-------------------+-----------------------------------------------------------------------------------+
| 10c38a65-954c-4b74-92d3-83a2fc63306a |      | fa:16:3e:ec:62:41 | {"subnet_id": "889bba29-bcb1-4e0a-9219-0785e76c95bb", "ip_address": "10.31.31.2"} |
| 538479f2-e715-4687-aa88-b4c7626015ea |      | fa:16:3e:f9:e2:7c | {"subnet_id": "889bba29-bcb1-4e0a-9219-0785e76c95bb", "ip_address": "10.31.31.3"} |
| 70466c99-8abd-4ed9-9fcc-2800d4417698 |      | fa:16:3e:78:7a:eb | {"subnet_id": "9d80cebb-cb07-436e-8620-a8277a30ce4a", "ip_address": "10.41.41.2"} |
| 842ae886-2ade-466a-9e1d-3321f26928b0 |      | fa:16:3e:f9:d7:97 | {"subnet_id": "9d80cebb-cb07-436e-8620-a8277a30ce4a", "ip_address": "10.41.41.1"} |
| 8dd2d824-eb70-46c9-b3fa-494aec382bd8 |      | fa:16:3e:1c:01:a7 | {"subnet_id": "889bba29-bcb1-4e0a-9219-0785e76c95bb", "ip_address": "10.31.31.1"} |
+--------------------------------------+------+-------------------+-----------------------------------------------------------------------------------+

Now, let’s go to the neutron database and remove these unwanted ports.


[root@ocs01 neutron(keystone_chain)]# mysql -u root 
Welcome to the MariaDB monitor.  Commands end with ; or \g.
Your MariaDB connection id is 600
Server version: 5.5.40-MariaDB-wsrep MariaDB Server, wsrep_25.11.r4026

Copyright (c) 2000, 2015, Oracle, MariaDB Corporation Ab and others.

Type 'help;' or '\h' for help. Type '\c' to clear the current input statement.

MariaDB [(none)]> use neutron
Reading table information for completion of table and column names
You can turn off this feature to get a quicker startup with -A

Database changed
MariaDB [neutron]> delete from ports where id='10c38a65-954c-4b74-92d3-83a2fc63306a';
Query OK, 1 row affected (0.09 sec)

MariaDB [neutron]> delete from ports where id='538479f2-e715-4687-aa88-b4c7626015ea';
Query OK, 1 row affected (0.07 sec)

MariaDB [neutron]> delete from ports where id='70466c99-8abd-4ed9-9fcc-2800d4417698';
Query OK, 1 row affected (0.00 sec)

Send me any comment if you struggle.
See you.

Building a Nuage/PackStack Lab at home Part 3

Update – August 1st, 2016: I’ve made an update thanks to @karkull feedback. some changes to neutron.cfg and nova.cfg files. I’ve made important changes the way I was presenting the info over this post.

Hi there,

Through this post, I will install nested packstack liberty with a controller/network node and a nova compute node. Then, I will install the Nuage plugin for neutron and the metadata, heat, horizon files. Also I will install our VRS (Virtualized Routing and Switching) replacing the OVS instance.

I’ve done some changes from my last post. I’ve created a couple new flavors: nuage.osc.2 and nuage.nova.2. Reason: I’ve got some issues with the memory capacity into the OpenStack Controller. Since now, replace flavors nuage.osc and nuage.nova with those:

[root@box01 ~(keystone_admin)]# openstack flavor create --ram 10240 --disk 250 --vcpus 4 --public nuage.nova.2
+----------------------------+--------------------------------------+
| Field                      | Value                                |
+----------------------------+--------------------------------------+
| OS-FLV-DISABLED:disabled   | False                                |
| OS-FLV-EXT-DATA:ephemeral  | 0                                    |
| disk                       | 250                                  |
| id                         | 4e191554-25f9-4ce7-bb1b-80941d6ab839 |
| name                       | nuage.nova.2                         |
| os-flavor-access:is_public | True                                 |
| ram                        | 10240                                |
| rxtx_factor                | 1.0                                  |
| swap                       |                                      |
| vcpus                      | 4                                    |
+----------------------------+--------------------------------------+
[root@box01 ~(keystone_admin)]# openstack flavor create --ram 8192 --disk 50 --vcpus 4 --public nuage.osc.2
+----------------------------+--------------------------------------+
| Field                      | Value                                |
+----------------------------+--------------------------------------+
| OS-FLV-DISABLED:disabled   | False                                |
| OS-FLV-EXT-DATA:ephemeral  | 0                                    |
| disk                       | 50                                   |
| id                         | a98464a5-1008-45bb-972d-7997cc2f0df3 |
| name                       | nuage.osc.2                          |
| os-flavor-access:is_public | True                                 |
| ram                        | 8192                                 |
| rxtx_factor                | 1.0                                  |
| swap                       |                                      |
| vcpus                      | 4                                    |
+----------------------------+--------------------------------------+

Our new list of instances will be now:

pinrojas - packstack lab nuage new layout

OpenStack Controller

I will install an OpenStack controller/network with the services: neutron, horizon, heat, nova, keystone and glance. And a nova compute server with KVM.

Let’s start creating the server

[root@box01 ~]# . keystonerc_nuage
[root@box01 ~(keystone_nuage)]# openstack server create --image centos7-image  --flavor nuage.osc.2 --key-name pin-laptop --nic net-id=nuage-lab,v4-fixed-ip=192.168.101.6 osc01
+--------------------------------------+----------------------------------------------------------+
| Field                                | Value                                                    |
+--------------------------------------+----------------------------------------------------------+
| OS-DCF:diskConfig                    | MANUAL                                                   |
| OS-EXT-AZ:availability_zone          |                                                          |
| OS-EXT-STS:power_state               | 0                                                        |
| OS-EXT-STS:task_state                | scheduling                                               |
| OS-EXT-STS:vm_state                  | building                                                 |
| OS-SRV-USG:launched_at               | None                                                     |
| OS-SRV-USG:terminated_at             | None                                                     |
| accessIPv4                           |                                                          |
| accessIPv6                           |                                                          |
| addresses                            |                                                          |
| adminPass                            | fdqWisumw9tB                                             |
| config_drive                         |                                                          |
| created                              | 2016-05-23T17:15:20Z                                     |
| flavor                               | nuage.osc.2 (a98464a5-1008-45bb-972d-7997cc2f0df3)       |
| hostId                               |                                                          |
| id                                   | 859bfab9-6547-471f-b83f-73b7997a2b7f                     |
| image                                | snap-160519-osc01 (6082c049-a98d-4fa3-87be-241e08ea0b19) |
| key_name                             | pin-laptop                                               |
| name                                 | ocs01                                                    |
| os-extended-volumes:volumes_attached | []                                                       |
| progress                             | 0                                                        |
| project_id                           | 39e2f35bc10f4047b1ea77f79559807d                         |
| properties                           |                                                          |
| security_groups                      | [{u'name': u'default'}]                                  |
| status                               | BUILD                                                    |
| updated                              | 2016-05-23T17:15:20Z                                     |
| user_id                              | c91cd992e79149209c41416a55a661b1                         |
+--------------------------------------+----------------------------------------------------------+

I will add a floating IP 192.168.1.30 to get access from my home network to our osc01.


openstack ip floating create external_network
openstack ip floating add 192.168.1.30 ocs01

Let’s proceed preparing our controller and installing PackStack now.

OpenStack Controller: disable selinux and update

Let’s disable selinux to save resources.

[root@ocs01 ~]# cat /etc/selinux/config
# This file controls the state of SELinux on the system.
# SELINUX= can take one of these three values:
# enforcing - SELinux security policy is enforced.
# permissive - SELinux prints warnings instead of enforcing.
# disabled - No SELinux policy is loaded.
SELINUX=DISABLED
# SELINUXTYPE= can take one of three two values:
# targeted - Targeted processes are protected,
# minimum - Modification of targeted policy. Only selected processes are protected.
# mls - Multi Level Security protection.
SELINUXTYPE=targeted
[root@ocs01 ~]# vi /etc/grub2.cfg

change /etc/grub2.conf and reboot. See an extract of the file over the following:


### BEGIN /etc/grub.d/10_linux ###
menuentry 'CentOS Linux (3.10.0-327.13.1.el7.x86_64) 7 (Core)' --class centos --class gnu-linux --class gnu --class os --unrestricted $menuentry_id_option 'gnulinux-3.10.0-327.13.1.el7.x86_64-advanced-8a9d38ed-14e7-462a-be6c-e385d6b1906d' {
load_video
set gfxpayload=keep
insmod gzio
insmod part_msdos
insmod xfs
set root='hd0,msdos1'
if [ x$feature_platform_search_hint = xy ]; then
search --no-floppy --fs-uuid --set=root --hint='hd0,msdos1' 8a9d38ed-14e7-462a-be6c-e385d6b1906d
else
search --no-floppy --fs-uuid --set=root 8a9d38ed-14e7-462a-be6c-e385d6b1906d
fi
linux16 /boot/vmlinuz-3.10.0-327.13.1.el7.x86_64 root=UUID=8a9d38ed-14e7-462a-be6c-e385d6b1906d ro console=tty0 console=ttyS0,115200n8 crashkernel=auto console=ttyS0,115200 LANG=en_US.UTF-8 selinux=0

Update your system thru “yum -y update”. Set you timezone (My case is US/Central): sudo ln -s /usr/share/zoneinfo/US/Central /etc/localtime. You may need to delete /etc/localtime first.

OpenStack Controller: Configure NTP Server

Add you jumpbox server into the /etc/ntp.conf file as following (jus showing an extract of the file)


[root@ocs01 ~]# yum -y install ntp
Loaded plugins: fastestmirror
#
# some boring lines
# more boring lines
#
Installed:
ntp.x86_64 0:4.2.6p5-22.el7.centos.1

Dependency Installed:
autogen-libopts.x86_64 0:5.18-5.el7 ntpdate.x86_64 0:4.2.6p5-22.el7.centos.1

Complete!
# Use public servers from the pool.ntp.org project.
# Please consider joining the pool (http://www.pool.ntp.org/join.html).
server jumpbox.nuage.lab iburst
server 0.centos.pool.ntp.org iburst
server 1.centos.pool.ntp.org iburst
server 2.centos.pool.ntp.org iburst
server 3.centos.pool.ntp.org iburst

Synchronize time services as the following:


[root@ocs01 ~]# service ntpd stop
Redirecting to /bin/systemctl stop ntpd.service
[root@ocs01 ~]# ntpdate -u jumpbox.nuage.lab
16 May 19:49:30 ntpdate[11914]: adjust time server 192.168.101.3 offset 0.018515 sec
[root@ocs01 ~]# service ntpd start
Redirecting to /bin/systemctl start ntpd.service
[root@ocs01 ~]# ntpstat
synchronised to NTP server (107.161.29.207) at stratum 3
time correct to within 7972 ms
polling server every 64 s

OpenStack Controller: pre-tasks to packstack installation

Install packstack running “yum install -y https://repos.fedorapeople.org/repos/openstack/openstack-liberty/rdo-release-liberty-2.noarch.rpm” and then “yum install -y openstack-packstack”

I’ve created a snap from it to use it later. take a look the following:

Now use “ssh-keygen” to generate your key pair into the controller:


[root@ocs01 ~]# ssh-keygen
Generating public/private rsa key pair.
Enter file in which to save the key (/root/.ssh/id_rsa):
Enter passphrase (empty for no passphrase):
Enter same passphrase again:
Your identification has been saved in /root/.ssh/id_rsa.
Your public key has been saved in /root/.ssh/id_rsa.pub.
The key fingerprint is:
f8:d1:79:50:3d:4d:e6:2c:6c:13:e4:86:65:21:0e:c4 root@ocs01.novalocal
The key's randomart image is:
+--[ RSA 2048]----+
| oo oo*+o|
| E+ Bo=.|
| . o B.o|
| . . o o o |
| . S o . |
| . . . |
| . |
| |
| |
+-----------------+
[root@ocs01 ~]# cd .ssh/
[root@ocs01 .ssh]# cat id_rsa.pub
ssh-rsa AAAAB3NzaC1yc2EAAAADAQABAAABAQDL/k1URNcPeTG3NZJENPloueh/orIiDuzFRfMbgFuUVJrVVoAWHjAsHYu8N3pzDtZAQSxGK7AcpuHjCveNY+kk1cVI5nzmvguHRce8OeGpXxp1AWAVDOia5ipTPEmdOSk+RP496v64bZR2uInZXMaS97SsXwqXULLLtTxWMjS5evdynNCmAsfmJ+Z2mNrE3l2rZcECJj4uKlNhWAhTN7BlO8soPvE+oX+yjfXqOsTZW+Rtz5tg7ZSDOftNR3HVa859dJxqu6FgOhEELOtP/B5T/NAoSMhpR9VcJmJEZA5iQtTSORIdylHnw+kkGg0ks1/j4TfCzFcm8RvcJ4YKSg6H root@ocs01.novalocal

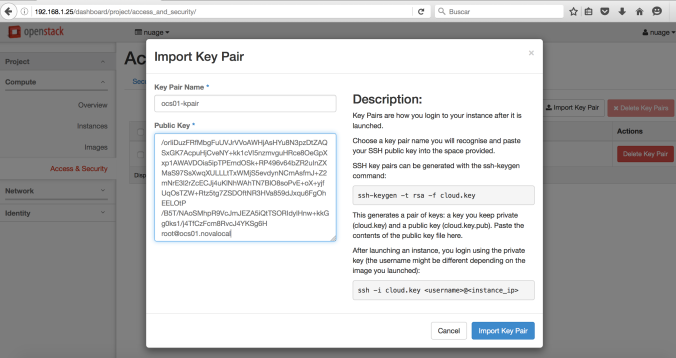
Create a new key-pair for your OpenStack Controller importing the public key as following:

pinrojas - packstack import keypair openstack controller.png

Compute Node

We’ll use our snap from the controller as following (don’t forget use keystone_nuage for credentials). Switch to box01 to create the servers.


[root@box01 ~(keystone_nuage)]# openstack server create --image snap-osc01-160516-packstack-pkg --flavor nuage.nova.2 --key-name osc01-kpair --nic net-id=nuage-lab,v4-fixed-ip=192.168.101.7 nova01
+--------------------------------------+-----------------------------------------------------------+
| Field                                | Value                                                     |
+--------------------------------------+-----------------------------------------------------------+
| OS-DCF:diskConfig                    | MANUAL                                                    |
| OS-EXT-AZ:availability_zone          |                                                           |
| OS-EXT-STS:power_state               | 0                                                         |
| OS-EXT-STS:task_state                | scheduling                                                |
| OS-EXT-STS:vm_state                  | building                                                  |
| OS-SRV-USG:launched_at               | None                                                      |
| OS-SRV-USG:terminated_at             | None                                                      |
| accessIPv4                           |                                                           |
| accessIPv6                           |                                                           |
| addresses                            |                                                           |
| adminPass                            | GTbBa5A6JxzS                                              |
| config_drive                         |                                                           |
| created                              | 2016-05-23T17:23:55Z                                      |
| flavor                               | nuage.nova.2 (4e191554-25f9-4ce7-bb1b-80941d6ab839)       |
| hostId                               |                                                           |
| id                                   | c0f78a72-e304-4292-8620-c0581a9e6aa8                      |
| image                                | snap-160519-nova01 (958f0ed6-b186-4a72-a662-df78c3ab78b8) |
| key_name                             | osc01-kpair                                               |
| name                                 | nova01                                                    |
| os-extended-volumes:volumes_attached | []                                                        |
| progress                             | 0                                                         |
| project_id                           | 39e2f35bc10f4047b1ea77f79559807d                          |
| properties                           |                                                           |
| security_groups                      | [{u'name': u'default'}]                                   |
| status                               | BUILD                                                     |
| updated                              | 2016-05-23T17:23:56Z                                      |
| user_id                              | c91cd992e79149209c41416a55a661b1                          |
+--------------------------------------+-----------------------------------------------------------+

Some minutes later, go back to osc01. Check the connection to nova server from your OpenStack Controller and add the public key in /root/ssh/authorized_host


[root@ocs01 ~]# ssh centos@192.168.101.7
The authenticity of host '192.168.101.7 (192.168.101.7)' can't be established.
ECDSA key fingerprint is aa:31:dd:ab:9a:08:3d:7a:23:93:71:97:e1:fb:15:6b.
Are you sure you want to continue connecting (yes/no)? yes
Warning: Permanently added '192.168.101.7' (ECDSA) to the list of known hosts.
Last login: Mon May 16 19:38:42 2016 from 192.168.1.66
[centos@nova01 ~]$
[centos@nova01 ~]$ sudo vi /root/.ssh/authorized_keys
#
# add public OCS's public key
#
[centos@nova01 ~]$ exit
logout
Connection to 192.168.101.7 closed.
[root@ocs01 ~]# ssh 192.168.101.7
Last login: Tue May 17 18:12:23 2016
[root@nova01 ~]#

IMPORTANT: Add this public key even into /root/.ssh/authorized_keys at ocs01 server
Sync NTP after you get a clean access to nova01 as root user:


[root@nova01 ~]# ntpdate -u jumpbox.nuage.lab
17 May 18:17:38 ntpdate[9205]: adjust time server 192.168.101.3 offset 0.018297 sec
[root@nova01 ~]# service ntpd start
Redirecting to /bin/systemctl start ntpd.service
[root@nova01 ~]# ntpstat
synchronised to NTP server (192.168.101.3) at stratum 4
time correct to within 8139 ms
polling server every 64 s

PackStack Installation: Using answer file to install both servers

Install packstack now from the controller (osc01) changing the compute to nova01 in the answer file. First, create the answer file


[root@ocs01 ~]# packstack --gen-answer-file=/root/answer.txt
[root@ocs01 ~]# vi answer.txt

Change the following parameters:


CONFIG_CONTROLLER_HOST=192.168.101.6
CONFIG_COMPUTE_HOSTS=192.168.101.7
CONFIG_NETWORK_HOSTS=192.168.101.6
CONFIG_PROVISION_DEMO=n
CONFIG_CINDER_INSTALL=n
CONFIG_SWIFT_INSTALL=n
CONFIG_CEILOMETER_INSTALL=n
CONFIG_NAGIOS_INSTALL=n
CONFIG_NTP_SERVERS=192.168.101.3

Now, execute “packstack –answer-file=/root/answer.txt”


[root@ocs01 ~]# packstack --answer-file=/root/answer.txt
Welcome to the Packstack setup utility

The installation log file is available at: /var/tmp/packstack/20160517-184422-KxwSmh/openstack-setup.log

Installing:
Clean Up [ DONE ]
Discovering ip protocol version [ DONE ]
Setting up ssh keys [ DONE ]
Preparing servers [ DONE ]
Pre installing Puppet and discovering hosts' details [ DONE ]
Adding pre install manifest entries [ DONE ]
Installing time synchronization via NTP [ DONE ]
Setting up CACERT [ DONE ]
Adding AMQP manifest entries [ DONE ]
Adding MariaDB manifest entries [ DONE ]
Fixing Keystone LDAP config parameters to be undef if empty[ DONE ]
Adding Keystone manifest entries [ DONE ]
Adding Glance Keystone manifest entries [ DONE ]
Adding Glance manifest entries [ DONE ]
Adding Nova API manifest entries [ DONE ]
Adding Nova Keystone manifest entries [ DONE ]
Adding Nova Cert manifest entries [ DONE ]
Adding Nova Conductor manifest entries [ DONE ]
Creating ssh keys for Nova migration [ DONE ]
Gathering ssh host keys for Nova migration [ DONE ]
Adding Nova Compute manifest entries [ DONE ]
Adding Nova Scheduler manifest entries [ DONE ]
Adding Nova VNC Proxy manifest entries [ DONE ]
Adding OpenStack Network-related Nova manifest entries[ DONE ]
Adding Nova Common manifest entries [ DONE ]
Adding Neutron VPNaaS Agent manifest entries [ DONE ]
Adding Neutron FWaaS Agent manifest entries [ DONE ]
Adding Neutron LBaaS Agent manifest entries [ DONE ]
Adding Neutron API manifest entries [ DONE ]
Adding Neutron Keystone manifest entries [ DONE ]
Adding Neutron L3 manifest entries [ DONE ]
Adding Neutron L2 Agent manifest entries [ DONE ]
Adding Neutron DHCP Agent manifest entries [ DONE ]
Adding Neutron Metering Agent manifest entries [ DONE ]
Adding Neutron Metadata Agent manifest entries [ DONE ]
Adding Neutron SR-IOV Switch Agent manifest entries [ DONE ]
Checking if NetworkManager is enabled and running [ DONE ]
Adding OpenStack Client manifest entries [ DONE ]
Adding Horizon manifest entries [ DONE ]
Adding post install manifest entries [ DONE ]
Copying Puppet modules and manifests [ DONE ]
Applying 192.168.101.6_prescript.pp
Applying 192.168.101.7_prescript.pp
192.168.101.7_prescript.pp: [ DONE ]
192.168.101.6_prescript.pp: [ DONE ]
Applying 192.168.101.6_chrony.pp
Applying 192.168.101.7_chrony.pp
192.168.101.7_chrony.pp: [ DONE ]
192.168.101.6_chrony.pp: [ DONE ]
Applying 192.168.101.6_amqp.pp
Applying 192.168.101.6_mariadb.pp
192.168.101.6_amqp.pp: [ DONE ]
192.168.101.6_mariadb.pp: [ DONE ]
Applying 192.168.101.6_keystone.pp
Applying 192.168.101.6_glance.pp
192.168.101.6_keystone.pp: [ DONE ]
192.168.101.6_glance.pp: [ DONE ]
Applying 192.168.101.6_api_nova.pp
192.168.101.6_api_nova.pp: [ DONE ]
Applying 192.168.101.6_nova.pp
Applying 192.168.101.7_nova.pp
192.168.101.6_nova.pp: [ DONE ]
192.168.101.7_nova.pp: [ DONE ]
Applying 192.168.101.6_neutron.pp
Applying 192.168.101.7_neutron.pp
192.168.101.7_neutron.pp: [ DONE ]
192.168.101.6_neutron.pp: [ DONE ]
Applying 192.168.101.6_osclient.pp
Applying 192.168.101.6_horizon.pp
192.168.101.6_osclient.pp: [ DONE ]
192.168.101.6_horizon.pp: [ DONE ]
Applying 192.168.101.6_postscript.pp
Applying 192.168.101.7_postscript.pp
192.168.101.7_postscript.pp: [ DONE ]
192.168.101.6_postscript.pp: [ DONE ]
Applying Puppet manifests [ DONE ]
Finalizing [ DONE ]

**** Installation completed successfully ******

Additional information:
* File /root/keystonerc_admin has been created on OpenStack client host 192.168.101.6. To use the command line tools you need to source the file.
* To access the OpenStack Dashboard browse to http://192.168.101.6/dashboard .
Please, find your login credentials stored in the keystonerc_admin in your home directory.
* Because of the kernel update the host 192.168.101.6 requires reboot.
* The installation log file is available at: /var/tmp/packstack/20160517-184422-KxwSmh/openstack-setup.log
* The generated manifests are available at: /var/tmp/packstack/20160517-184422-KxwSmh/manifests

Reboot the controller

OpenStack Controller: Installing Nuage Plugin for Liberty

First, remove Neutron services from controller/network node osc01.


[root@osc01 ~]# systemctl stop neutron-dhcp-agent.service
[root@osc01 ~]# systemctl stop neutron-l3-agent.service
[root@osc01 ~]# systemctl stop neutron-metadata-agent.service
[root@osc01 ~]# systemctl stop neutron-openvswitch-agent.service
[root@osc01 ~]# systemctl stop neutron-netns-cleanup.service
[root@osc01 ~]# systemctl stop neutron-ovs-cleanup.service
[root@osc01 ~]# systemctl disable neutron-dhcp-agent.service
Removed symlink /etc/systemd/system/multi-user.target.wants/neutron-dhcp-agent.service.
[root@osc01 ~]# systemctl disable neutron-l3-agent.service
Removed symlink /etc/systemd/system/multi-user.target.wants/neutron-l3-agent.service.
[root@osc01 ~]# systemctl disable neutron-metadata-agent.service
Removed symlink /etc/systemd/system/multi-user.target.wants/neutron-metadata-agent.service.
[root@osc01 ~]# systemctl disable neutron-openvswitch-agent.service
Removed symlink /etc/systemd/system/multi-user.target.wants/neutron-openvswitch-agent.service.
[root@osc01 ~]# systemctl disable neutron-netns-cleanup.service
[root@osc01 ~]# systemctl disable neutron-ovs-cleanup.service
Removed symlink /etc/systemd/system/multi-user.target.wants/neutron-ovs-cleanup.service.

Get the rpm files for openstack liberty (el7) from Nokia’s support site (send me a comment if you need help on that).


[root@osc01 ~]# ls
answer.txt nuage-openstack-heat-5.0.0.1818-nuage.noarch.rpm
keystonerc_admin nuage-openstack-horizon-8.0.0.1818-nuage.noarch.rpm
nuage-metadata-agent-3.2.6-232.el7.x86_64.rpm nuage-openstack-neutron-7.0.0.1818-nuage.noarch.rpm
nuagenetlib-2015.1.3.2.6_228-nuage.noarch.rpm nuage-openstack-neutronclient-3.1.0.1818-nuage.noarch.rpm
[root@osc01 ~]# rpm -i nuagenetlib-2015.1.3.2.6_228-nuage.noarch.rpm
[root@osc01 ~]# rpm -i nuage-openstack-neutron-7.0.0.1818-nuage.noarch.rpm
[root@osc01 ~]# rpm -i nuage-openstack-neutronclient-3.1.0.1818-nuage.noarch.rpm
[root@osc01 ~]# rpm -i nuage-openstack-horizon-8.0.0.1818-nuage.noarch.rpm
[root@osc01 ~]# rpm -i nuage-openstack-heat-5.0.0.1818-nuage.noarch.rpm
[root@osc01 ~]# rpm -i nuage-metadata-agent-3.2.6-232.el7.x86_64.rpm

Configuring Nuage plugin

Modify neutron.conf file using token string from keystone.conf file:

[root@osc01 ~]# <b>mkdir /etc/neutron/plugins/nuage/</b>
[root@osc01 ~]# <b>vi /etc/neutron/plugins/nuage/nuage_plugin.ini</b>
[root@osc01 ~]# cat /etc/neutron/plugins/nuage/nuage_plugin.ini
[RESTPROXY]
default_net_partition_name = OpenStack_Lab
auth_resource = /me
server = 192.168.101.4:8443
organization = csp
serverauth = csproot:csproot
serverssl = True
base_uri = /nuage/api/v3_2

Now, Let’s modify /etc/nova/nova.conf. Change the following lines (have to be change in all compute and controller/network nodes):

use_forwarded_for = False
[neutron]
service_metadata_proxy = True
metadata_proxy_shared_secret=NuageNetworksSharedSecret
ovs_bridge=alubr0
security_group_api=neutron

Configuring Neutron

Edit/add the following lines to /etc/neutron/neutron.conf. Don’t forget to comment out “service_plugins = router”

core_plugin = neutron.plugins.nuage.plugin.NuagePlugin

Required installation tasks in PackStack Controller

More changes. copy “nuage-openstack-upgrade-1818.tar.gz” to packstack controller.


[root@osc01 ~]# mkdir /tmp/nuage
[root@osc01 ~]# mkdir /tmp/nuage/upgrade
[root@osc01 ~]# cd /tmp/nuage/upgrade
[root@osc01 upgrade]# mv /root/
 .
[root@osc01 upgrade]# tar -xzf nuage-openstack-upgrade-1818.tar.gz
[root@osc01 upgrade]# python set_and_audit_cms.py --neutron-config-file /etc/neutron/neutron.conf --plugin-config-file /etc/neutron/plugins/nuage/nuage_plugin.ini
WARNING:oslo_config.cfg:Option "verbose" from group "DEFAULT" is deprecated for removal. Its value may be silently ignored in the future.
INFO:VPort_Sync:Starting Vports Sync.
WARNING:neutron.notifiers.nova:Authenticating to nova using nova_admin_* options is deprecated. This should be done using an auth plugin, like password
WARNING:oslo_config.cfg:Option "nova_region_name" from group "DEFAULT" is deprecated. Use option "region_name" from group "nova".
INFO:VPort_Sync:Vports Sync on VSD is now complete.
INFO:generate_cms_id:created CMS 031b436e-3181-4705-8285-e74816d9f5b9
WARNING:neutron.notifiers.nova:Authenticating to nova using nova_admin_* options is deprecated. This should be done using an auth plugin, like password
WARNING:oslo_config.cfg:Option "nova_region_name" from group "DEFAULT" is deprecated. Use option "region_name" from group "nova".
INFO:Upgrade_Logger:Audit begins.
INFO:Upgrade_Logger:Checking subnets.
INFO:Upgrade_Logger:Subnets done.
INFO:Upgrade_Logger:Checking domains.
INFO:Upgrade_Logger:Domains done.
INFO:Upgrade_Logger:Checking static routes.
INFO:Upgrade_Logger:Static routes done.
INFO:Upgrade_Logger:Checking acl entry templates.
INFO:Upgrade_Logger:Acl entry templates done.
INFO:Upgrade_Logger:Checking policy groups.
INFO:Upgrade_Logger:Policy groups done.
INFO:Upgrade_Logger:Checking floating ips.
INFO:Upgrade_Logger:Floating ips done.
INFO:Upgrade_Logger:Checking vports.
INFO:Upgrade_Logger:Vports done.
INFO:Upgrade_Logger:Checking shared network resources.
INFO:Upgrade_Logger:Shared network resources done.
INFO:Upgrade_Logger:Checking application domains.
INFO:Upgrade_Logger:Application domains done.
INFO:Upgrade_Logger:File "audit.yaml" created.
INFO:Upgrade_Logger:Audit Finished.
INFO:Upgrade_Logger:Processing CMS ID discrepancies in the audit file...
INFO:Upgrade_Logger:Processed all the CMS ID discrepancies in the audit file
[root@osc01 upgrade]# systemctl restart neutron-server
[root@osc01 upgrade]# cd
[root@osc01 ~]# . keystonerc_admin
[root@osc01 ~(keystone_admin)]# nova list
+----+------+--------+------------+-------------+----------+
| ID | Name | Status | Task State | Power State | Networks |
+----+------+--------+------------+-------------+----------+
+----+------+--------+------------+-------------+----------+
[root@osc01 ~]# systemctl restart neutron-server
[root@osc01 ~]# rm -rf /etc/neutron/plugin.ini
[root@osc01 ~]# ln -s /etc/neutron/plugins/nuage/nuage_plugin.ini /etc/neutron/plugin.ini
[root@osc01 ~]# neutron-db-manage --config-file /etc/neutron/neutron.conf --config-file /etc/neutron/plugins/nuage/nuage_plugin.ini upgrade head
INFO [alembic.runtime.migration] Context impl MySQLImpl.
INFO [alembic.runtime.migration] Will assume non-transactional DDL.
Running upgrade for neutron ...
#
# Some boring lines
# More boring lines
#
INFO [alembic.runtime.migration] Running upgrade 1b4c6e320f79 -> 48153cb5f051, qos db changes
INFO [alembic.runtime.migration] Running upgrade 48153cb5f051 -> 9859ac9c136, quota_reservations
INFO [alembic.runtime.migration] Running upgrade 9859ac9c136 -> 34af2b5c5a59, Add dns_name to Port
OK
[root@osc01 ~]# systemctl restart openstack-nova-api
[root@osc01 ~]# systemctl restart openstack-nova-scheduler
[root@osc01 ~]# systemctl restart openstack-nova-conductor
[root@osc01 ~]# systemctl restart neutron-server

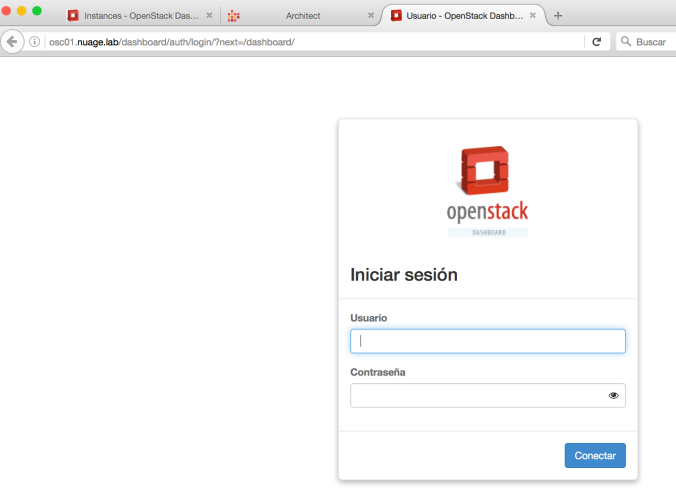
Just, let’s check if we have access to horizon (don’t login yet!).

pinrojas - nuage lab packstack home horizon access.png

Compute Node: Configuring nova.conf and  installing VRS

It’s turn to make same changes to our compute node nova01.


[root@nova01 ~]# rpm -Uvh http://mirror.pnl.gov/epel/7/x86_64/e/epel-release-7-6.noarch.rpm
Retrieving http://mirror.pnl.gov/epel/7/x86_64/e/epel-release-7-6.noarch.rpm
warning: /var/tmp/rpm-tmp.VNThyF: Header V3 RSA/SHA256 Signature, key ID 352c64e5: NOKEY
Preparing... ################################# [100%]
Updating / installing...
1:epel-release-7-6 ################################# [100%]
[root@nova01 ~]# vi /etc/yum.repos.d/CentOS-Base.repo
[root@nova01 ~]# yum -y update
Loaded plugins: fastestmirror
base | 3.6 kB 00:00:00
centosplus | 3.4 kB 00:00:00
epel/x86_64/metalink | 12 kB 00:00:00
epel | 4.3 kB 00:00:00
extras | 3.4 kB 00:00:00
updates | 3.4 kB 00:00:00
(1/4): centosplus/7/x86_64/primary_db | 2.3 MB 00:00:00
(2/4): epel/x86_64/updateinfo | 555 kB 00:00:01
(3/4): epel/x86_64/group_gz | 170 kB 00:00:01
(4/4): epel/x86_64/primary_db | 4.1 MB 00:00:00
Loading mirror speeds from cached hostfile
* base: mirror.rackspace.com
* centosplus: pubmirrors.dal.corespace.com
* epel: mirror.compevo.com
* extras: mirror.team-cymru.org
* updates: mirror.steadfast.net
Resolving Dependencies
#
# Boring lines
# more boring lines
#

Installed:
python2-boto.noarch 0:2.39.0-1.el7 python2-crypto.x86_64 0:2.6.1-9.el7 python2-ecdsa.noarch 0:0.13-4.el7 python2-msgpack.x86_64 0:0.4.7-3.el7

Dependency Installed:
libtomcrypt.x86_64 0:1.17-23.el7 libtommath.x86_64 0:0.42.0-4.el7 postgresql-libs.x86_64 0:9.2.15-1.el7_2 python2-rsa.noarch 0:3.4.1-1.el7

Updated:
hiera.noarch 1:1.3.4-5.el7 libndp.x86_64 0:1.2-6.el7_2 postfix.x86_64 2:2.10.1-6.0.1.el7.centos
python-contextlib2.noarch 0:0.5.1-1.el7 python-mimeparse.noarch 0:0.1.4-2.el7 python-perf.x86_64 0:3.10.0-327.18.2.el7.centos.plus
python-psutil.x86_64 0:2.2.1-1.el7 python-pygments.noarch 0:2.0.2-4.el7 python-qpid.noarch 0:0.32-13.el7
python-qpid-common.noarch 0:0.32-13.el7 python-requests.noarch 0:2.9.1-2.el7 python-unicodecsv.noarch 0:0.14.1-4.el7
python-unittest2.noarch 0:1.1.0-4.el7 python-urllib3.noarch 0:1.13.1-3.el7 python2-eventlet.noarch 0:0.18.4-1.el7

Replaced:
python-boto.noarch 0:2.25.0-2.el7.centos python-crypto.x86_64 0:2.6.1-1.el7.centos python-ecdsa.noarch 0:0.11-3.el7.centos
python-msgpack.x86_64 0:0.4.6-3.el7

Complete!


Nova/KVM: solving dependencies

Solve some dependencies in KVM.


[root@nova01 ~]# yum install libvirt -y
#
# Boring lines
#
Installed:
libvirt.x86_64 0:1.2.17-13.el7_2.4

Dependency Installed:
libvirt-daemon-config-network.x86_64 0:1.2.17-13.el7_2.4 libvirt-daemon-driver-lxc.x86_64 0:1.2.17-13.el7_2.4

Complete!
[root@nova01 ~]# yum install python-twisted-core -y
#
# Boring lines
#

Installed:
python-twisted.x86_64 0:15.4.0-3.el7

Dependency Installed:
libXft.x86_64 0:2.3.2-2.el7 libXrender.x86_64 0:0.9.8-2.1.el7 pyserial.noarch 0:2.6-5.el7
python-characteristic.noarch 0:14.3.0-4.el7 python-service-identity.noarch 0:14.0.0-4.el7 python-zope-interface.x86_64 0:4.0.5-4.el7
python2-pyasn1-modules.noarch 0:0.1.9-6.el7.1 tcl.x86_64 1:8.5.13-8.el7 tix.x86_64 1:8.4.3-12.el7
tk.x86_64 1:8.5.13-6.el7 tkinter.x86_64 0:2.7.5-34.el7

Complete!
[root@nova01 ~]# yum install perl-JSON -y
#
# Boring lines
#

Installed:
perl-JSON.noarch 0:2.59-2.el7

Complete!
[root@nova01 ~]# yum install vconfig -y
#
# Boring lines
#

Installed:
vconfig.x86_64 0:1.9-16.el7

Complete!

Configure Metadata agent in PackStack controller

Delete current file nuage-metadata-agent and create a new file with the following information:

[root@nova01 ~]# vi /etc/nova/nova.conf
[root@nova01 ~]# rm -rf /etc/default/nuage-metadata-agent
[root@nova01 ~]# vi /etc/default/nuage-metadata-agent
[centos@nova01 ~]$ cat /etc/default/nuage-metadata-agent
METADATA_PORT=9697
NOVA_METADATA_IP=127.0.0.1
NOVA_METADATA_PORT=8775
METADATA_PROXY_SHARED_SECRET="NuageNetworksSharedSecret"
NOVA_CLIENT_VERSION=2
NOVA_OS_USERNAME=nova
NOVA_OS_PASSWORD=2b12874fcf3c43ff
NOVA_OS_TENANT_NAME=services
NOVA_OS_AUTH_URL=http://192.168.101.6:5000/v2.0
NOVA_REGION_NAME=RegionOne
NUAGE_METADATA_AGENT_START_WITH_OVS=true
NOVA_API_ENDPOINT_TYPE=publicURL


Installing Nuage VRS

We’ll install VRS into the nova node and replace OVS instance.


[root@nova01 ~]# cd /tmp/nuage/
[root@nova01 nuage]# mv /root/nuage-openvswitch-* .
[root@nova01 nuage]# yum -y remove openvswitch
#
# Some boring lines
# More boring lines
#
Removed:
openvswitch.x86_64 0:2.4.0-1.el7

Dependency Removed:
openstack-neutron-openvswitch.noarch 1:7.0.4-1.el7

Complete!
[root@nova01 nuage]# yum -y remove python-openvswitch
#
# Some boring lines
# More boring lines
#

Removed:
python-openvswitch.noarch 0:2.4.0-1.el7

Complete!
[root@nova01 nuage]# yum -y install nuage-openvswitch-3.2.6-232.el7.x86_64.rpm
#
# Some boring lines
# More boring lines
#
Installed:
nuage-openvswitch.x86_64 0:3.2.6-232.el7

Dependency Installed:
perl-Sys-Syslog.x86_64 0:0.33-3.el7 protobuf-c.x86_64 0:1.0.2-2.el7 python-setproctitle.x86_64 0:1.1.6-5.el7

Complete!
[root@nova01 nuage]# vi /etc/default/openvswitch
[root@nova01 nuage]# cat /etc/default/openvswitch | grep 101.5
ACTIVE_CONTROLLER=192.168.101.5
[root@nova01 nuage]# mv /root/nuage-metadata-agent-3.2.6-232.el7.x86_64.rpm .
[root@nova01 nuage]# rpm -i nuage-metadata-agent-3.2.6-232.el7.x86_64.rpm
[root@nova01 ~]# cd /tmp/nuage/
[root@nova01 nuage]# mv /root/nuage-metadata-agent-3.2.6-232.el7.x86_64.rpm .
[root@nova01 nuage]# rpm -i nuage-metadata-agent-3.2.6-232.el7.x86_64.rpm
[root@nova01 nuage]# vi /etc/nova/nova.conf

Configure nova.conf

We’ll modify /etc/nova/nova.conf as following:

ovs_bridge=alubr0

Restart services as following:


[root@nova01 nuage]# systemctl restart openstack-nova-compute
[root@nova01 nuage]# systemctl restart openvswitch

Checking service status and connections.


[root@nova01 ~]# systemctl status openvswitch
● openvswitch.service - Nuage Openvswitch
   Loaded: loaded (/usr/lib/systemd/system/openvswitch.service; enabled; vendor preset: disabled)
   Active: active (exited) since Mon 2016-05-23 12:26:19 CDT; 9h ago
 Main PID: 508 (code=exited, status=0/SUCCESS)
   CGroup: /system.slice/openvswitch.service
           ├─ 601 ovsdb-server: monitoring pid 602 (healthy)
           ├─ 602 ovsdb-server /etc/openvswitch/conf.db -vconsole:emer -vsyslog:err -vfile:warn --remote=punix:/var/run/openvswitch/db.sock --private-key=db:O...
           ├─ 694 ovs-vswitchd: monitoring pid 695 (healthy)
           ├─ 695 ovs-vswitchd unix:/var/run/openvswitch/db.sock -vconsole:emer -vsyslog:err -vfile:warn --mlockall --no-chdir --log-file=/var/log/openvswitch...
           ├─1069 nuage-SysMon: monitoring pid 1070 healthy
           ├─1070 /usr/bin/python /sbin/nuage-SysMon -vany:console:emer -vany:syslog:err -vany:file:info --no-chdir --log-file=/var/log/openvswitch/nuage-SysM...
           ├─1121 monitor(vm-monitor): vm-monitor: monitoring pid 1122 (healthy)
           ├─1122 vm-monitor --no-chdir --log-file=/var/log/openvswitch/vm-monitor.log --pidfile=/var/run/openvswitch/vm-monitor.pid --detach --monitor
           ├─1144 nuage-rpc: monitoring pid 1145 (healthy)
           └─1145 nuage-rpc unix:/var/run/openvswitch/db.sock -vconsole:emer -vsyslog:err -vfile:info --tcp 7406 --ssl 7407 --no-chdir --log-file=/var/log/ope...

May 23 12:26:13 nova01.novalocal openvswitch.init[508]: iptables: No chain/target/match by that name.
May 23 12:26:13 nova01.novalocal openvswitch.init[508]: iptables: Bad rule (does a matching rule exist in that chain?).
May 23 12:26:16 nova01.novalocal openvswitch.init[508]: Starting nuage system monitor:Starting nuage-SysMon[  OK  ]
May 23 12:26:19 nova01.novalocal openvswitch.init[508]: Starting vm-monitor:Starting vm-monitor:Starting vm-monitor[  OK  ]
May 23 12:26:19 nova01.novalocal openvswitch.init[508]: Starting nuage rpc server:Starting nuage-rpc[  OK  ]
May 23 12:26:19 nova01.novalocal systemd[1]: Started Nuage Openvswitch.
May 23 12:26:20 nova01.novalocal ovs-vsctl[1154]: ovs|00001|vsctl|INFO|Called as ovs-vsctl --no-wait --timeout=5 set Open_vSwitch . other_config:acl-...-port=514
May 23 12:26:22 nova01.novalocal ovs-vsctl[1185]: ovs|00001|vsctl|INFO|Called as ovs-vsctl --no-wait --timeout=5 set Open_vSwitch . other_config:stat...1.4:39090
May 23 12:29:24 nova01 systemd[1]: [/usr/lib/systemd/system/openvswitch.service:10] Unknown lvalue 'ExecRestart' in section 'Service'
Hint: Some lines were ellipsized, use -l to show in full.
[root@nova01 ~]# ovs-vsctl show
2df2c5a3-5f96-4186-bf54-4836d73e3b39
    Bridge "alubr0"
        Controller "ctrl1"
            target: "tcp:192.168.101.5:6633"
            role: master
            is_connected: true
        Port "svc-rl-tap1"
            Interface "svc-rl-tap1"
        Port "svc-rl-tap2"
            Interface "svc-rl-tap2"
        Port svc-pat-tap
            Interface svc-pat-tap
                type: internal
        Port "alubr0"
            Interface "alubr0"
                type: internal
    Bridge br-tun
        fail_mode: secure
        Port br-tun
            Interface br-tun
                type: internal
        Port patch-int
            Interface patch-int
                type: patch
                options: {peer=patch-tun}
        Port "vxlan-c0a86506"
            Interface "vxlan-c0a86506"
                type: vxlan
                options: {df_default="true", in_key=flow, local_ip="192.168.101.7", out_key=flow, remote_ip="192.168.101.6"}
    Bridge br-int
        fail_mode: secure
        Port br-int
            Interface br-int
                type: internal
        Port patch-tun
            Interface patch-tun
                type: patch
                options: {peer=patch-int}
    ovs_version: "3.2.6-232-nuage"

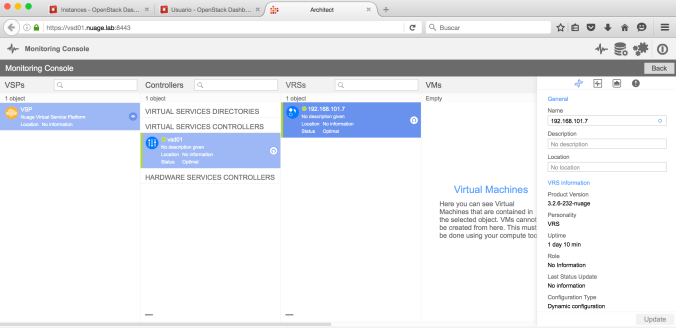
The next image will show you what you will get into the console

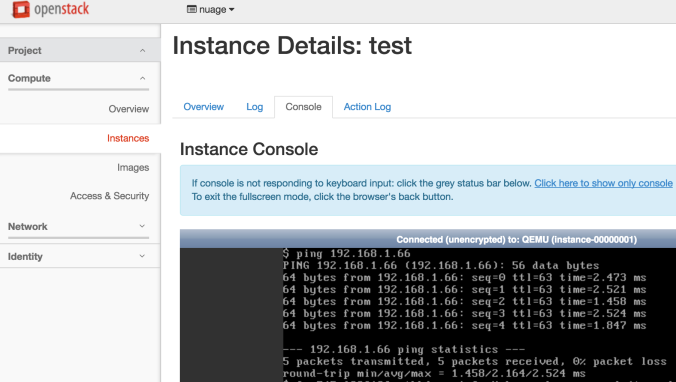
pinrojas - nuage packstack console monitoring openstack demo lab.png

Last Step: Add csproot user to CMS Group as the following

pinrojas - packstack openstack plugin nuage neutron.png

And we are done with our lab. Thanks very much for reading!
see you.

Building a Nuage/PackStack Demo at home – Part 2

First of all, just a reminder that I’m using a fanless server 8 cores / 32 GB RAM at home (details at Diego’s post). And you will need to read my previous post: BUILDING A NUAGE/OPENSTACK DEMO AT HOME: GIVING PACKSTACK A CHANCE – CENTOS7.

Also, I want to say thanks to Scott Irwin for his scripts and Remi Vichery for his prompt support with my VSC.

This second part I will show you how to install Nuage VSP on PackStack. Most of the time those are installed using just KVM. However, I think you’ll have more fun doing on OpenStack. That way also, we’ll help us to make this demo portable to any other OpenStack instance.

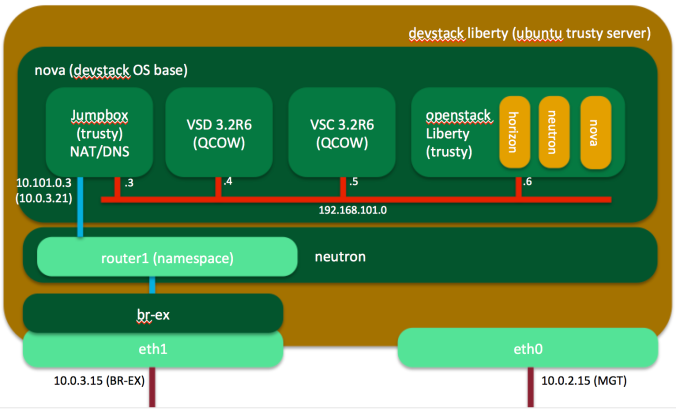
Next, you will see how I am configuring these lab:
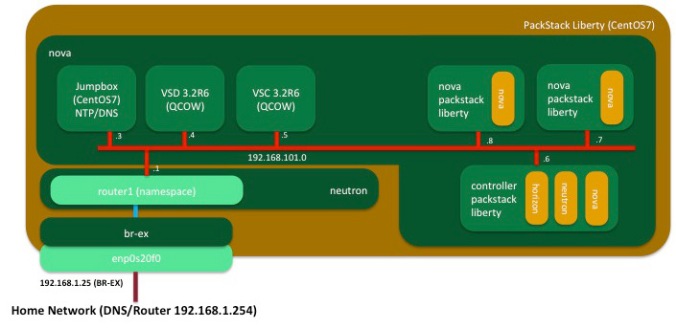
pinrojas - nuage packstack lab diagram

These are the instances that I am planing to have when I finish this journey

pinrojas - nuage packstack lab table

Important Note: before upload VSC image, be sure to have read NUAGE VSC – MODIFY QCOW2 IMAGES WITH GUESTFISH

Check your lab settings before start anything

We’ll check what we have so far. PackStack is already installed. We’ve done over the first part.

Checking the networks and subnets:


[root@box01 ~(keystone_admin)]# openstack network list
+--------------------------------------+------------------+--------------------------------------+
| ID | Name | Subnets |
+--------------------------------------+------------------+--------------------------------------+
| 9eec420a-eb76-4ebc-a814-3ce935b9bca2 | external_network | 407b139d-70b6-49c9-9056-e9211a41b7fb |
| 05235f6d-95fc-4455-a6a6-3d4077cab245 | nuage-lab | 60724bd0-8606-4c7a-bae1-7c31410dd456 |
+--------------------------------------+------------------+--------------------------------------+
[root@box01 ~(keystone_admin)]# openstack network show 9eec420a-eb76-4ebc-a814-3ce935b9bca2
+---------------------------+--------------------------------------+
| Field | Value |
+---------------------------+--------------------------------------+
| id | 9eec420a-eb76-4ebc-a814-3ce935b9bca2 |
| mtu | 0 |
| name | external_network |
| project_id | da64bceb671e4719b41de08c15e1eebe |
| provider:network_type | flat |
| provider:physical_network | extnet |
| provider:segmentation_id | None |
| router_type | External |
| shared | False |
| state | UP |
| status | ACTIVE |
| subnets | 407b139d-70b6-49c9-9056-e9211a41b7fb |
+---------------------------+--------------------------------------+
[root@box01 ~(keystone_admin)]# neutron subnet-show 407b139d-70b6-49c9-9056-e9211a41b7fb
+-------------------+--------------------------------------------------+
| Field | Value |
+-------------------+--------------------------------------------------+
| allocation_pools | {"start": "192.168.1.27", "end": "192.168.1.33"} |
| cidr | 192.168.1.0/24 |
| dns_nameservers | |
| enable_dhcp | False |
| gateway_ip | 192.168.1.254 |
| host_routes | |
| id | 407b139d-70b6-49c9-9056-e9211a41b7fb |
| ip_version | 4 |
| ipv6_address_mode | |
| ipv6_ra_mode | |
| name | public_subnet |
| network_id | 9eec420a-eb76-4ebc-a814-3ce935b9bca2 |
| subnetpool_id | |
| tenant_id | da64bceb671e4719b41de08c15e1eebe |
+-------------------+--------------------------------------------------+

Checking router in the lab’s tenant.


[root@box01 ~(keystone_nuage)]# neutron router-list
+--------------------------------------+--------------+------------------------------------------------------------------------------------------------------------------------------------------------------------------------------------------+
| id | name | external_gateway_info |
+--------------------------------------+--------------+------------------------------------------------------------------------------------------------------------------------------------------------------------------------------------------+
| b9d31b63-99c7-4d84-89e4-6c716210fb20 | nuage-router | {"network_id": "9eec420a-eb76-4ebc-a814-3ce935b9bca2", "enable_snat": true, "external_fixed_ips": [{"subnet_id": "407b139d-70b6-49c9-9056-e9211a41b7fb", "ip_address": "192.168.1.27"}]} |
+--------------------------------------+--------------+------------------------------------------------------------------------------------------------------------------------------------------------------------------------------------------+
[root@box01 ~(keystone_nuage)]# neutron subnet-list
+--------------------------------------+--------------+------------------+------------------------------------------------------+
| id | name | cidr | allocation_pools |
+--------------------------------------+--------------+------------------+------------------------------------------------------+
| 60724bd0-8606-4c7a-bae1-7c31410dd456 | nuage-subnet | 192.168.101.0/24 | {"start": "192.168.101.2", "end": "192.168.101.254"} |
+--------------------------------------+--------------+------------------+------------------------------------------------------+
[root@box01 ~(keystone_admin)]# . keystonerc_nuage
[root@box01 ~(keystone_nuage)]# neutron router-list
+--------------------------------------+--------------+------------------------------------------------------------------------------------------------------------------------------------------------------------------------------------------+
| id | name | external_gateway_info |
+--------------------------------------+--------------+------------------------------------------------------------------------------------------------------------------------------------------------------------------------------------------+
| b9d31b63-99c7-4d84-89e4-6c716210fb20 | nuage-router | {"network_id": "9eec420a-eb76-4ebc-a814-3ce935b9bca2", "enable_snat": true, "external_fixed_ips": [{"subnet_id": "407b139d-70b6-49c9-9056-e9211a41b7fb", "ip_address": "192.168.1.27"}]} |
+--------------------------------------+--------------+------------------------------------------------------------------------------------------------------------------------------------------------------------------------------------------+

We’ll update the subnet to define a dhcp address pool to avoid any conflict with our instances.


[root@box01 ~(keystone_nuage)]# neutron subnet-update --allocation-pool start=192.168.101.50,end=192.168.101.254 nuage-subnet
Updated subnet: nuage-subnet

Preparing our images and flavor

Create the flavor and upload the images to glance for our jumpbox (local NTP/DNS server), VSD, VSC and our nested PackStack (Controller and Nova servers).


[root@box01 ~(keystone_admin)]# openstack flavor create --ram 1024 --disk 10 --vcpus 1 --public nuage.tiny
+----------------------------+--------------------------------------+
| Field | Value |
+----------------------------+--------------------------------------+
| OS-FLV-DISABLED:disabled | False |
| OS-FLV-EXT-DATA:ephemeral | 0 |
| disk | 10 |
| id | a9559f30-3914-4227-8201-5fd7e1262b3d |
| name | nuage.tiny |
| os-flavor-access:is_public | True |
| ram | 1024 |
| rxtx_factor | 1.0 |
| swap | |
| vcpus | 1 |
+----------------------------+--------------------------------------+
[root@box01 ~(keystone_admin)]# openstack flavor create --ram 4096 --disk 10 --vcpus 4 --public nuage.vsc
+----------------------------+--------------------------------------+
| Field | Value |
+----------------------------+--------------------------------------+
| OS-FLV-DISABLED:disabled | False |
| OS-FLV-EXT-DATA:ephemeral | 0 |
| disk | 10 |
| id | 6a17cd1c-ee29-4f29-a4c9-14852a1e0394 |
| name | nuage.vsc |
| os-flavor-access:is_public | True |
| ram | 4096 |
| rxtx_factor | 1.0 |
| swap | |
| vcpus | 4 |
+----------------------------+--------------------------------------+

[root@box01 ~(keystone_admin)]# openstack flavor create --ram 8192 --disk 108 --vcpus 4 --public nuage.vsd
+----------------------------+--------------------------------------+
| Field | Value |
+----------------------------+--------------------------------------+
| OS-FLV-DISABLED:disabled | False |
| OS-FLV-EXT-DATA:ephemeral | 0 |
| disk | 108 |
| id | d4a3eda0-b2e2-4d86-b28a-357e8b94166c |
| name | nuage.vsd |
| os-flavor-access:is_public | True |
| ram | 8192 |
| rxtx_factor | 1.0 |
| swap | |
| vcpus | 4 |
+----------------------------+--------------------------------------+
[root@box01 ~(keystone_admin)]# openstack flavor create --ram 2048 --disk 20 --vcpus 2 --public nuage.osc
+----------------------------+--------------------------------------+
| Field | Value |
+----------------------------+--------------------------------------+
| OS-FLV-DISABLED:disabled | False |
| OS-FLV-EXT-DATA:ephemeral | 0 |
| disk | 20 |
| id | ba637f8a-aff4-4e53-b758-d946c2242b6d |
| name | nuage.osc |
| os-flavor-access:is_public | True |
| ram | 2048 |
| rxtx_factor | 1.0 |
| swap | |
| vcpus | 2 |
+----------------------------+--------------------------------------+
[root@box01 ~(keystone_admin)]# openstack flavor create --ram 5120 --disk 50 --vcpus 4 --public nuage.nova
+----------------------------+--------------------------------------+
| Field | Value |
+----------------------------+--------------------------------------+
| OS-FLV-DISABLED:disabled | False |
| OS-FLV-EXT-DATA:ephemeral | 0 |
| disk | 50 |
| id | 88c0cc7c-8aca-4374-aad1-c54c955ab754 |
| name | nuage.nova |
| os-flavor-access:is_public | True |
| ram | 5120 |
| rxtx_factor | 1.0 |
| swap | |
| vcpus | 4 |
+----------------------------+--------------------------------------+

Let’s install wget to download our CentOS7 image


[root@box01 ~(keystone_admin)]# yum -y install wget
Loaded plugins: fastestmirror
#
# some boring lines
# more boring lines
#
Installed:
wget.x86_64 0:1.14-10.el7_0.1

Complete!
[root@box01 ~(keystone_admin)]# wget http://cloud.centos.org/centos/7/images/CentOS-7-x86_64-GenericCloud.qcow2
--2016-05-05 18:18:14-- http://cloud.centos.org/centos/7/images/CentOS-7-x86_64-GenericCloud.qcow2
Resolving cloud.centos.org (cloud.centos.org)... 162.252.80.138
Connecting to cloud.centos.org (cloud.centos.org)|162.252.80.138|:80... connected.
HTTP request sent, awaiting response... 200 OK
Length: 912654336 (870M)
Saving to: ‘CentOS-7-x86_64-GenericCloud.qcow2’

100%[================================================================================================================>] 912,654,336 5.66MB/s in 43s

2016-05-05 18:18:57 (20.3 MB/s) - ‘CentOS-7-x86_64-GenericCloud.qcow2’ saved [912654336/912654336]

Let’s create our jumbox image:


[root@box01 ~(keystone_admin)]# openstack image create --file CentOS-7-x86_64-GenericCloud.qcow2 --disk-format qcow2 --public --container-format bare centos7-image
+------------------+--------------------------------------+
| Property | Value |
+------------------+--------------------------------------+
| checksum | 6008a645f61baffe0d19dfe992def8a6 |
| container_format | bare |
| created_at | 2016-05-05T23:19:33Z |
| disk_format | qcow2 |
| id | e9ee4c2a-006b-4d53-a158-47ec6bb6c422 |
| min_disk | 0 |
| min_ram | 0 |
| name | centos7-image |
| owner | da64bceb671e4719b41de08c15e1eebe |
| protected | False |
| size | 912654336 |
| status | active |
| tags | [] |
| updated_at | 2016-05-05T23:19:43Z |
| virtual_size | None |
| visibility | private |
+------------------+--------------------------------------+

Create your VSD and VSC images. I’ve got them in my laptop, then I have to copy them thru scp.


[root@box01 ~(keystone_nuage)]# ls *.qcow2
CentOS-7-x86_64-GenericCloud.qcow2 vsc_singledisk.qcow2 VSD-3.2.6_230.qcow2
[root@box01 ~(keystone_nuage)]# . keystonerc_admin
[root@box01 ~(keystone_admin)]# openstack image create --file VSD-3.2.6_230.qcow2 --disk-format qcow2 --public --container-format bare VSD32R6
+------------------+--------------------------------------+
| Property | Value |
+------------------+--------------------------------------+
| checksum | a1419434721c53bf3c848896c48de7d5 |
| container_format | bare |
| created_at | 2016-05-06T13:14:31Z |
| disk_format | qcow2 |
| id | aff1535d-570b-4e19-98de-9c27cde94784 |
| min_disk | 0 |
| min_ram | 0 |
| name | VSD32R6 |
| owner | da64bceb671e4719b41de08c15e1eebe |
| protected | False |
| size | 5573574656 |
| status | active |
| tags | [] |
| updated_at | 2016-05-06T13:15:22Z |
| virtual_size | None |
| visibility | private |
+------------------+--------------------------------------+
[root@box01 ~(keystone_admin)]# openstack image create --file vsc_singledisk-dhcp.qcow2 --disk-format qcow2 --public --container-format bare VSC32R6
+------------------+--------------------------------------+
| Property | Value |
+------------------+--------------------------------------+
| checksum | 95a481632192ad8ea3f8701846b0c5ff |
| container_format | bare |
| created_at | 2016-05-06T13:31:55Z |
| disk_format | qcow2 |
| id | abcb1b0b-0389-4f07-b3a3-36bc2d0c0507 |
| min_disk | 0 |
| min_ram | 0 |
| name | VSC32R6 |
| owner | da64bceb671e4719b41de08c15e1eebe |
| protected | False |
| size | 45613056 |
| status | active |
| tags | [] |
| updated_at | 2016-05-06T13:31:56Z |
| virtual_size | None |
| visibility | private |
+------------------+--------------------------------------+

We need to create our keypair. I will use my laptop public key. And I will copy it as following:


usmovnmroja001:~ mroja001$ scp .ssh/id_rsa.pub root@192.168.1.25:/root
root@192.168.1.25's password:
id_rsa.pub 100% 414 0.4KB/s 00:00

Now, create your keypair using this public key file as following:


[root@box01 ~(keystone_admin)]# . keystonerc_nuage
[root@box01 ~(keystone_nuage)]# openstack keypair create --public-key id_rsa.pub pin-laptop
+-------------+-------------------------------------------------+
| Field | Value |
+-------------+-------------------------------------------------+
| fingerprint | b6:01:9c:76:a6:e6:d8:04:38:27:5d:8f:92:20:f3:32 |
| name | pin-laptop |
| user_id | c91cd992e79149209c41416a55a661b1 |
+-------------+-------------------------------------------------+

Creating your servers

Time to create your servers: jumpbox (local NTP/DNS server), VSC and VSD.


[root@box01 ~(keystone_nuage)]# openstack server create --image centos7-image --flavor nuage.tiny --key-name pin-laptop --nic net-id=nuage-lab,v4-fixed-ip=192.168.101.3 jumpbox
+--------------------------------------+------------------------------------------------------+
| Field | Value |
+--------------------------------------+------------------------------------------------------+
| OS-DCF:diskConfig | MANUAL |
| OS-EXT-AZ:availability_zone | |
| OS-EXT-STS:power_state | 0 |
| OS-EXT-STS:task_state | scheduling |
| OS-EXT-STS:vm_state | building |
| OS-SRV-USG:launched_at | None |
| OS-SRV-USG:terminated_at | None |
| accessIPv4 | |
| accessIPv6 | |
| addresses | |
| adminPass | id9AYj3o7WqE |
| config_drive | |
| created | 2016-05-06T13:56:02Z |
| flavor | nuage.tiny (a9559f30-3914-4227-8201-5fd7e1262b3d) |
| hostId | |
| id | f71bb396-47a8-477f-8f6b-8390769cfa73 |
| image | centos7-image (e9ee4c2a-006b-4d53-a158-47ec6bb6c422) |
| key_name | pin-laptop |
| name | jumpbox |
| os-extended-volumes:volumes_attached | [] |
| progress | 0 |
| project_id | 39e2f35bc10f4047b1ea77f79559807d |
| properties | |
| security_groups | [{u'name': u'default'}] |
| status | BUILD |
| updated | 2016-05-06T13:56:02Z |
| user_id | c91cd992e79149209c41416a55a661b1 |
+--------------------------------------+------------------------------------------------------+
[root@box01 ~(keystone_nuage)]# openstack server create --image VSD32R6 --flavor nuage.vsd --key-name pin-laptop --nic net-id=nuage-lab,v4-fixed-ip=192.168.101.4 vsd01
+--------------------------------------+--------------------------------------------------+
| Field | Value |
+--------------------------------------+--------------------------------------------------+
| OS-DCF:diskConfig | MANUAL |
| OS-EXT-AZ:availability_zone | |
| OS-EXT-STS:power_state | 0 |
| OS-EXT-STS:task_state | scheduling |
| OS-EXT-STS:vm_state | building |
| OS-SRV-USG:launched_at | None |
| OS-SRV-USG:terminated_at | None |
| accessIPv4 | |
| accessIPv6 | |
| addresses | |
| adminPass | SGsdF4DvkPVo |
| config_drive | |
| created | 2016-05-06T13:57:34Z |
| flavor | nuage.vsd (d4a3eda0-b2e2-4d86-b28a-357e8b94166c) |
| hostId | |
| id | 5befd9f3-98d5-404a-a1a7-ce1fa03127e8 |
| image | VSD32R6 (aff1535d-570b-4e19-98de-9c27cde94784) |
| key_name | pin-laptop |
| name | vsd01 |
| os-extended-volumes:volumes_attached | [] |
| progress | 0 |
| project_id | 39e2f35bc10f4047b1ea77f79559807d |
| properties | |
| security_groups | [{u'name': u'default'}] |
| status | BUILD |
| updated | 2016-05-06T13:57:34Z |
| user_id | c91cd992e79149209c41416a55a661b1 |
+--------------------------------------+--------------------------------------------------+
[root@box01 ~(keystone_nuage)]# openstack server create --image VSC32R6 --flavor nuage.vsc --key-name pin-laptop --nic net-id=nuage-lab,v4-fixed-ip=192.168.101.5 vsc01
+--------------------------------------+--------------------------------------------------+
| Field | Value |
+--------------------------------------+--------------------------------------------------+
| OS-DCF:diskConfig | MANUAL |
| OS-EXT-AZ:availability_zone | |
| OS-EXT-STS:power_state | 0 |
| OS-EXT-STS:task_state | scheduling |
| OS-EXT-STS:vm_state | building |
| OS-SRV-USG:launched_at | None |
| OS-SRV-USG:terminated_at | None |
| accessIPv4 | |
| accessIPv6 | |
| addresses | |
| adminPass | wCM4DzJijau9 |
| config_drive | |
| created | 2016-05-06T13:58:10Z |
| flavor | nuage.vsc (6a17cd1c-ee29-4f29-a4c9-14852a1e0394) |
| hostId | |
| id | 77a75f63-4615-4479-ace2-e0b21e70a038 |
| image | VSC32R6 (abcb1b0b-0389-4f07-b3a3-36bc2d0c0507) |
| key_name | pin-laptop |
| name | vsc01 |
| os-extended-volumes:volumes_attached | [] |
| progress | 0 |
| project_id | 39e2f35bc10f4047b1ea77f79559807d |
| properties | |
| security_groups | [{u'name': u'default'}] |
| status | BUILD |
| updated | 2016-05-06T13:58:10Z |
| user_id | c91cd992e79149209c41416a55a661b1 |
+--------------------------------------+--------------------------------------------------+
[root@box01 ~(keystone_nuage)]# nova list
+--------------------------------------+---------+--------+------------+-------------+-------------------------+
| ID | Name | Status | Task State | Power State | Networks |
+--------------------------------------+---------+--------+------------+-------------+-------------------------+
| f71bb396-47a8-477f-8f6b-8390769cfa73 | jumpbox | ACTIVE | - | Running | nuage-lab=192.168.101.3 |
| 77a75f63-4615-4479-ace2-e0b21e70a038 | vsc01 | ACTIVE | - | Running | nuage-lab=192.168.101.5 |
| 0f572cb6-d4a4-4b8a-b277-eb55fc859c68 | vsd01 | ACTIVE | - | Running | nuage-lab=192.168.101.4 |
+--------------------------------------+---------+--------+------------+-------------+-------------------------+

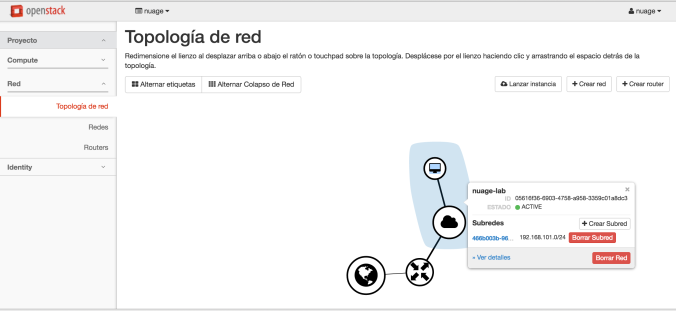
Lab topology so far (remember use nuage/foo credentials to access your horizon at http://192.168.1.25/dashboard)
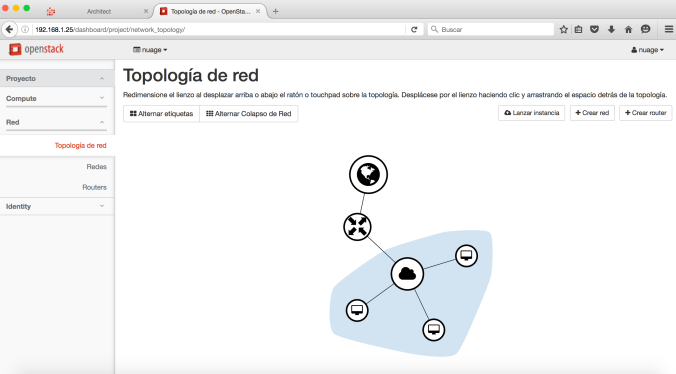
pinrojas - nuage lab topology packstack 01.png


Jumpbox: Creating your DNS and NTP local server

We’ll start configuring NTP and DNS service in jumpbox. Assign Floating IP to your jumpbox to get access from outside.


[root@box01 ~(keystone_nuage)]# openstack ip floating pool list
+------------------+
| Name |
+------------------+
| external_network |
+------------------+
[root@box01 ~(keystone_nuage)]# openstack ip floating create external_network
+-------------+--------------------------------------+
| Field | Value |
+-------------+--------------------------------------+
| fixed_ip | None |
| id | ca767cc0-fc65-4d74-8e4a-d2ef555c6b0d |
| instance_id | None |
| ip | 192.168.1.28 |
| pool | external_network |
+-------------+--------------------------------------+
[root@box01 ~(keystone_nuage)]# openstack ip floating add 192.168.1.28 jumpbox

Add security rules to default group to open ssh and ping port.
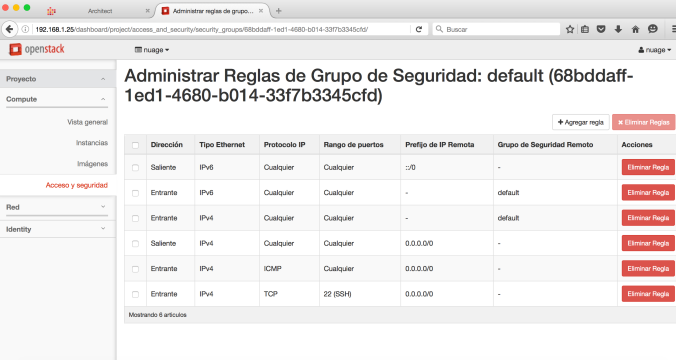
pinrojas - nuage lab packstack adding rules to security group.png

Let’s start with network settings…


usmovnmroja001:~ mroja001$ ssh centos@192.168.1.28
The authenticity of host '192.168.1.28 (192.168.1.28)' can't be established.
RSA key fingerprint is d9:f2:5e:95:96:94:48:a2:4a:63:2e:6b:e0:31:fa:a0.
Are you sure you want to continue connecting (yes/no)? yes
Warning: Permanently added '192.168.1.28' (RSA) to the list of known hosts.
[centos@jumpbox ~]$ su -
password: #you need to change the password before
[root@jumpbox ~]# cat /etc/hosts
127.0.0.1 localhost
192.168.101.3 jumpbox jumpbox.nuage.lab
[root@jumpbox ~]# cat /etc/hostname
jumpbox.nuage.lab
[root@jumpbox ~]# cat /etc/sysconfig/network-scripts/ifcfg-eth0
DEVICE="eth0"
BOOTPROTO="dhcp"
ONBOOT="yes"
TYPE="Ethernet"
USERCTL="yes"
PEERDNS="yes"
IPV6INIT="no"
PERSISTENT_DHCLIENT="1"
[root@jumpbox ~]# cat /etc/resolv.conf
; generated by /usr/sbin/dhclient-script
search nuage.lab
nameserver 192.168.1.254
[root@jumpbox ~]# ping www.google.com
PING www.google.com (64.233.176.99) 56(84) bytes of data.
64 bytes from yw-in-f99.1e100.net (64.233.176.99): icmp_seq=1 ttl=43 time=23.3 ms
64 bytes from yw-in-f99.1e100.net (64.233.176.99): icmp_seq=2 ttl=43 time=22.9 ms

Jumpbox: Install your DNS local server

Time to install bind and get our DNS.


[root@jumpbox ~]# yum -y install bind bind-utils
Loaded plugins: fastestmirror
Loading mirror speeds from cached hostfile
#
#some boring lines....
#more boring lines....
Installed:
bind.x86_64 32:9.9.4-29.el7_2.3 bind-utils.x86_64 32:9.9.4-29.el7_2.3 

Dependency Installed:
bind-libs.x86_64 32:9.9.4-29.el7_2.3

Complete!

We have to create DNS zones and entries as following:


[root@jumpbox ~]# cat /etc/named.conf
acl "trusted" {
192.168.101.3; # ns1 - can be set to localhost
192.168.101.4;
192.168.101.5;
192.168.101.6;
192.168.101.7;
192.168.101.8;
};

options {
directory "/var/cache/bind";

recursion yes; # enables resursive queries
allow-recursion { trusted; }; # allows recursive queries from "trusted" clients
listen-on { 192.168.101.3; }; # ns1 private IP address - listen on private network only
allow-transfer { none; }; # disable zone transfers by default

forwarders {
8.8.8.8;
8.8.4.4;
};

};
include "/etc/named/named.conf.local";
[root@jumpbox ~]# cat /etc/named/named.conf.local
zone "nuage.lab" {
type master;
file "/etc/named/zones/db.nuage.lab"; # zone file path
};

zone "101.168.192.in-addr.arpa" {
type master;
file "/etc/named/zones/db.101.168.192"; # 192.168.101/24 subnet
};

[root@jumpbox ~]# cat /etc/named/zones/db.nuage.lab
;
; BIND data file for local loopback interface
;
$TTL 604800
@ IN SOA jumpbox.nuage.lab. admin.nuage.lab (
3 ; Serial
604800 ; Refresh
86400 ; Retry
2419200 ; Expire
604800 ) ; Negative Cache TTL
;
; name servers - NS records
IN NS jumpbox.nuage.lab.

; name servers - A records
jumpbox.nuage.lab. IN A 192.168.101.3

; 192.168.101.0/16 - A records
vsd01.nuage.lab. IN A 192.168.101.4
xmpp IN CNAME vsd01
vsc01.nuage.lab. IN A 192.168.101.5
osc01.nuage.lab. IN A 192.168.101.6
nova01.nuage.lab. IN A 192.168.101.7
nova02.nuage.lab. IN A 192.168.101.7

; SRV records
_xmpp-client._tcp IN SRV 10 0 5222 vsd01.nuage.lab.
[root@jumpbox ~]# cat /etc/named/zones/db.101.168.192
;
; BIND reverse data file for local loopback interface
;
$TTL 604800
@ IN SOA jumpbox.nuage.lab. admin.nuage.lab. (
3 ; Serial
604800 ; Refresh
86400 ; Retry
2419200 ; Expire
604800 ) ; Negative Cache TTL
; name servers
IN NS jumpbox.nuage.lab.

; PTR Records
3 IN PTR jumpbox.nuage.lab. ; 192.168.101.3
4 IN PTR vsd01.nuage.lab. ; 192.168.101.4
5 IN PTR vsc01.nuage.lab. ; 192.168.101.5
6 IN PTR osc01.nuage.lab. ; 192.168.101.6
7 IN PTR nova01.nuage.lab. ; 192.168.101.7
8 IN PTR nova02.nuage.lab. ; 192.168.101.8
last settings to make our DNS works


[root@jumpbox ~]# mkdir /var/cache/bind
[root@jumpbox ~]# systemctl start named
[root@jumpbox ~]# cat /etc/resolv.conf
; generated by /usr/sbin/dhclient-script
search nuage.lab
nameserver 192.168.101.3

Test your local DNS


[root@jumpbox ~]# nslookup vsd01
Server: 192.168.101.3
Address: 192.168.101.3#53

Name: vsd01.nuage.lab
Address: 192.168.101.4

[root@jumpbox ~]# nslookup vsd01.nuage.lab
Server: 192.168.101.3
Address: 192.168.101.3#53

Name: vsd01.nuage.lab
Address: 192.168.101.4

[root@jumpbox ~]# nslookup 192.168.101.4
Server: 192.168.101.3
Address: 192.168.101.3#53

4.101.168.192.in-addr.arpa name = vsd01.nuage.lab.

Jumpbox: Install your NTP local server

We’ll install ntp as following:


[root@jumpbox ~]# yum -y install ntp
Loaded plugins: fastestmirror
Loading mirror speeds from cached hostfile
# boring lines
# more boring lines
# more boris lines...
Installed:
ntp.x86_64 0:4.2.6p5-22.el7.centos.1 

Dependency Installed:
autogen-libopts.x86_64 0:5.18-5.el7 ntpdate.x86_64 0:4.2.6p5-22.el7.centos.1

Complete!

Modify your ntp.conf file


[root@jumpbox ~]# cat /etc/ntp.conf
driftfile /var/lib/ntp/drift
restrict default nomodify notrap nopeer noquery
restrict 127.0.0.1
restrict ::1

restrict 192.168.101.0 mask 255.255.255.0 nomodify notrap
restrict 192.168.1.0 mask 255.255.255.0 nomodify notrap

server ntp1.jst.mfeed.ad.jp iburst
server ntp2.jst.mfeed.ad.jp iburst
server ntp3.jst.mfeed.ad.jp iburst

includefile /etc/ntp/crypto/pw

keys /etc/ntp/keys

disable monitor

Let’s speed up the sync as following:


[root@jumpbox ~]# ntpdate -u ntp3.jst.mfeed.ad.jp
6 May 15:08:52 ntpdate[16769]: adjust time server 210.173.160.87 offset 0.037419 sec
[root@jumpbox ~]# ntpdate -u ntp2.jst.mfeed.ad.jp
6 May 15:09:14 ntpdate[16770]: adjust time server 210.173.160.57 offset 0.020899 sec
[root@jumpbox ~]# systemctl start ntpd
[root@jumpbox ~]# ntpstat
synchronised to NTP server (210.173.160.27) at stratum 3
time correct to within 8132 ms
polling server every 64 s
[root@jumpbox ~]# ntpq -cpe -cas
remote refid st t when poll reach delay offset jitter
==============================================================================
+ntp1.jst.mfeed. 133.243.236.17 2 u 17 64 1 190.149 26.285 3.164
*ntp2.jst.mfeed. 133.243.236.17 2 u 16 64 1 169.770 18.778 2.302
+ntp3.jst.mfeed. 133.243.236.17 2 u 15 64 1 168.504 12.655 2.307

ind assid status conf reach auth condition last_event cnt
===========================================================
1 55973 943a yes yes none candidate sys_peer 3
2 55974 963a yes yes none sys.peer sys_peer 3
3 55975 9424 yes yes none candidate reachable 2

VSD: Configuring Virtualized Services Director v32.R6

Attach a floating ip to VSD instance and updating nameserver into the subnet
Don’t forget to add other rule in default security group to access local NTP.


[root@box01 ~]# . keystonerc_nuage
[root@box01 ~(keystone_nuage)]# openstack ip floating create external_network
+-------------+--------------------------------------+
| Field | Value |
+-------------+--------------------------------------+
| fixed_ip | None |
| id | 91903e82-362b-4ab0-9bfb-437b443fa9ed |
| instance_id | None |
| ip | 192.168.1.29 |
| pool | external_network |
+-------------+--------------------------------------+
[root@box01 ~(keystone_nuage)]# openstack ip floating add 192.168.1.29 vsd01
[root@box01 ~(keystone_nuage)]# neutron subnet-update --dns-nameserver 192.168.101.3 nuage-subnet
Updated subnet: nuage-subnet
[root@box01 ~(keystone_nuage)]# openstack security group rule create --proto udp --dst-port 123 default

Reboot you VSD01 to get the last change to your subnet
We’ll prepare server before the VSD installation: change network settings, add NTP server to ntp.conf, change timezone and syncup time.


usmovnmroja001:~ mroja001$ ssh root@192.168.1.29
The authenticity of host '192.168.1.29 (192.168.1.29)' can't be established.
RSA key fingerprint is 7d:60:cd:5e:2e:08:6e:e1:f2:1d:28:a8:55:ae:23:7c.
Are you sure you want to continue connecting (yes/no)? yes
Warning: Permanently added '192.168.1.29' (RSA) to the list of known hosts.
root@192.168.1.29's password:
Last login: Fri May 8 21:09:15 2015

Welcome to VSD. (3.2.6_230)

[root@host-192-168-101-4 ~]# hostname vsd01.nuage.lab
[root@host-192-168-101-4 ~]# hostname -f
vsd01.nuage.lab
[root@host-192-168-101-4 ~]# hostname
vsd01.nuage.lab
[root@host-192-168-101-4 ~]# cat /etc/resolv.conf
; generated by /sbin/dhclient-script
search nuage.lab
nameserver 192.168.101.3
[root@host-192-168-101-4 ~]# cat /etc/sysconfig/network-scripts/ifcfg-eth0
DEVICE="eth0"
IPV6INIT="yes"
NM_CONTROLLED="yes"
ONBOOT="yes"
TYPE="Ethernet"
BOOTPROTO="dhcp"
[root@host-192-168-101-4 ~]# cat /etc/hosts
127.0.0.1 localhost
192.168.101.4 vsd01.nuage.lab vsd01
[root@host-192-168-101-4 ~]# cat /etc/ntp.conf
driftfile /var/lib/ntp/drift

restrict default kod nomodify notrap nopeer noquery
restrict -6 default kod nomodify notrap nopeer noquery

restrict 127.0.0.1
restrict -6 ::1

server jumpbox.nuage.lab iburst
server 0.centos.pool.ntp.org iburst
server 1.centos.pool.ntp.org iburst
server 2.centos.pool.ntp.org iburst
server 3.centos.pool.ntp.org iburst

includefile /etc/ntp/crypto/pw

keys /etc/ntp/keys

[root@vsd01 ~]# ntpdate -u jumpbox.nuage.lab
6 May 20:57:18 ntpdate[1363]: adjust time server 192.168.101.3 offset 0.001624 sec
[root@vsd01 ~]# service ntpd start
Starting ntpd:
[root@vsd01 ~]# ntpstat
synchronised to NTP server (216.218.254.202) at stratum 2
time correct to within 51 ms
polling server every 64 s
[root@vsd01 ~]# rm /etc/localtime
rm: remove regular file `/etc/localtime'? y
[root@vsd01 ~]# sudo ln -s /usr/share/zoneinfo/US/Central /etc/localtime

All set to start our installation. execute /opt/vsd/install.sh


[root@vsd01 ~]# /opt/vsd/install.sh
-------------------------------------------------------------
V I R T U A L I Z E D S E R V I C E S D I R E C T O R Y
version 3.2.6_230
(c) 2015 Nuage Networks
-------------------------------------------------------------
Error: FQDN vsd01 missing the domain part
[root@vsd01 ~]# vi /etc/hosts
[root@vsd01 ~]# hostname -f
vsd01.nuage.lab
[root@vsd01 ~]# /opt/vsd/install.sh
-------------------------------------------------------------
V I R T U A L I Z E D S E R V I C E S D I R E C T O R Y
version 3.2.6_230
(c) 2015 Nuage Networks
-------------------------------------------------------------
VSD supports two configurations:
1) HA, consisting of 3 redundant installs of VSD with a cluster name node server.
2) Standalone, where all services are installed on a single machine.
Is this a redundant (r) or standalone (s) installation [r|s]? (default=s): s
WARN: Memory is at 7872 MB; 16GB is preferred
Deploy VSD on single host vsd01.nuage.lab ...
Continue [y|n]? (default=y): y
Starting VSD deployment. This may take as long as 20 minutes in some situations ...
VSD package deployment and configuration DONE. Please initialize VSD.
DONE: VSD deployed.
Starting VSD initialization. This may take as long as 20 minutes in some situations ...
A self-signed certificate has been generated to get you started using VSD.
VSD installed and the services have started.

Wait a few minutes….
Now you can check your services:


[root@vsd01 ~]#
[root@vsd01 ~]#
[root@vsd01 ~]# monit summary
The Monit daemon 5.15 uptime: 3m 

Program 'vsd-stats-status' Status failed
Program 'vsd-core-status' Status failed
Program 'vsd-common-status' Status ok
Process 'tca-daemon' Initializing
Program 'tca-daemon-status' Initializing
Process 'stats-collector' Initializing
Program 'stats-collector-status' Initializing
Process 'opentsdb' Running
Program 'opentsdb-status' Status failed
Program 'ntp-status' Status ok
Process 'mysql' Running
Program 'mysql-status' Status ok
Process 'mediator' Running
Program 'mediator-status' Initializing
File 'jboss-console-log' Accessible
File 'monit-log' Accessible
File 'mediator-out' Does not exist
File 'stats-out' Does not exist
File 'tca-daemon-out' Does not exist
Program 'keyserver-status' Status ok
Process 'jboss' Running
Program 'jboss-status' Status ok
Process 'hbase' Running
Program 'hbase-status' Status ok
Program 'ejbca-status' Status ok
Process 'ejabberd' Running
Program 'ejabberd-status' Status ok
System 'vsd01.nuage.lab' Running

It’s important to understand how to gracefully restart these services as following (you need to wait some time between commands until services come up ‘ok’). We’ll keep stats down to avoid annoying messages later. This is matter for other post.


[root@vsd01 ~]# monit -g vsd-stats stop
# Wait for all the vsd-stats services to show as “Not Monitored”.
[root@vsd01 ~]# monit -g vsd-core stop
# Wait for all the vsd-core services to show as “Not Monitored”.
[root@vsd01 ~]# monit -g vsd-common stop
# Wait for all the vsd-common services to show as “Not Monitored”.
[root@vsd01 ~]# monit -g vsd-common start
# Wait for all the vsd-common services to show as “status ok”.
[root@vsd01 ~]# monit -g vsd-core start
# Wait for all the vsd-common services to show as “status ok”.
# I will keep vsd-stats down
[root@vsd01 ~]# monit summary
The Monit daemon 5.15 uptime: 17m

Program 'vsd-stats-status' Not monitored
Program 'vsd-core-status' Status ok
Program 'vsd-common-status' Status ok
Process 'tca-daemon' Not monitored
Program 'tca-daemon-status' Not monitored
Process 'stats-collector' Not monitored
Program 'stats-collector-status' Not monitored
Process 'opentsdb' Not monitored
Program 'opentsdb-status' Not monitored
Program 'ntp-status' Status ok
Process 'mysql' Running
Program 'mysql-status' Status ok
Process 'mediator' Running
Program 'mediator-status' Status ok
File 'jboss-console-log' Accessible
File 'monit-log' Accessible
File 'mediator-out' Accessible
File 'stats-out' Accessible
File 'tca-daemon-out' Accessible
Program 'keyserver-status' Status failed
Process 'jboss' Running
Program 'jboss-status' Status ok
Process 'hbase' Not monitored
Program 'hbase-status' Not monitored
Program 'ejbca-status' Status ok
Process 'ejabberd' Running
Program 'ejabberd-status' Status ok
System 'vsd01.nuage.lab' Running

We need to open tcp 8443 port to access vsd console
Switch again to your OS controller and add the required security group.


[root@box01 ~(keystone_nuage)]# openstack security group create vsd
+-------------+--------------------------------------+
| Field | Value |
+-------------+--------------------------------------+
| description | vsd |
| id | 7ff1256c-aeec-4dac-9cf8-ff6ae9c7ab04 |
| name | vsd |
| rules | [] |
| tenant_id | 39e2f35bc10f4047b1ea77f79559807d |
+-------------+--------------------------------------+
[root@box01 ~(keystone_nuage)]# openstack security group rule create --proto tcp --dst-port 8443 vsd
+-----------------+--------------------------------------+
| Field | Value |
+-----------------+--------------------------------------+
| group | {} |
| id | 5a82cacf-b846-4307-a059-7640154ff24b |
| ip_protocol | tcp |
| ip_range | 0.0.0.0/0 |
| parent_group_id | 7ff1256c-aeec-4dac-9cf8-ff6ae9c7ab04 |
| port_range | 8443:8443 |
+-----------------+--------------------------------------+
[root@box01 ~(keystone_nuage)]# openstack server add security group vsd01 vsd

It’s time to access your VSD server. use cpsroot/cpsroot credentials.
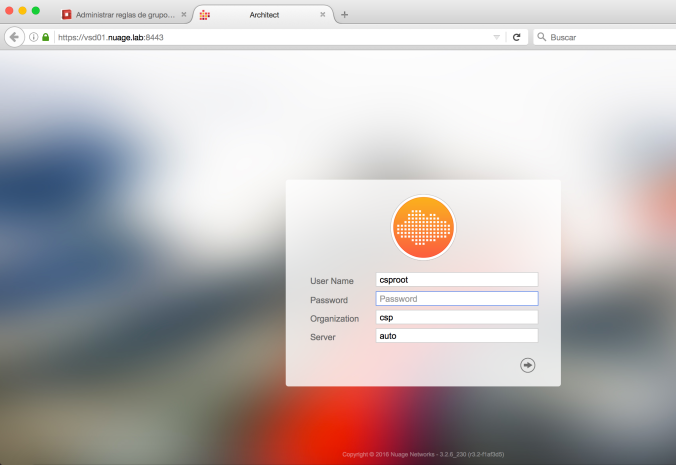
pinrojas - vsd nuage packstack console.png

You’ll need a license. comment this post to figure it out that.
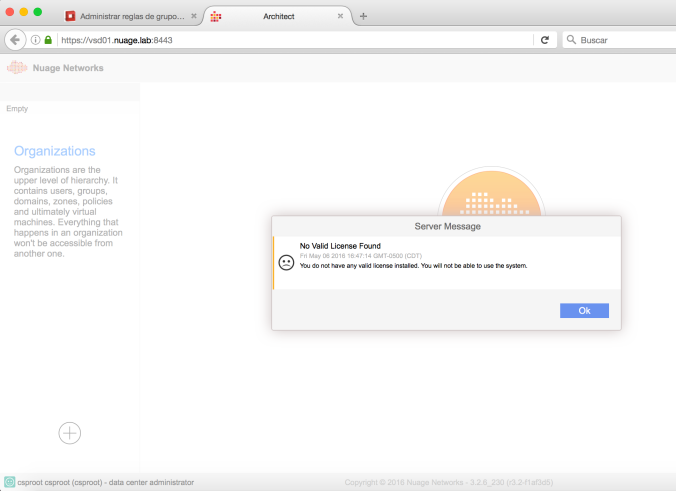
pinrojas - license vsd console nuage lab packstack.png

VSC: Installing SDN Controller

First of all, you will have to change the qcow2 image. please check my post: NUAGE VSC – MODIFY QCOW2 IMAGES WITH GUESTFISH
This is what will you have on your console if everything was ok (Don’t get confuse is you see the screen stuck at the booting… state)
pinrojas - vsc screen nuage lab

Ping from vsd01 to your brand new VSC (vsc01 / 192.168.101.5) to check your installation as following


[root@vsd01 ~]# ping 192.168.101.5
PING 192.168.101.5 (192.168.101.5) 56(84) bytes of data.
64 bytes from 192.168.101.5: icmp_seq=1 ttl=64 time=2.70 ms
64 bytes from 192.168.101.5: icmp_seq=2 ttl=64 time=0.621 ms
^C
--- 192.168.101.5 ping statistics ---
2 packets transmitted, 2 received, 0% packet loss, time 1244ms
rtt min/avg/max/mdev = 0.621/1.661/2.702/1.041 ms
[root@vsd01 ~]# ssh admin@192.168.101.5
The authenticity of host '192.168.101.5 (192.168.101.5)' can't be established.
RSA key fingerprint is 47:e6:d6:33:9f:d7:cb:fa:ab:83:89:28:28:02:8c:56.
Are you sure you want to continue connecting (yes/no)? yes
Warning: Permanently added '192.168.101.5' (RSA) to the list of known hosts.
TiMOS-DC-C-3.2.6-228 cpm/i386 NUAGE VSC Copyright (c) 2000-2016 Alcatel-Lucent.
All rights reserved. All use subject to applicable license agreements.
Built on Tue Jan 26 21:42:10 PST 2016 [d6274a] by builder in /rel3.2-DC/b1/6-228/panos/main

admin@192.168.101.5's password:

A:vm1#
A:vm1#
A:vm1#
A:vm1#
A:vm1# show bof
===============================================================================
BOF (Memory)
===============================================================================
primary-image cf1:\timos\cpm.tim
primary-config cf1:\config.cfg
ip-address-dhcp
address 192.168.101.5/24 active
primary-dns 192.168.101.3
dns-domain openstacklocal
autonegotiate
duplex full
speed 100
wait 3
persist off
no li-local-save
no li-separate
console-speed 115200
===============================================================================
A:vm1#

We’ll add a route and our domain to bof.cfg file


A:vm1# bof
A:vm1>bof# dns-domain nuage.lab
*A:vm1>bof# static-route 0.0.0.0/1 next-hop 192.168.101.1
*A:vm1>bof# save
Writing BOF to cf1:/bof.cfg ... OK
Completed.
A:vm1>bof# exit
A:vm1# show bof
===============================================================================
BOF (Memory)
===============================================================================
primary-image cf1:\timos\cpm.tim
primary-config cf1:\config.cfg
ip-address-dhcp
address 192.168.101.5/24 active
primary-dns 192.168.101.3
dns-domain nuage.lab
static-route 0.0.0.0/1 next-hop 192.168.101.1
autonegotiate
duplex full
speed 100
wait 3
persist off
no li-local-save
no li-separate
console-speed 115200
===============================================================================

Now, we’ll configure NTP and time zone.


A:vm1# configure system
A:vm1>config>system# name vsd01
*A:vsd01>config>system# snmp
*A:vsd01>config>system>snmp# exit
*A:vsd01>config>system# time
*A:vsd01>config>system>time# ntp
*A:vsd01>config>system>time>ntp# server 192.168.101.3
*A:vsd01>config>system>time>ntp# no shutdown
*A:vsd01>config>system>time>ntp# exit
*A:vsd01>config>system>time# sntp
*A:vsd01>config>system>time>sntp# shutdown
*A:vsd01>config>system>time>sntp# exit
*A:vsd01>config>system>time# dst-zone
*A:vsd01>config>system>time# dst-zone CST
*A:vsd01>config>system>time>dst-zone# start second sunday march 02:00
*A:vsd01>config>system>time>dst-zone# end first sunday november 02:00
*A:vsd01>config>system>time>dst-zone# exit
*A:vsd01>config>system>time# zone CST
*A:vsd01>config>system>time# exit
*A:vsd01>config>system# thresholds
*A:vsd01>config>system>thresholds# rmon
*A:vsd01>config>system>thresh>rmon# exit
*A:vsd01>config>system>thresholds# exit
*A:vsd01>config>system# exit
*A:vsd01#

Before save our configuration, we’ll set vsd connection thru xmpp as following:


*A:vsd01#
*A:vsd01# exit all
*A:vsd01# configure vswitch-controller
*A:vsd01>config>vswitch-controller# xmpp-server vsd01:password@vsd01.nuage.lab
*A:vsd01>config>vswitch-controller# open-flow
*A:vsd01>config>vswitch-controller>open-flow# exit
*A:vsd01>config>vswitch-controller# xmpp
*A:vsd01>config>v-switch-controller>xmpp# exit
*A:vsd01>config>vswitch-controller# ovsdb
*A:vsd01>config>vswitch-controller>ovsdb# exit
*A:vsd01>config>vswitch-controller# exit
*A:vsd01#
*A:vsd01# admin save

Now, let’s see if everything is ok and your VSC is connected to your VSD


A:vsd01# show vswitch-controller vsd detail 

===============================================================================
VSD Server Table
===============================================================================
VSD User Name : cna@vsd01.nuage.lab/nuage
Uptime : 0d 02:31:27
Status : available
Nuage Msg Tx. : 8 Nuage Msg Rx. : 8
Nuage Msg Ack. Rx. : 8 Nuage Msg Error : 0
Nuage Msg TimedOut : 0 Nuage Msg MinRtt : 50
Nuage Msg MaxRtt : 60

===============================================================================

Ok guys, next post we’ll install our plugin into a brand new openstack installation

See you around!

Nuage VSC – Modify QCOW2 images with guestfish

Hi there,

This post is useful to anyone planing to use guestfish to make some changes to any qcow2 disk image file. You can solve issues like change user settings, or define static ip addresses, or change grub settings.

I am using guestfish to change some configurations into my vsc_singledisk.qcow2 image. Why? because all the changes into VSC must be done thru a console. However, If you are thinking to run this on OpenStack liberty/kvm. It would be a issue. Most of the instances has been managed thru vnc (graphics). Then, I’ve added network settings to bof.cfg file to make this instance boot with a specific ip address. I can follow the next steps of its setup thru ssh 😉

Install your guestfish and libvirtd packages

I’ve downloaded a centos7 minimal OVA file to my Mac. I’ve imported it to my vbox and make run. I’ve used to have selinux disabled. Maybe you will need to change it to permissible.

First of all you have to install kvm and the guestfish. Then, you will have to disbale NetworManager and firewalld. Restart the libvirtd and set LIBGUESTFS_BACKEND=direct. I’ve copied my qcow2 file thru scp previously. You will have to change the ownership to qemu:qemu to this file to make it work.


[root@jumbox ~]# yum install -y qemu-kvm libvirt libvirt-python libguestfs-tools virt-install
Loaded plugins: fastestmirror
Loading mirror speeds from cached hostfile
 * base: bay.uchicago.edu
 * extras: centos-distro.cavecreek.net
 * updates: centos.mia.host-engine.com
#
# many boring lines
# many boring lines
#

Installed:
  libguestfs-tools.noarch 1:1.28.1-1.55.el7.centos.2        libvirt.x86_64 0:1.2.17-13.el7_2.4        qemu-kvm.x86_64 10:1.5.3-105.el7_2.4       
  virt-install.noarch 0:1.2.1-8.el7                        

Dependency Installed:
  libguestfs.x86_64 1:1.28.1-1.55.el7.centos.2                        libguestfs-tools-c.x86_64 1:1.28.1-1.55.el7.centos.2                      
  libvirt-daemon-kvm.x86_64 0:1.2.17-13.el7_2.4                       perl-Sys-Guestfs.x86_64 1:1.28.1-1.55.el7.centos.2                        
  perl-Sys-Virt.x86_64 0:1.2.17-2.el7                                 perl-libintl.x86_64 0:1.20-12.el7                                         

Complete!
[root@jumbox ~]# yum -y install guestfish
Loaded plugins: fastestmirror
Loading mirror speeds from cached hostfile
 * base: bay.uchicago.edu
 * extras: centos-distro.cavecreek.net
 * updates: centos.mia.host-engine.com
#
# many boring lines
# many boring lines
#
Installed:
  libguestfs-tools-c.x86_64 1:1.28.1-1.55.el7.centos.2                                                                                           

Complete!
[root@jumbox ~]# systemctl stop NetworkManager
[root@jumbox ~]# systemctl disable NetworkManager
Removed symlink /etc/systemd/system/multi-user.target.wants/NetworkManager.service.
Removed symlink /etc/systemd/system/dbus-org.freedesktop.NetworkManager.service.
Removed symlink /etc/systemd/system/dbus-org.freedesktop.nm-dispatcher.service.
[root@jumbox ~]# systemctl start network
[root@jumbox ~]# systemctl stop firewalld
[root@jumbox ~]# systemctl disable firewalld
Removed symlink /etc/systemd/system/dbus-org.fedoraproject.FirewallD1.service.
Removed symlink /etc/systemd/system/basic.target.wants/firewalld.service.
[root@jumbox ~]# service libvirtd restart
Redirecting to /bin/systemctl restart  libvirtd.service
[root@jumbox ~]# virsh
Welcome to virsh, the virtualization interactive terminal.

Type:  'help' for help with commands
       'quit' to quit

virsh # list
 Id    Name                           State
----------------------------------------------------

virsh # exit
[root@jumbox ~]# chown qemu:qemu vsc_singledisk.qcow2 
[root@jumbox ~]# export LIBGUESTFS_BACKEND=direct

Modify your files into your qcow2 image thru guestfish

Next lines will show you how to modify the qcow2 image file. This case I am modifying bof.cfg file at the root folder.


[root@jumbox ~]# mv vsc_singledisk.qcow2 vsc_singledisk_dhcp.qcow2 
[root@jumbox ~]# guestfish --rw -a vsc_singledisk_dhcp.qcow2 

Welcome to guestfish, the guest filesystem shell for
editing virtual machine filesystems and disk images.

Type: 'help' for help on commands
      'man' to read the manual
      'quit' to quit the shell

> run
 100% ⟦▒▒▒▒▒▒▒▒▒▒▒▒▒▒▒▒▒▒▒▒▒▒▒▒▒▒▒▒▒▒▒▒▒▒▒▒▒▒▒▒▒▒▒▒▒▒▒▒▒▒▒▒▒▒▒▒▒▒▒▒▒▒▒▒▒▒▒▒▒▒▒▒▒▒▒▒▒▒▒▒▒▒▒▒▒▒▒▒▒▒▒▒▒▒▒▒▒▒▒▒▒▒▒▒▒▒▒▒▒▒▒▒▒▒▒▒▒▒▒▒▒▒▒▒▒▒▒▒▒▒⟧ 00:00
> mount /dev/sda1 /
> ls /
bof.cfg
config.cfg
nvram.dat
syslinux
timos
> vi /bof.cfg
> exit

The bof.cfg file that I’ve found is this:


primary-image        cf1:/timos/cpm.tim
primary-config       cf1:/config.cfg
autonegotiate
duplex               full
speed                100
wait                 3
persist              off
console-speed        115200

And this is how I’ve left it.


primary-image    cf1:\timos\cpm.tim
primary-config   cf1:\config.cfg
ip-address-dhcp
primary-dns      192.168.101.3
dns-domain       nuage.lab
static-route     0.0.0.0/1 next-hop 192.168.101.1
autonegotiate
duplex           full
speed            100
wait             3
persist          off
no li-local-save
no li-separate
console-speed    115200

See ya!

Building a Nuage/OpenStack demo at Home: Giving PackStack a chance – Centos7

update 05/05/2016: I’ve just got a 32GB fanless server and I stop using VBox to build my demo at home. Sorry in advance for any misunderstanding. More details about the server at Diego’s post.


Howdy,

Exploring some ways to install OpenStack demos with Nuage and after some tries with DevStack, I’m amazed the way how those projects has been packed and make portable. However, DevStack has some challenge regarding its management. It’s painful (almost impossible) try to restart services after a server reboot. Manage every service thru different sessions handled by the old GNU screen it’s even worse.

I’ve got some references and guidelines from Scott Irwin that’d make PackStack more enjoyable. Then, I’m giving it more than a chance.

PackStack: Preparing my server

I’ll try it on my laptop’s VirtualBox. I’ve downloaded a Centos 7 OVA base image. I’ve imported to my VBox and I’ve set a Bridge network interface (192.168.1.15/24). Don’t forget to set this interface in promiscuos mode allowing all kind of traffic. Range between 192.168.1.2 to 192.168.1.50 is out of DHCP pool. Also, I’ve set 8GB of memory to play with a couple of virtual instances later. A forwarding rule to connect thru ssh from my laptop’s terminal.

Install net tools: sudo yum -y install net-tools

Edit you /etc/hosts and /etc/hostname files to your own settings. I’ve used “osc01.nuage.lab” and IP address 192.168.1.15. Also, modify you ifcfg-enp0s3 file and resolv.conf.


[centos@osc01 ~]$ cat /etc/sysconfig/network-scripts/ifcfg-enp0s3
HWADDR="08:00:27:0B:BC:9D"
TYPE="Ethernet"
BOOTPROTO=static
NM_CONTROLLED=no
DEFROUTE="yes"
PEERDNS="yes"
PEERROUTES="yes"
IPV4_FAILURE_FATAL="no"
NAME="enp0s3"
UUID="dfa5c587-f319-41dc-b7da-84fe77bf4f85"
ONBOOT="yes"
IPADDR=192.168.1.15
PREFIX=24
GATEWAY=192.168.1.254
DNS=192.168.1.254
[centos@osc01 ~]$ cat /etc/resolv.conf 
search nuage.lab
nameserver 192.168.1.254

Stop and disable NetworkManager and Firewall:


sudo systemctl stop firewalld
sudo systemctl disable firewalld
sudo systemctl stop NetworkManager
sudo systemctl disable NetworkManager
sudo systemctl start network

Edit /etc/selinux/config and change SELINUX=disabled
Some OS’s need more than just disabled selinux from this file. I had to change also /etc/grub2.conf as the following way (manage this file this precaution).

This step si very important is you want to save resources in your laptop.


### END /etc/grub.d/00_header ###

### BEGIN /etc/grub.d/10_linux ###
menuentry 'CentOS Linux (3.10.0-123.9.2.el7.x86_64) 7 (Core)' --class centos --class gnu-linux --class gnu --class os --unrestricted $menuentry_id_option 'gnulinux-3.10.0-123.el7.x86_64-advanced-f12869d8-bd8f-40b9-98fa-bbbdbf4d0301' {
    load_video
    set gfxpayload=keep
    insmod gzio
    insmod part_msdos
    insmod xfs
    set root='hd0,msdos1'
    if [ x$feature_platform_search_hint = xy ]; then
      search --no-floppy --fs-uuid --set=root --hint-bios=hd0,msdos1 --hint-efi=hd0,msdos1 --hint-baremetal=ahci0,msdos1 --hint='hd0,msdos1'  aca5ee7d-3e13-43ac-8dd3-a1486f5948e4
    else
      search --no-floppy --fs-uuid --set=root aca5ee7d-3e13-43ac-8dd3-a1486f5948e4
    fi
    linux16 /vmlinuz-3.10.0-123.9.2.el7.x86_64 root=/dev/mapper/centos-root ro rd.lvm.lv=centos/swap vconsole.font=latarcyrheb-sun16 rd.lvm.lv=centos/root crashkernel=auto  vconsole.keymap=us rhgb quiet LANG=en_US.UTF-8 selinux=0
    initrd16 /initramfs-3.10.0-123.9.2.el7.x86_64.img
}
#
#... more boring lines
#

Execute sudo yum -y update and reboot

Check you centos release thru sudo rpm --query centos-release. I’ve got centos-release-7-2.1511.el7.centos.2.10.x86_64

Packstack: Set NTP Client settings

Set you timezone (My case is US/Central): sudo ln -s /usr/share/zoneinfo/US/Central /etc/localtime. You may need to delete /etc/localtime first.

Check your /etc/ntp.conf file and do a manual sync:


[root@osc01 ~]# service ntpd stop
Shutting down ntpd:                                        [  OK  ]
[root@osc01 ~]# ntpdate -u 50.22.155.163
12 Apr 10:59:48 ntpdate[2317]: step time server 50.22.155.163 offset 1424.472299 sec
[root@osc01 ~]# service ntpd start
Starting ntpd:                                             [  OK  ]
[root@osc01 ~]# ntpstat #as many times take to sync up
synchronised to NTP server (152.2.133.54) at stratum 2 
   time correct to within 1049 ms
   polling server every 64 s

PackStack: Installing and configuring

Setup the RDO repositories thru the followin way: yum install -y https://repos.fedorapeople.org/repos/openstack/openstack-liberty/rdo-release-liberty-2.noarch.rpm


[centos@ocs01 ~]$ sudo yum install -y https://repos.fedorapeople.org/repos/openstack/openstack-liberty/rdo-release-liberty-2.noarch.rpm
Loaded plugins: fastestmirror
rdo-release-liberty-2.noarch.rpm                                                                                                                           | 5.1 kB  00:00:00     
Examining /var/tmp/yum-root-RTP070/rdo-release-liberty-2.noarch.rpm: rdo-release-liberty-2.noarch
Marking /var/tmp/yum-root-RTP070/rdo-release-liberty-2.noarch.rpm to be installed
Resolving Dependencies
--> Running transaction check
---> Package rdo-release.noarch 0:liberty-2 will be installed
--> Finished Dependency Resolution

Dependencies Resolved

==================================================================================================================================================================================
 Package                                 Arch                               Version                               Repository                                                 Size
==================================================================================================================================================================================
Installing:
 rdo-release                             noarch                             liberty-2                             /rdo-release-liberty-2.noarch                             1.4 k

Transaction Summary
==================================================================================================================================================================================
Install  1 Package

Total size: 1.4 k
Installed size: 1.4 k
Downloading packages:
Running transaction check
Running transaction test
Transaction test succeeded
Running transaction
  Installing : rdo-release-liberty-2.noarch                                                                                                                                   1/1 
  Verifying  : rdo-release-liberty-2.noarch                                                                                                                                   1/1 

Installed:
  rdo-release.noarch 0:liberty-2                                                                                                                                                  

Complete!

Install PackStack: yum install -y openstack-packstack


[centos@ocs01 ~]$ sudo yum install -y openstack-packstack
Loaded plugins: fastestmirror
openstack-liberty                                                                                                                                          | 2.9 kB  00:00:00     
openstack-liberty/x86_64/primary_db                                                                                                                        | 544 kB  00:00:00     
Loading mirror speeds from cached hostfile
 * base: repo1.dal.innoscale.net
 * extras: pubmirrors.dal.corespace.com
 * updates: reflector.westga.edu
Resolving Dependencies
--> Running transaction check
---> Package openstack-packstack.noarch 1:7.0.0-0.10.dev1682.g42b3426.el7 will be installed
--> Processing Dependency: openstack-packstack-puppet = 1:7.0.0-0.10.dev1682.g42b3426.el7 for package: 1:openstack-packstack-7.0.0-0.10.dev1682.g42b3426.el7.noarch
--> Processing Dependency: openstack-puppet-modules >= 2014.2.10 for package: 1:openstack-packstack-7.0.0-0.10.dev1682.g42b3426.el7.noarch
#
#... some boring lines
#
Installed:
  openstack-packstack.noarch 1:7.0.0-0.10.dev1682.g42b3426.el7                                                                                                                    

Dependency Installed:
  PyYAML.x86_64 0:3.10-11.el7                                              jbigkit-libs.x86_64 0:2.0-11.el7                   libjpeg-turbo.x86_64 0:1.2.90-5.el7                
  libtiff.x86_64 0:4.0.3-14.el7                                            libwebp.x86_64 0:0.3.0-3.el7                       libyaml.x86_64 0:0.1.4-11.el7_0                    
  openstack-packstack-puppet.noarch 1:7.0.0-0.10.dev1682.g42b3426.el7      openstack-puppet-modules.noarch 1:7.0.1-1.el7      pyOpenSSL.noarch 0:0.15.1-1.el7                    
  python-docutils.noarch 0:0.11-0.2.20130715svn7687.el7                    python-enum34.noarch 0:1.0.4-1.el7                 python-idna.noarch 0:2.0-1.el7                     
  python-ipaddress.noarch 0:1.0.7-4.el7                                    python-netaddr.noarch 0:0.7.18-1.el7               python-pillow.x86_64 0:2.0.0-19.gitd1c6db8.el7     
  python-ply.noarch 0:3.4-10.el7                                           python-pycparser.noarch 0:2.14-1.el7               python-six.noarch 0:1.9.0-2.el7                    
  python2-cffi.x86_64 0:1.5.2-1.el7                                        python2-cryptography.x86_64 0:1.2.1-3.el7          python2-pyasn1.noarch 0:0.1.9-6.el7.1              
  ruby.x86_64 0:2.0.0.598-25.el7_1                                         ruby-irb.noarch 0:2.0.0.598-25.el7_1               ruby-libs.x86_64 0:2.0.0.598-25.el7_1              
  rubygem-bigdecimal.x86_64 0:1.2.0-25.el7_1                               rubygem-io-console.x86_64 0:0.4.2-25.el7_1         rubygem-json.x86_64 0:1.7.7-25.el7_1               
  rubygem-psych.x86_64 0:2.0.0-25.el7_1                                    rubygem-rdoc.noarch 0:4.0.0-25.el7_1               rubygems.noarch 0:2.0.14-25.el7_1                  

Complete!

Packstack: configuring your OpenStack instance in a box

You can install this with the default settings: packstack --allinone

Or create you own packstack-answer file as mine. use packstack --answer-file=/your/answer/file

However, I’ve decided to use bridge interfaces after getting some bad experiences with the NAT’s ones. I’ve turned enp0s3 interface into a port in br-ex bridge. That way I will be able to access any instance with a floating IP from my LAN at home.

Said that, you can start either thru a command like this:packstack --allinone --provision-demo=n --os-neutron-ovs-bridge-mappings=extnet:br-ex --os-neutron-ovs-bridge-interfaces=br-ex:enp0s3 --os-neutron-ml2-type-drivers=vxlan,flat --os-cinder-install=n --os-swift-install=n --os-ceilometer-install=n --nagios-install=n

Or using an answer file like this (I’ve intentionally removed services like cinder and swift among others):


[general]
CONFIG_SSH_KEY=/root/.ssh/id_rsa.pub
CONFIG_DEFAULT_PASSWORD=
CONFIG_MARIADB_INSTALL=y
CONFIG_GLANCE_INSTALL=y
CONFIG_CINDER_INSTALL=n
CONFIG_MANILA_INSTALL=n
CONFIG_NOVA_INSTALL=y
CONFIG_NEUTRON_INSTALL=y
CONFIG_HORIZON_INSTALL=y
CONFIG_SWIFT_INSTALL=n
CONFIG_CEILOMETER_INSTALL=n
CONFIG_SAHARA_INSTALL=n
CONFIG_HEAT_INSTALL=n
CONFIG_TROVE_INSTALL=n
CONFIG_IRONIC_INSTALL=n
CONFIG_CLIENT_INSTALL=y
CONFIG_NTP_SERVERS=
CONFIG_NAGIOS_INSTALL=n
CONFIG_DEBUG_MODE=n
CONFIG_CONTROLLER_HOST=192.168.1.15
CONFIG_COMPUTE_HOSTS=192.168.1.15
CONFIG_NETWORK_HOSTS=192.168.1.15
CONFIG_VMWARE_BACKEND=n
CONFIG_UNSUPPORTED=n
CONFIG_USE_SUBNETS=n
CONFIG_STORAGE_HOST=192.168.1.15
CONFIG_USE_EPEL=n
CONFIG_ENABLE_RDO_TESTING=n
CONFIG_RH_OPTIONAL=y
CONFIG_SSL_CACERT_FILE=/etc/pki/tls/certs/selfcert.crt
CONFIG_SSL_CACERT_KEY_FILE=/etc/pki/tls/private/selfkey.key
CONFIG_SSL_CERT_DIR=~/packstackca/
CONFIG_SSL_CACERT_SELFSIGN=y
CONFIG_SELFSIGN_CACERT_SUBJECT_C=--
CONFIG_SELFSIGN_CACERT_SUBJECT_ST=State
CONFIG_SELFSIGN_CACERT_SUBJECT_L=City
CONFIG_SELFSIGN_CACERT_SUBJECT_O=openstack
CONFIG_SELFSIGN_CACERT_SUBJECT_OU=packstack
CONFIG_SELFSIGN_CACERT_SUBJECT_CN=ocs01.nuage.lab
CONFIG_SELFSIGN_CACERT_SUBJECT_MAIL=admin@ocs01.nuage.lab
CONFIG_AMQP_BACKEND=rabbitmq
CONFIG_AMQP_HOST=192.168.1.15
CONFIG_AMQP_ENABLE_SSL=n
CONFIG_AMQP_ENABLE_AUTH=n
CONFIG_AMQP_NSS_CERTDB_PW=PW_PLACEHOLDER
CONFIG_AMQP_AUTH_USER=amqp_user
CONFIG_AMQP_AUTH_PASSWORD=PW_PLACEHOLDER
CONFIG_MARIADB_HOST=192.168.1.15
CONFIG_MARIADB_USER=root
CONFIG_MARIADB_PW=6fa4f04edee8422e
CONFIG_KEYSTONE_DB_PW=9b528f4cf1034fa9
CONFIG_KEYSTONE_DB_PURGE_ENABLE=True
CONFIG_KEYSTONE_REGION=RegionOne
CONFIG_KEYSTONE_ADMIN_TOKEN=baf9dc7f10bc4e959196123210346f5e
CONFIG_KEYSTONE_ADMIN_EMAIL=root@localhost
CONFIG_KEYSTONE_ADMIN_USERNAME=admin
CONFIG_KEYSTONE_ADMIN_PW=ab111b7f96d84895
CONFIG_KEYSTONE_DEMO_PW=60fe9990c4304f4e
CONFIG_KEYSTONE_API_VERSION=v2.0
CONFIG_KEYSTONE_TOKEN_FORMAT=UUID
CONFIG_KEYSTONE_SERVICE_NAME=httpd
CONFIG_KEYSTONE_IDENTITY_BACKEND=sql
CONFIG_KEYSTONE_LDAP_URL=ldap://192.168.1.15
CONFIG_KEYSTONE_LDAP_QUERY_SCOPE=one
CONFIG_KEYSTONE_LDAP_PAGE_SIZE=-1
CONFIG_KEYSTONE_LDAP_USER_ENABLED_MASK=-1
CONFIG_KEYSTONE_LDAP_USER_ENABLED_DEFAULT=TRUE
CONFIG_KEYSTONE_LDAP_USER_ENABLED_INVERT=n
CONFIG_KEYSTONE_LDAP_USER_ALLOW_CREATE=n
CONFIG_KEYSTONE_LDAP_USER_ALLOW_UPDATE=n
CONFIG_KEYSTONE_LDAP_USER_ALLOW_DELETE=n
CONFIG_KEYSTONE_LDAP_GROUP_ALLOW_CREATE=n
CONFIG_KEYSTONE_LDAP_GROUP_ALLOW_UPDATE=n
CONFIG_KEYSTONE_LDAP_GROUP_ALLOW_DELETE=n
CONFIG_KEYSTONE_LDAP_USE_TLS=n
CONFIG_KEYSTONE_LDAP_TLS_REQ_CERT=demand
CONFIG_GLANCE_DB_PW=bb1db0b842f04b74
CONFIG_GLANCE_KS_PW=0425826680bc4ede
CONFIG_GLANCE_BACKEND=file
CONFIG_NOVA_DB_PURGE_ENABLE=True
CONFIG_NOVA_DB_PW=41f2fe944b784fbf
CONFIG_NOVA_KS_PW=83ea3891ab7b4ed8
CONFIG_NOVA_SCHED_CPU_ALLOC_RATIO=16.0
CONFIG_NOVA_SCHED_RAM_ALLOC_RATIO=1.5
CONFIG_NOVA_COMPUTE_MIGRATE_PROTOCOL=tcp
CONFIG_NEUTRON_KS_PW=bd0cc982cb8746c2
CONFIG_NEUTRON_DB_PW=6e958cec52c74ea4
CONFIG_NEUTRON_L3_EXT_BRIDGE=br-ex
CONFIG_NEUTRON_METADATA_PW=ed66dd7989cb4fc0
CONFIG_LBAAS_INSTALL=n
CONFIG_NEUTRON_METERING_AGENT_INSTALL=n
CONFIG_NEUTRON_FWAAS=n
CONFIG_NEUTRON_VPNAAS=n
CONFIG_NEUTRON_ML2_TYPE_DRIVERS=vxlan,flat
CONFIG_NEUTRON_ML2_TENANT_NETWORK_TYPES=vxlan
CONFIG_NEUTRON_ML2_MECHANISM_DRIVERS=openvswitch
CONFIG_NEUTRON_ML2_FLAT_NETWORKS=*
CONFIG_NEUTRON_ML2_VNI_RANGES=10:100
CONFIG_NEUTRON_L2_AGENT=openvswitch
CONFIG_NEUTRON_ML2_SUPPORTED_PCI_VENDOR_DEVS=['15b3:1004', '8086:10ca']
CONFIG_NEUTRON_ML2_SRIOV_AGENT_REQUIRED=n
CONFIG_NEUTRON_OVS_BRIDGE_MAPPINGS=extnet:br-ex
CONFIG_NEUTRON_OVS_BRIDGE_IFACES=br-ex:enp0s3
CONFIG_NEUTRON_OVS_VXLAN_UDP_PORT=4789
CONFIG_HORIZON_SSL=n
CONFIG_HORIZON_SECRET_KEY=072e59e4d9a5416eb4706ebcaa9dd814
CONFIG_PROVISION_DEMO=n
CONFIG_PROVISION_TEMPEST=n
CONFIG_PROVISION_IMAGE_NAME=cirros
CONFIG_PROVISION_IMAGE_URL=http://download.cirros-cloud.net/0.3.3/cirros-0.3.3-x86_64-disk.img
CONFIG_PROVISION_IMAGE_FORMAT=qcow2
CONFIG_PROVISION_IMAGE_SSH_USER=cirros
CONFIG_PROVISION_OVS_BRIDGE=y
CONFIG_MONGODB_HOST=192.168.1.15

Here you have the output of my installation process:


[root@ocs01 ~(keystone_admin)]# packstack --answer-file=packstack-answer-ocs01.bridge2 
Welcome to the Packstack setup utility

The installation log file is available at: /var/tmp/packstack/20160419-224207-ihA0Zh/openstack-setup.log

Installing:
Clean Up                                             [ DONE ]
Discovering ip protocol version                      [ DONE ]
Setting up ssh keys                                  [ DONE ]
Preparing servers                                    [ DONE ]
Pre installing Puppet and discovering hosts' details [ DONE ]
Adding pre install manifest entries                  [ DONE ]
Setting up CACERT                                    [ DONE ]
Adding AMQP manifest entries                         [ DONE ]
Adding MariaDB manifest entries                      [ DONE ]
Fixing Keystone LDAP config parameters to be undef if empty[ DONE ]
Adding Keystone manifest entries                     [ DONE ]
Adding Glance Keystone manifest entries              [ DONE ]
Adding Glance manifest entries                       [ DONE ]
Adding Nova API manifest entries                     [ DONE ]
Adding Nova Keystone manifest entries                [ DONE ]
Adding Nova Cert manifest entries                    [ DONE ]
Adding Nova Conductor manifest entries               [ DONE ]
Creating ssh keys for Nova migration                 [ DONE ]
Gathering ssh host keys for Nova migration           [ DONE ]
Adding Nova Compute manifest entries                 [ DONE ]
Adding Nova Scheduler manifest entries               [ DONE ]
Adding Nova VNC Proxy manifest entries               [ DONE ]
Adding OpenStack Network-related Nova manifest entries[ DONE ]
Adding Nova Common manifest entries                  [ DONE ]
Adding Neutron VPNaaS Agent manifest entries         [ DONE ]
Adding Neutron FWaaS Agent manifest entries          [ DONE ]
Adding Neutron LBaaS Agent manifest entries          [ DONE ]
Adding Neutron API manifest entries                  [ DONE ]
Adding Neutron Keystone manifest entries             [ DONE ]
Adding Neutron L3 manifest entries                   [ DONE ]
Adding Neutron L2 Agent manifest entries             [ DONE ]
Adding Neutron DHCP Agent manifest entries           [ DONE ]
Adding Neutron Metering Agent manifest entries       [ DONE ]
Adding Neutron Metadata Agent manifest entries       [ DONE ]
Adding Neutron SR-IOV Switch Agent manifest entries  [ DONE ]
Checking if NetworkManager is enabled and running    [ DONE ]
Adding OpenStack Client manifest entries             [ DONE ]
Adding Horizon manifest entries                      [ DONE ]
Adding post install manifest entries                 [ DONE ]
Copying Puppet modules and manifests                 [ DONE ]
Applying 192.168.1.15_prescript.pp
192.168.1.15_prescript.pp:                           [ DONE ]        
Applying 192.168.1.15_amqp.pp
Applying 192.168.1.15_mariadb.pp
192.168.1.15_amqp.pp:                                [ DONE ]      
192.168.1.15_mariadb.pp:                             [ DONE ]      
Applying 192.168.1.15_keystone.pp
Applying 192.168.1.15_glance.pp
192.168.1.15_keystone.pp:                            [ DONE ]       
192.168.1.15_glance.pp:                              [ DONE ]       
Applying 192.168.1.15_api_nova.pp
192.168.1.15_api_nova.pp:                            [ DONE ]       
Applying 192.168.1.15_nova.pp
192.168.1.15_nova.pp:                                [ DONE ]   
Applying 192.168.1.15_neutron.pp
192.168.1.15_neutron.pp:                             [ DONE ]      
Applying 192.168.1.15_osclient.pp
Applying 192.168.1.15_horizon.pp
192.168.1.15_osclient.pp:                            [ DONE ]       
192.168.1.15_horizon.pp:                             [ DONE ]       
Applying 192.168.1.15_postscript.pp
192.168.1.15_postscript.pp:                          [ DONE ]         
Applying Puppet manifests                            [ DONE ]
Finalizing                                           [ DONE ]

 **** Installation completed successfully ******

Additional information:
 * Time synchronization installation was skipped. Please note that unsynchronized time on server instances might be problem for some OpenStack components.
 * File /root/keystonerc_admin has been created on OpenStack client host 192.168.1.15. To use the command line tools you need to source the file.
 * To access the OpenStack Dashboard browse to http://192.168.1.15/dashboard .
Please, find your login credentials stored in the keystonerc_admin in your home directory.
 * The installation log file is available at: /var/tmp/packstack/20160419-224207-ihA0Zh/openstack-setup.log
 * The generated manifests are available at: /var/tmp/packstack/20160419-224207-ihA0Zh/manifests

Packstack: preparing my external network and floating IP range

Most of this info I’ve got it from RDO’s post “Neutron with existing external network”.

Just a look up of what we have so far:


[root@ocs01 ~]# ovs-vsctl show
8353c231-7d13-4680-8486-a70521ec2ff2
    Bridge br-ex
        Port phy-br-ex
            Interface phy-br-ex
                type: patch
                options: {peer=int-br-ex}
        Port br-ex
            Interface br-ex
                type: internal
        Port "enp0s3"
            Interface "enp0s3"
    Bridge br-tun
        fail_mode: secure
        Port patch-int
            Interface patch-int
                type: patch
                options: {peer=patch-tun}
        Port br-tun
            Interface br-tun
                type: internal
    Bridge br-int
        fail_mode: secure
        Port br-int
            Interface br-int
                type: internal
        Port patch-tun
            Interface patch-tun
                type: patch
                options: {peer=patch-int}
        Port int-br-ex
            Interface int-br-ex
                type: patch
                options: {peer=phy-br-ex}
    ovs_version: "2.4.0"

I will set a Nuage lab tenant using a floating pool over my local network. To do that we need to set a external network and later a subnet with a range out of my local network DHCP pool.


[root@ocs01 ~(keystone_admin)]#  . keystonerc_admin 
[root@ocs01 ~(keystone_admin)]# neutron net-create external_network --provider:network_type flat --provider:physical_network extnet  --router:external
Created a new network:
+---------------------------+--------------------------------------+
| Field                     | Value                                |
+---------------------------+--------------------------------------+
| admin_state_up            | True                                 |
| id                        | e9b19556-1846-473f-9dac-f5b53e65d6d4 |
| mtu                       | 0                                    |
| name                      | external_network                     |
| provider:network_type     | flat                                 |
| provider:physical_network | extnet                               |
| provider:segmentation_id  |                                      |
| router:external           | True                                 |
| shared                    | False                                |
| status                    | ACTIVE                               |
| subnets                   |                                      |
| tenant_id                 | 8adad4c02b6c43a3a5bdc705596ff938     |
+---------------------------+--------------------------------------+
[root@ocs01 ~(keystone_admin)]# neutron subnet-create --name public_subnet --enable_dhcp=False --allocation-pool=start=192.168.1.17,end=192.168.1.25 --gateway=192.168.1.254 external_network 192.168.1.0/24
Created a new subnet:
+-------------------+--------------------------------------------------+
| Field             | Value                                            |
+-------------------+--------------------------------------------------+
| allocation_pools  | {"start": "192.168.1.17", "end": "192.168.1.25"} |
| cidr              | 192.168.1.0/24                                   |
| dns_nameservers   |                                                  |
| enable_dhcp       | False                                            |
| gateway_ip        | 192.168.1.254                                    |
| host_routes       |                                                  |
| id                | dbe5ea98-4f26-43e0-918d-42fad5b3b4f1             |
| ip_version        | 4                                                |
| ipv6_address_mode |                                                  |
| ipv6_ra_mode      |                                                  |
| name              | public_subnet                                    |
| network_id        | e9b19556-1846-473f-9dac-f5b53e65d6d4             |
| subnetpool_id     |                                                  |
| tenant_id         | 8adad4c02b6c43a3a5bdc705596ff938                 |
+-------------------+--------------------------------------------------+

Now we’ll create our Nuage demo tenant.


[root@ocs01 ~(keystone_admin)]# openstack project create --enable nuage
+-------------+----------------------------------+
| Field       | Value                            |
+-------------+----------------------------------+
| description | None                             |
| enabled     | True                             |
| id          | 16ce36b9f7d54b518b02f001e7170821 |
| name        | nuage                            |
+-------------+----------------------------------+
[root@ocs01 ~(keystone_admin)]# openstack user create --project nuage --password foo --email mau@nuage.lab --enable nuage
+------------+----------------------------------+
| Field      | Value                            |
+------------+----------------------------------+
| email      | mau@nuage.lab                    |
| enabled    | True                             |
| id         | 06df4f2fa1ee4064b33c54bce7c7e7db |
| name       | nuage                            |
| project_id | 16ce36b9f7d54b518b02f001e7170821 |
| username   | nuage                            |
+------------+----------------------------------+
[root@ocs01 ~(keystone_admin)]# curl http://download.cirros-cloud.net/0.3.4/cirros-0.3.4-x86_64-disk.img | glance \
>          image-create --name='cirros image' --visibility=public --container-format=bare --disk-format=qcow2
  % Total    % Received % Xferd  Average Speed   Time    Time     Time  Current
                                 Dload  Upload   Total   Spent    Left  Speed
100 12.6M  100 12.6M    0     0  1366k      0  0:00:09  0:00:09 --:--:-- 1540k
+------------------+--------------------------------------+
| Property         | Value                                |
+------------------+--------------------------------------+
| checksum         | ee1eca47dc88f4879d8a229cc70a07c6     |
| container_format | bare                                 |
| created_at       | 2016-04-21T01:11:11Z                 |
| disk_format      | qcow2                                |
| id               | 34d46776-1a40-46d4-895b-cb626d50a200 |
| min_disk         | 0                                    |
| min_ram          | 0                                    |
| name             | cirros image                         |
| owner            | 487c319958fb4e3097ba1cd7fa0e3ca9     |
| protected        | False                                |
| size             | 13287936                             |
| status           | active                               |
| tags             | []                                   |
| updated_at       | 2016-04-21T01:11:19Z                 |
| virtual_size     | None                                 |
| visibility       | public                               |
+------------------+--------------------------------------+
[root@ocs01 ~(keystone_admin)]# cp keystonerc_admin keystonerc_nuage
#
# Editing file keystonerc_nuage
#
[root@ocs01 ~(keystone_admin)]# cat keystonerc_nuage
unset OS_SERVICE_TOKEN
export OS_USERNAME=nuage
export OS_PASSWORD=foo
export OS_AUTH_URL=http://192.168.1.15:5000/v2.0
export PS1='[\u@\h \W(keystone_nuage)]\$ '

export OS_TENANT_NAME=nuage
export OS_REGION_NAME=RegionOne

We’ll switch over our new tenant to create a router and connect it to our external_network. That way, any instance connected to this router could be got a floating address on the range that we’ve just prepared.


[root@ocs01 ~(keystone_admin)]# . keystonerc_nuage
[root@ocs01 ~(keystone_nuage)]# neutron router-create router1
Created a new router:
+-----------------------+--------------------------------------+
| Field                 | Value                                |
+-----------------------+--------------------------------------+
| admin_state_up        | True                                 |
| external_gateway_info |                                      |
| id                    | 36883167-2404-47cf-a86f-bab47d6684a8 |
| name                  | router1                              |
| routes                |                                      |
| status                | ACTIVE                               |
| tenant_id             | 16ce36b9f7d54b518b02f001e7170821     |
+-----------------------+--------------------------------------+
[root@ocs01 ~(keystone_nuage)]# neutron router-gateway-set router1 external_network
Set gateway for router router1
[root@ocs01 ~(keystone_nuage)]# neutron net-create nuage-lab
Created a new network:
+-----------------+--------------------------------------+
| Field           | Value                                |
+-----------------+--------------------------------------+
| admin_state_up  | True                                 |
| id              | d46b2c8a-5ed1-4bb7-bac5-053bb4a8bfc9 |
| mtu             | 0                                    |
| name            | nuage-lab                            |
| router:external | False                                |
| shared          | False                                |
| status          | ACTIVE                               |
| subnets         |                                      |
| tenant_id       | 16ce36b9f7d54b518b02f001e7170821     |
+-----------------+--------------------------------------+
[root@ocs01 ~(keystone_nuage)]# neutron subnet-create --name nuage-subnet nuage-lab 192.168.101.0/24
Created a new subnet:
+-------------------+------------------------------------------------------+
| Field             | Value                                                |
+-------------------+------------------------------------------------------+
| allocation_pools  | {"start": "192.168.101.2", "end": "192.168.101.254"} |
| cidr              | 192.168.101.0/24                                     |
| dns_nameservers   |                                                      |
| enable_dhcp       | True                                                 |
| gateway_ip        | 192.168.101.1                                        |
| host_routes       |                                                      |
| id                | 7bb59ca6-7547-4134-a6a1-af0ff166525a                 |
| ip_version        | 4                                                    |
| ipv6_address_mode |                                                      |
| ipv6_ra_mode      |                                                      |
| name              | nuage-subnet                                         |
| network_id        | d46b2c8a-5ed1-4bb7-bac5-053bb4a8bfc9                 |
| subnetpool_id     |                                                      |
| tenant_id         | 16ce36b9f7d54b518b02f001e7170821                     |
+-------------------+------------------------------------------------------+
[root@ocs01 ~(keystone_nuage)]# neutron router-interface-add router1 nuage-subnet
Added interface 29e44fd3-0ac3-4fa1-a479-ea1f12f4646a to router router1.

Following you will see how our router has been set:


[root@ocs01 ~(keystone_nuage)]# neutron router-show router1
+-----------------------+------------------------------------------------------------------------------------------------------------------------------------------------------------------------------------------+
| Field                 | Value                                                                                                                                                                                    |
+-----------------------+------------------------------------------------------------------------------------------------------------------------------------------------------------------------------------------+
| admin_state_up        | True                                                                                                                                                                                     |
| external_gateway_info | {"network_id": "e9b19556-1846-473f-9dac-f5b53e65d6d4", "enable_snat": true, "external_fixed_ips": [{"subnet_id": "dbe5ea98-4f26-43e0-918d-42fad5b3b4f1", "ip_address": "192.168.1.17"}]} |
| id                    | 36883167-2404-47cf-a86f-bab47d6684a8                                                                                                                                                     |
| name                  | router1                                                                                                                                                                                  |
| routes                |                                                                                                                                                                                          |
| status                | ACTIVE                                                                                                                                                                                   |
| tenant_id             | 16ce36b9f7d54b518b02f001e7170821                                                                                                                                                         |
+-----------------------+------------------------------------------------------------------------------------------------------------------------------------------------------------------------------------------+

Now, I’ll take from horizon.

I’ve created a cirrus instance to test my new brand openstack implementation:

packstack install pinrojas neutron nuage demo at home 01

As you can see over the following picture, I have direct access to my Laptop’s IP address from my cirrus instance 😉

packstack install pinrojas neutron nuage demo at home 03.png

See you over the next part!


Building a Nuage/OpenStack demo at home – Part1

update 05/05/2016: I’ve done some important changes over the next post. Like switching desvtack to packstack. Anyway, you are invited to check out both and create your own opinion. Also, I’ve changed jumpbox from ubuntu to Centos 7. I will update on the next posts some of my notes here.

Next posts will take you to a step-by-step guide to create you on-premises Proof of Concept of Nuage 3.2R6 and OpenStack Liberty. I’m considering installing this demo in just one server.

Next picture shows you the components I’m considering for this demo:

nuage demo devstack pinrojas 01


This will help you to understand how Nuage works with OpenStack. You will be able to try different use cases like: forwarding policies (chaining), ACLs, Manage L3/L2 Domains, Create a LBaaS based on haproxy, etc…

Minimal Capacity Requirements

In order to try some of the mentioned use cases, we need a minimal capacity requirements:

1.- VSD requires at least 8G memory and 100G disk for a demo (24G is the required on production). 3 instances is needed for High Availability. I’ve tried 4G into my laptop. However, services takes a long time of your life to set-up.

2.- VSC requires 4GB of memory (You need at least x2 on production)

3.- Jumpbox requires a minimal of 2G of memory

4.- OpenStack controller and computes depends on what do you want to do. Controller Nodes can fit in 4GB memory perfectly. Computes depends on how many memory you will provide to your instances. My case I will consider 5GB to have a minimal o 3 instances to play around.

Now, If we consider to install everything in one just server using devstack. And we add 4GB to support QEMU and a few of the projects (neutron, nova, keystone, glance). We do need at least 27GB memory in just one server. Let’s make it 32GB (just in case you’ve motivated to install also a VRS-G or an additional compute node)

Creating Base Image with DevStack

Ok guys, we need to create our small private stack to build our demo. At first I was thinking just to use KVM, but what the hell! Let’s do it with DevStack.

My suggestion is to run this OS base for DevStack in a physical server with al least 32 GB of memory, 4CPUs, 2 NICs and 300GB of Disk. Otherwise, you can download my Virtualbox ubuntu image that contains my DevStack downloaded and ready to install via ./stack.sh.

We’ll go thru the process to install DevStack in a server. Most of the info I’ll show you is on a VirtualBox’s venture. However, you can use the same procedure to implement that on your own. Actually I buying a fanless box in CappuccinoPC and disks/memory from Amazon (I’ve got this configuration from Jerrod). You can also see Diego’s option.

Meantime I’ll follow next with my VBox configuration.

Creating you demo in VirtualBox

VBox: Preparing interfaces

I have to define two network adapters based on NAT  in my case (I am running this on my laptop and I need to take it with me over my trips, ok?). If your server will stay connected to your home network, you would better define both as bridged. Reserve a pool of bunch of IP addresses out of your DHCP’s one. Four IPs would be enough.

Then, you will have to  define forwarding rules to connect to your VM as the following picture

virtualbox forwarding rule devstack liberty nuage demo pinrojas

And connect your instance doing a something such as “ssh -l ubuntu -p 2222 127.0.0.1”

The second Interface It would be nice to create ssh access to your jumbox at 2223:

nuage demo devstack virtualbox jumbox.png

After you created your jumbox server you will be able to connect via “ssh -l ubuntu -p 2223 127.0.0.1″. Don’t forget to add your public-key among others into authorized_keys at jumbox server.

VBox: Creating and preparing your server

I am using VirtualBox 4.2.34 and I am using ubuntu-14.04-server-amd64.ova and download it from http://virtualboxes.org/images/ubuntu-server/ to my laptop. BTW, It’s a Mac with a 16GB RAM ☺.

I’ve changed the memory configuration of the OVA to 12GB memory and 4 CPUs. Remove useless things like USB ports.

As soon as you have your brand new Ubuntu running, I suggest you to upgrade and reboot after:


sudo apt-get update
sudo apt-get upgrade
sudo apt-get dist-upgrade
reboot

Now Let’s make more disk space into our brand new server. First add a disk as the following picture. I’ve defined 200GB for glance cache and nova images (/opt/stack).

virtualbox disk devstack liberty nuage demo pinrojas

After create these virtual devices now we have to partition and mount as the following way:


ubuntu@ubuntu-amd64:/var/lib$ sudo fdisk -l

Disk /dev/sda: 19.3 GB, 19327352832 bytes
255 heads, 63 sectors/track, 2349 cylinders, total 37748736 sectors
Units = sectors of 1 * 512 = 512 bytes
Sector size (logical/physical): 512 bytes / 512 bytes
I/O size (minimum/optimal): 512 bytes / 512 bytes
Disk identifier: 0x000c95b1

   Device Boot      Start         End      Blocks   Id  System
/dev/sda1   *        2048    36702207    18350080   83  Linux
/dev/sda2        36704254    37746687      521217    5  Extended
/dev/sda5        36704256    37746687      521216   82  Linux swap / Solaris

Disk /dev/sdb: 214.7 GB, 214748364800 bytes
255 heads, 63 sectors/track, 26108 cylinders, total 419430400 sectors
Units = sectors of 1 * 512 = 512 bytes
Sector size (logical/physical): 512 bytes / 512 bytes
I/O size (minimum/optimal): 512 bytes / 512 bytes
Disk identifier: 0x00000000

Disk /dev/sdb doesn't contain a valid partition table
ubuntu@ubuntu-amd64:/var/lib$ sudo fdisk /dev/sdb
Device contains neither a valid DOS partition table, nor Sun, SGI or OSF disklabel
Building a new DOS disklabel with disk identifier 0xa3859b8e.
Changes will remain in memory only, until you decide to write them.
After that, of course, the previous content won't be recoverable.

Warning: invalid flag 0x0000 of partition table 4 will be corrected by w(rite)

Command (m for help): n
Partition type:
   p   primary (0 primary, 0 extended, 4 free)
   e   extended
Select (default p): 
Using default response p
Partition number (1-4, default 1): 
Using default value 1
First sector (2048-419430399, default 2048): 
Using default value 2048
Last sector, +sectors or +size{K,M,G} (2048-419430399, default 419430399): 
Using default value 419430399

Command (m for help): p

Disk /dev/sdb: 214.7 GB, 214748364800 bytes
255 heads, 63 sectors/track, 26108 cylinders, total 419430400 sectors
Units = sectors of 1 * 512 = 512 bytes
Sector size (logical/physical): 512 bytes / 512 bytes
I/O size (minimum/optimal): 512 bytes / 512 bytes
Disk identifier: 0x8c9832c1

   Device Boot      Start         End      Blocks   Id  System
/dev/sdb1            2048   419430399   209714176   83  Linux

Command (m for help): w
The partition table has been altered!

Calling ioctl() to re-read partition table.
Syncing disks.
ubuntu@ubuntu-amd64:/var/lib$ sudo mkfs -t ext4 /dev/sdb1
mke2fs 1.42.9 (4-Feb-2014)
Filesystem label=
OS type: Linux
Block size=4096 (log=2)
Fragment size=4096 (log=2)
Stride=0 blocks, Stripe width=0 blocks
13107200 inodes, 52428544 blocks
2621427 blocks (5.00%) reserved for the super user
First data block=0
Maximum filesystem blocks=4294967296
1600 block groups
32768 blocks per group, 32768 fragments per group
8192 inodes per group
Superblock backups stored on blocks: 
    32768, 98304, 163840, 229376, 294912, 819200, 884736, 1605632, 2654208, 
    4096000, 7962624, 11239424, 20480000, 23887872

Allocating group tables: done                            
Writing inode tables: done                            
Creating journal (32768 blocks): done
Writing superblocks and filesystem accounting information: done        

ubuntu@ubuntu-amd64:/var/lib$ df -h
Filesystem      Size  Used Avail Use% Mounted on
udev            5.9G  4.0K  5.9G   1% /dev
tmpfs           1.2G  420K  1.2G   1% /run
/dev/sda1        18G  3.1G   14G  20% /
none            4.0K     0  4.0K   0% /sys/fs/cgroup
none            5.0M     0  5.0M   0% /run/lock
none            5.9G     0  5.9G   0% /run/shm
none            100M     0  100M   0% /run/user
ubuntu@ubuntu-amd64:/var/lib$ sudo mkdir /opt/stack
ubuntu@ubuntu-amd64:/var/lib$ sudo mount /dev/sdb1 /opt/stack
ubuntu@ubuntu-amd64:/var/lib$ df -h
Filesystem      Size  Used Avail Use% Mounted on
udev            5.9G  4.0K  5.9G   1% /dev
tmpfs           1.2G  420K  1.2G   1% /run
/dev/sda1        18G  3.1G   14G  20% /
none            4.0K     0  4.0K   0% /sys/fs/cgroup
none            5.0M     0  5.0M   0% /run/lock
none            5.9G     0  5.9G   0% /run/shm
none            100M     0  100M   0% /run/user
/dev/sdb1       197G   52M  197G   1% /opt/stack
ubuntu@ubuntu-amd64:~$ sudo tune2fs -m 0 /dev/sdb1
tune2fs 1.42.9 (4-Feb-2014)
Setting reserved blocks percentage to 0% (0 blocks)
ubuntu@ubuntu-amd64:~$ sudo tune2fs -o journal_data_writeback /dev/sdb1
tune2fs 1.42.9 (4-Feb-2014)

Remember add the following lines to your /etc/fstab and reboot:


# /etc/fstab: static file system information.
#
# Use 'blkid' to print the universally unique identifier for a
# device; this may be used with UUID= as a more robust way to name devices
# that works even if disks are added and removed. See fstab(5).
#
#              
# / was on /dev/sda1 during installation
UUID=7d4c7424-d351-4b70-8bc2-37f5e37d778b /               ext4    errors=remount-ro 0       1
# swap was on /dev/sda5 during installation
UUID=8ceef34f-b47a-4ce3-b3b4-5d93f24667e6 none            swap    sw              0       0
/dev/sdb1 /opt/stack ext4 noatime,nodiratime,data=writeback,barrier=0,nobh,errors=remount-ro 0 1

OS Base DevStack: Install and Configuration

Let’s get our devstack files:


ubuntu@ubuntu-amd64:~$ git clone https://git.openstack.org/openstack-dev/devstack
Cloning into 'devstack'...
remote: Counting objects: 33096, done.
remote: Compressing objects: 100% (15655/15655), done.
remote: Total 33096 (delta 23512), reused 26231 (delta 17015)
Receiving objects: 100% (33096/33096), 6.48 MiB | 747.00 KiB/s, done.
Resolving deltas: 100% (23512/23512), done.
Checking connectivity... done.
 

Let’s set our local.conf file for this setup. We define the main directory to store our project and data files: “/opt/stack” and others. Also, eth0 would be our main network interface to connect all services like databases and MQ. I’ve disabled horizon and cinder to save memory for instances. The secondary port eth1 would be our external interface attached to our public bridge br-ex (check out my post as a reference of OpenVSwitch ports at the Network node).

I’ve added also the serial_console option. VSD would require access thru console to start doing anything.

Locate this file at ~/devstack folder. Here you have the file that I’ve executed:


[[local|localrc]]
DEST=/opt/stack
SCREEN_LOGDIR=/opt/stack/screen-logs
SYSLOG=True
LOGFILE=~/devstack/stack.sh.log

HOST_IP=10.0.2.15
SERVICE_HOST=10.0.2.15
MYSQL_HOST=10.0.2.15
RABBIT_HOST=10.0.2.15
GLANCE_HOSTPORT=10.0.2.15:9292

ADMIN_PASSWORD=demonuage
DATABASE_PASSWORD=demonuage
RABBIT_PASSWORD=demonuage
SERVICE_PASSWORD=demonuage

# Do not use Nova-Network
disable_service n-net
# Do not use Horizon & Cinder
disable_service horizon
disable_service c-api c-sch c-vol
# Enable Neutron
ENABLED_SERVICES+=,q-svc,q-dhcp,q-meta,q-agt,q-l3
# Enable-Console
enable_service n-sproxy


## Neutron options
Q_USE_SECGROUP=True
FIXED_RANGE="192.168.1.0/24"
FIXED_NETWORK_SIZE=256
NETWORK_GATEWAY=192.168.1.1
PRIVATE_SUBNET_NAME=Nuage-Priv01

PUBLIC_SUBNET_NAME=Nuage-Public
FLOATING_RANGE="10.0.3.15/27"
Q_FLOATING_ALLOCATION_POOL=start=10.0.3.20,end=10.0.3.30
PUBLIC_NETWORK_GATEWAY="10.0.3.2"
Q_L3_ENABLED=True
PUBLIC_INTERFACE=eth1

# Open vSwitch provider networking configuration
Q_USE_PROVIDERNET_FOR_PUBLIC=True
OVS_PHYSICAL_BRIDGE=br-ex
PUBLIC_BRIDGE=br-ex
OVS_BRIDGE_MAPPINGS=public:br-ex

Other important thing is to define just one default gateway. devstack resets interfaces over the process and you connection to the outside could be messy. I’ve change eth1 to static and remove its default gw at /etc/network/interfaces file as follow:


# This file describes the network interfaces available on your system
# and how to activate them. For more information, see interfaces(5).

# The loopback network interface
auto lo
iface lo inet loopback

# The primary network interface
auto eth0
iface eth0 inet dhcp
    dns-nameservers 8.8.8.8

# The sec interface
auto eth1
iface eth1 inet static
    address 10.0.3.15
    netmask 255.255.255.0
    dns-nameservers 8.8.8.8

Your session’s user must to have sudo privileges. Now run ./stack.sh and wait. wait.. wait… until you get this message:


========================
DevStack Components Timed
========================

run_process - 69 secs
test_with_retry - 4 secs
apt-get-update - 19 secs
pip_install - 100 secs
restart_apache_server - 5 secs
wait_for_service - 18 secs
apt-get - 41 secs


This is your host IP address: 10.0.2.15
This is your host IPv6 address: ::1
Keystone is serving at http://10.0.2.15:5000/
The default users are: admin and demo
The password: demonuage

You will get this network interface configuration:


ubuntu@ubuntu-amd64:~/devstack$ ifconfig –a
br-ex     Link encap:Ethernet  HWaddr 08:00:27:ea:81:23  
          inet addr:10.0.3.15  Bcast:10.0.3.255  Mask:255.255.255.0
          inet6 addr: fe80::34cf:80ff:fe38:387a/64 Scope:Link
          inet6 addr: 2001:db8::2/64 Scope:Global
          UP BROADCAST RUNNING  MTU:1500  Metric:1
          RX packets:18 errors:0 dropped:0 overruns:0 frame:0
          TX packets:13 errors:0 dropped:0 overruns:0 carrier:0
          collisions:0 txqueuelen:0 
          RX bytes:1284 (1.2 KB)  TX bytes:1166 (1.1 KB)

br-int    Link encap:Ethernet  HWaddr 02:59:41:8a:01:44  
          inet6 addr: fe80::105f:7bff:fef7:813d/64 Scope:Link
          UP BROADCAST RUNNING  MTU:1500  Metric:1
          RX packets:72 errors:0 dropped:0 overruns:0 frame:0
          TX packets:10 errors:0 dropped:0 overruns:0 carrier:0
          collisions:0 txqueuelen:0 
          RX bytes:6416 (6.4 KB)  TX bytes:828 (828.0 B)

br-tun    Link encap:Ethernet  HWaddr d2:c5:95:1f:b2:41  
          inet6 addr: fe80::2429:aff:fe60:2f8e/64 Scope:Link
          UP BROADCAST RUNNING  MTU:1500  Metric:1
          RX packets:0 errors:0 dropped:0 overruns:0 frame:0
          TX packets:10 errors:0 dropped:0 overruns:0 carrier:0
          collisions:0 txqueuelen:0 
          RX bytes:0 (0.0 B)  TX bytes:828 (828.0 B)

eth0      Link encap:Ethernet  HWaddr 08:00:27:96:dd:d0  
          inet addr:10.0.2.15  Bcast:10.0.2.255  Mask:255.255.255.0
          inet6 addr: fe80::a00:27ff:fe96:ddd0/64 Scope:Link
          UP BROADCAST RUNNING MULTICAST  MTU:1500  Metric:1
          RX packets:33395 errors:0 dropped:0 overruns:0 frame:0
          TX packets:20053 errors:0 dropped:0 overruns:0 carrier:0
          collisions:0 txqueuelen:1000 
          RX bytes:18895091 (18.8 MB)  TX bytes:3757597 (3.7 MB)

eth1      Link encap:Ethernet  HWaddr 08:00:27:ea:81:23  
          inet6 addr: fe80::a00:27ff:feea:8123/64 Scope:Link
          UP BROADCAST RUNNING MULTICAST  MTU:1500  Metric:1
          RX packets:187 errors:0 dropped:0 overruns:0 frame:0
          TX packets:210 errors:0 dropped:0 overruns:0 carrier:0
          collisions:0 txqueuelen:1000 
          RX bytes:23744 (23.7 KB)  TX bytes:29124 (29.1 KB)

lo        Link encap:Local Loopback  
          inet addr:127.0.0.1  Mask:255.0.0.0
          inet6 addr: ::1/128 Scope:Host
          UP LOOPBACK RUNNING  MTU:65536  Metric:1
          RX packets:122326 errors:0 dropped:0 overruns:0 frame:0
          TX packets:122326 errors:0 dropped:0 overruns:0 carrier:0
          collisions:0 txqueuelen:0 
          RX bytes:64243895 (64.2 MB)  TX bytes:64243895 (64.2 MB)

ovs-system Link encap:Ethernet  HWaddr ee:ca:dd:82:73:83  
          BROADCAST MULTICAST  MTU:1500  Metric:1
          RX packets:0 errors:0 dropped:0 overruns:0 frame:0
          TX packets:0 errors:0 dropped:0 overruns:0 carrier:0
          collisions:0 txqueuelen:0 
          RX bytes:0 (0.0 B)  TX bytes:0 (0.0 B)

virbr0    Link encap:Ethernet  HWaddr ee:43:7c:62:b1:2d  
          inet addr:192.168.122.1  Bcast:192.168.122.255  Mask:255.255.255.0
          UP BROADCAST MULTICAST  MTU:1500  Metric:1
          RX packets:0 errors:0 dropped:0 overruns:0 frame:0
          TX packets:0 errors:0 dropped:0 overruns:0 carrier:0
          collisions:0 txqueuelen:0 
          RX bytes:0 (0.0 B)  TX bytes:0 (0.0 B)

Let’s set our env file to easier our job. You can copy ~/devstack/userrc_early to your home dir and run “source userrc_early”.


ubuntu@ubuntu-amd64:~$ cat userrc 
# Use this for debugging issues before files in accrc are created

# Set up password auth credentials now that Keystone is bootstrapped
export OS_IDENTITY_API_VERSION=3
export OS_AUTH_URL=http://10.0.2.15:35357
export OS_USERNAME=demo
export OS_USER_DOMAIN_ID=default
export OS_PASSWORD=demonuage
export OS_PROJECT_NAME=demo
export OS_PROJECT_DOMAIN_ID=default
export OS_REGION_NAME=RegionOne

DevStack: Building some resources to our lab

We’ll create some elements in our lab to test our devstack. First of fall, let’s create some key pairs into the demo project. I used my own key into this VM. If you don’t have your keys in .ssh folder you can create them with “ssh-keygen -t rsa”. Then let’s download a Ubuntu cloud image to take into glance. I will create a flavor to save some resources called pin.1.


openstack keypair create --public-key ~/.ssh/id_rsa.pub my-keypair
wget https://cloud-images.ubuntu.com/trusty/current/trusty-server-cloudimg-amd64-disk1.img
glance image-create --name ubuntu-trusty-image --file trusty-server-cloudimg-amd64-disk1.img --disk-format qcow2 --container-format bare
# need admin access to add flavors. use ~/devstack/userrc_early credentials
openstack flavor create --ram 1024 --vcpus 1 --disk 5 --public pin.1

I’ve created a couple of network based on the demo architecture that I’ve shown. We are done to create our first server called jumpbox and add a secondary interface to our private network:


openstack network create public-demo
openstack network create private-demo
neutron subnet-create --dns-nameserver 8.8.8.8 --name public-demo public-demo 10.101.0.0/24
# preparing our subnet to use jumpbox as gateway/dns
neutron subnet-create --dns-nameserver 192.168.101.3 --gateway 192.168.101.3 --name private-demo private-demo 192.168.101.0/24
nova boot --image ubuntu-trusty-image --nic net-name=public-demo --flavor pin.1 --key-name my-keypair jumpbox
# use "nova list" to check how it's going
neutron port-create private-demo
# use "neutron port-list" to check out the ID to use over the next command
nova interface-attach --port-id e11de213-3141-465d-85a6-5957261ca395 jumpbox

Don’t forget to create your security group to bring ssh access to your instance.


openstack security group create ssh-access
openstack security group rule create --proto tcp --src-ip 0.0.0.0/0 --dst-port 22 ssh-access
openstack server add security group jumpbox ssh-access

I’ve added a route to connect this new server (route add –net 10.101.0.0/24 gw 10.0.3.20) thru router1 (use “neutron router-list” to check it). In case to use a physical server you will be able to add floating IPs to access this from your laptop (don’t forget to add your public key to authorized_keys file into .ssh). To add a floating ip you need to use IDs of your port and the floating ip. Maybe you will have to create a floating IPs. Here you have an example:


# before to add a floatingip, you need to create interface at router1 to subnet public-demo using ID of the subnet over the next command
neutron router-interface-add router1 971db454-91e2-4a04-af6c-75591a2b758b
neutron floatingip-create public
# use "neutron floatingip-list" to check available ips
neutron floatingip-associate ab73e086-0c70-4d67-80ab-a2c740d25b62 32144a6c-2d47-4e96-97b9-b144855b6a5e

Connect your jumpbox instance via IP address (i.e. 10.101.0.3). Don’t forget to add a route in your server thru the router (i.e sudo route add -net 10.101.0.0/24 gw 10.0.3.20) or access it thru console.

DevStack-Nova: Enable console access

To get access to console you need to install “novaconsole” via:

pip install git+http://github.com/larsks/novaconsole.git

More details at github. Connect thru the follwing way to test your console connection.


ubuntu@ubuntu-amd64:~$ nova get-serial-console jumpbox
+--------+-----------------------------------------------------------------+
| Type   | Url                                                             |
+--------+-----------------------------------------------------------------+
| serial | ws://127.0.0.1:6083/?token=5c48b7ef-84dc-476c-a02e-7cd4a500ab68 |
+--------+-----------------------------------------------------------------+
ubuntu@ubuntu-amd64:~$ novaconsole  --url ws://127.0.0.1:6083/?token=5c48b7ef-84dc-476c-a02e-7cd4a500ab68
WARNING:novaconsole.client:connected to: ws://127.0.0.1:6083/?token=5c48b7ef-84dc-476c-a02e-7cd4a500ab68
WARNING:novaconsole.client:type "~." to disconnect

Ubuntu 14.04.4 LTS jumpbox ttyS0

jumpbox login: 

See you into the next part!

Sentinel.la | LATAM startups play global | OpenStack Monitoring & Healthcheck

Sentinel.la is not just another startup supported on the open source community mattress. It’s a live proof that LATAM’s talent is playing global. Founders Memo and Paco have been closed to OpenStack foundation over the last four years. They have a HUGE experience operating it.

Sentinel.la has launched its beta last week. You would identify the value of the solution just seeing their posts and videos. I will point out some of the key bullets of their offering in the following lines.

One step ahead of users

OpenStack is an amazing platform. However, most of the users are just starting with this bunch of projects.

Liberty is offering a really nice dashboard experience. Horizon took what is using to display orchestration ongoing process (heat) and reproduce it into the “network topology”. Just let the next picture get you hooked.

networktopology sentinel.la openstack healthcare monitoring nova neutron liberty

source: https://www.openstack.org/assets/software/liberty/networktopology.png

Most of the tenant users don’t have enough insight in openstack to understand simple issues like: the size of the server flavor doesn’t big enough to fit the selected image (check next image)

sentinel.la openstack healthcare monitoring nova neutron

source: sentinel.la video https://vimeo.com/154817235

sentinel.la openstack healthcare monitoring nova neutron 02.png

source: sentinel.la video https://vimeo.com/154817235

Those events can be quickly managed. Even before users start to call Help Desk complaining about it. Understand what is happening with your users is priceless. Install OpenStack is so complex, even for experts. Imagine how hard could be operate it. Get eyes on what is happening behind will make your service more responsive and agile. If you don’t believe me, just check the next over the last openstack summit in Tokio: No Valid Host Was Found: Translating Tracebacks by Rackspace (James Denton, Wade Lewis, Sam Yaple). And tell how many guys in your team can traceback an issue like this.

https://www.openstack.org/summit/tokyo-2015/videos/presentation/no-valid-host-was-found-translating-tracebacks

These guys state, “Deciphering a traceback is a bit like reading the matrix”. Good way to size the challenge that means deal with it. This example shows an error message: “No valid host was found. There are not enough hosts available”. What that means? That means you need to dig deep among different openstack’s logs to get the root source of the problem. Sentinel.la server’s view bring tools to check log’s messages out from different services into only one panel.

Check Paco’s post: Mastering the Openstack logs

Geographically distributed monitoring

I love this dashboard! Know what is happening to all your sites at a glance. Features that I can point out:

  • Push notifications that keep aware of any error from any server.
  • Showing the last alerts that you get from all your servers.
  • Arrange your servers into different clouds and OpenStack versions and see them how they are display in a map.
  • Showing global counters of your availability and services.

Also, there is a server view that helps you to dig deep into logs and performance. Love the way services are classified into different OpenStack projects. Features to point out about this view:

  • Last alerts panel and services status are really useful to dig into server’s issues.
  • Search into the log’s events using keyword and correlate
  • A snapshot on the services that are running at every server.

sentinel.la-openstack-monitoring-healthcheck-service-nova-neutron-heat-cinder-ceilometer-monasca.000

Unlimited scalability and agility

On-demand resources will help your business scales forever. Sentinel.la doesn’t own any piece of infrastructure. 100% of their business is on the cloud. I am not talking only about compute. I am sure it took some time to study the best of the art regarding databases, platforms, agents and try to move all on a PaaS strategy.

Starting from a agent based on open source project tourbillon.  Using InfluxDB to master metric storage management. Leverage their scalability and costs through PaaS offerings for MQSeries and MongoDB.

Check the following posts at their site:

  • JSON Web Tokens for dummies: If you bring service on the cloud, you have to bring confidence to users this service is safe. I think JWT has been used perfectly in this case to ensure data is kept secure like your identity
  • OpenStack services on a Time-Series database: A post that describes why is very important to choose specific database tech to manage time-series data. I would think NoSQL could be a nice resource that. Well Paco shows why NoSQL isn’t good fit for this case.  InfluxDB makes the perfect match in this case. Something nice that’s been copied from the OpenStack Monasca project architecture.

Final Words

A big great step has been to launch the beta version last week. There are many things to improve yet: Make agent identify openstack services by itself, extend capabilities to other projects like keystone, cinder besides nova and neutron. No doubts you would make those ones up. You are on the right way to succeed for sure.

Paco/Memo, congrats for the courage to do something different. I hope more people take this as an example in LATAM to dream BIG!

See you!

Some Nuage Labs’ resources for NUTS

Hi there. I am just taking some tools over here, which I am normally using with Nuage’s labs (template: “Nuage VSP 3.2R4 with Red Hat OSP7 – blank”). More of these are being tested at Nuts ( A limited access labs we normally use to amaze customers). However, you can use them and modify them for your own purpose.

Use these scripts at your own risk. If you don’t know what they do, don’t use them (don’t make me say you later: “I told you!”)

neutron-lbaasv2-agent

A script file has been created to easily setup all what I explain in my previous post “INSTALLING OPENSTACK KILO (RED HAT OSP7) LBAAS WITH @NUAGENETWORKS VSP 3.2R4 (HAPROXY)”. It’s funny to see something that took me days is done in just 15min now.

It requires some files related to neutron, openvswitch and lbaas-agent configurations. Also, you will have to download VRS setup files from ALU’s support site: Nuage-VRS-3.2.4-133-el7.tar.gz.

All the files can be downloaded from my Bitbucket’s repo nuage-nuts-lbaas-install or download tar.gz file

I ‘ve added some additional steps to my previous posts. An update of our neutron’s nuage part from v3.2R4 to R5. Files must be downloaded from our support site:

  • nuagenetlib-2015.1.3.2.6_198-nuage.noarch.rpm
  • nuage-openstack-neutron-2015.1.1785-nuage.noarch.rpm
  • nuage-openstack-neutronclient-2015.1.1785-nuage.noarch.rpm

Get Nuage VSD domain’s details from command-line

A python small app that I built from some examples at Philippe Dellaert’s repo at Github. I personally hate to switch over to GUI many times to just get a couple of values. This app helps you to get details about your L3 domains, subnets and instances. You will also get expiration date of your Nuage VSP license.

Before to run any of these applications you have to install the following packages. (if you’ve installed neutron-lbaasv2-agent as I’ve showed in the previous section, you don’t need to add more repos to yum):


yum -y install python-pip
pip install bamboo
pip install vspk

Download list-domains-enterprise.py from here, and you’re done!

 
[root@os-controller python-files(kyst_adm)]# python list-domains-enterprise.py

License expiration date: 2016-12-31 15:59:59

Domains inside Enterprise OpenStack_Nuage_Lab
|- Domain: d24798fb-173d-483b-a6c8-c0949992584b
    |- Zone: def_zone-f4eac814-7543-4b5b-878a-cc95169d9762
        |- Subnets: 0240310e-d0da-4b78-9d50-fe67354123ac - 192.168.51.0 - 255.255.255.0
            |- Instance: instance-00000009
        |- Subnets: 02814ccd-e9ce-4415-9814-c0dcb71ec0f1 - 192.168.53.0 - 255.255.255.0
        |- Subnets: 1eaa4236-9c3a-4a83-9234-e5386fbeebf6 - 192.168.52.0 - 255.255.255.0
        |- Subnets: 45916c43-0f29-48bf-9fdd-332a2c99be5f - 172.16.1.0 - 255.255.255.0
        |- Subnets: d745c011-0573-4c00-b805-63d10dd397c3 - 192.168.54.0 - 255.255.255.0
    |- Zone: def_zone-pub-f4eac814-7543-4b5b-878a-cc95169d9762
--------------------------------------------------------------------------------

Source your OpenStack credentials

Source OS credentials will save you time to manage your resources thru CLI. It’s a trivial thing. However, if you didn’t know it. I’m taking you my personal file (admin.source):


export OS_USERNAME=admin
export OS_TENANT_NAME=admin
export OS_PASSWORD=sag81-sled
export OS_AUTH_URL=http://10.0.0.10:5000/v2.0/
export OS_REGION_NAME=RegionOne
export PS1='[\u@\h \W(kyst_adm)]\$ '

Create this file and use it as the following:


[root@os-controller ~]# neutron --os-username admin --os-password sag81-sled --os-tenant-name admin --os-auth-url http://10.0.0.10:5000/v2.0/ net-list 
+--------------------------------------+------------------+----------------------------------------------------+
| id                                   | name             | subnets                                            |
+--------------------------------------+------------------+----------------------------------------------------+
| b1a4897a-d6e8-4a0f-ae13-41a6bc40cea5 | private          | 45916c43-0f29-48bf-9fdd-332a2c99be5f 172.16.1.0/24 |
| 2f61f543-214f-462f-afb7-182ec816abe9 | external_network | 8f73aa92-e8af-454b-bffe-55c72257453b 10.0.1.0/24   |
+--------------------------------------+------------------+----------------------------------------------------+

[root@os-controller ~]# source admin.source 
[root@os-controller ~(kyst_adm)]# neutron net-list
+--------------------------------------+------------------+----------------------------------------------------+
| id                                   | name             | subnets                                            |
+--------------------------------------+------------------+----------------------------------------------------+
| b1a4897a-d6e8-4a0f-ae13-41a6bc40cea5 | private          | 45916c43-0f29-48bf-9fdd-332a2c99be5f 172.16.1.0/24 |
| 2f61f543-214f-462f-afb7-182ec816abe9 | external_network | 8f73aa92-e8af-454b-bffe-55c72257453b 10.0.1.0/24   |
+--------------------------------------+------------------+----------------------------------------------------+

Populate your admin tenant

I did this script (add-things-to-admin.py) as soon as create my second lab at Nuts. I didn’t want to create instances and networks manually every time. That helps me to save time and start showing the awesomeness of Nuage just some minutes after I’ve got the lab running.

The app isn’t perfect. You can take it from where I left it. You can argue the same thing could be done thru heat. In fact, I have some nice yaml files that I will gather and share later.

Anyway, when you run the script should show the following (don’t forget to get ssh access from security groups or VSD if you want to access any instance by its floating IP)


[root@os-controller python-files(kyst_adm)]# python nuts.adm.v3.py 
Creating keypair: mykey...
mykey done
Network b9e6f9a3-fba4-4d3f-8b37-8e0c4d6e8178 created
Sub-Network e83eab12-a231-4d4a-a334-9fded03052f5 created
Port {u'subnet_id': u'e83eab12-a231-4d4a-a334-9fded03052f5', u'tenant_id': u'63d41744393243b6a51a95c6063fe4c1', u'subnet_ids': [u'e83eab12-a231-4d4a-a334-9fded03052f5'], u'port_id': u'e7172f8f-0458-49e8-aa1c-a27a70bcc006', u'id': u'd24798fb-173d-483b-a6c8-c0949992584b'} created
Network ff207aff-08b7-40a9-9ce0-1b03fda1b1f9 created
Sub-Network 5ced7285-974c-4a1e-83c7-8f8c809a1de4 created
Port {u'subnet_id': u'5ced7285-974c-4a1e-83c7-8f8c809a1de4', u'tenant_id': u'63d41744393243b6a51a95c6063fe4c1', u'subnet_ids': [u'5ced7285-974c-4a1e-83c7-8f8c809a1de4'], u'port_id': u'149b327f-396b-4825-838f-a94f60fdd3bb', u'id': u'd24798fb-173d-483b-a6c8-c0949992584b'} created
Network 7e643f6d-1979-4b1a-aae0-f5330dc791cc created
Sub-Network da6afb58-2d40-4572-b0e0-60a0a828d836 created
Port {u'subnet_id': u'da6afb58-2d40-4572-b0e0-60a0a828d836', u'tenant_id': u'63d41744393243b6a51a95c6063fe4c1', u'subnet_ids': [u'da6afb58-2d40-4572-b0e0-60a0a828d836'], u'port_id': u'7c5cc123-dd64-486c-95ac-81563edec87e', u'id': u'd24798fb-173d-483b-a6c8-c0949992584b'} created
Network 98d5b2ad-c8c0-4558-bdc2-617d4ad2fffa created
Sub-Network 9ceb8391-e525-4c30-a0bf-d4551e77814f created
Port {u'subnet_id': u'9ceb8391-e525-4c30-a0bf-d4551e77814f', u'tenant_id': u'63d41744393243b6a51a95c6063fe4c1', u'subnet_ids': [u'9ceb8391-e525-4c30-a0bf-d4551e77814f'], u'port_id': u'2e759115-c594-4196-8059-e27dde410395', u'id': u'd24798fb-173d-483b-a6c8-c0949992584b'} created
Port cb285691-2681-4911-86fe-e413d8d7d0a3 created
Booting instance...Creating floating ip...Port abb19e89-9cf7-4113-8646-30e9e4c64ee0 created
Booting instance...Creating floating ip...Port f546cecb-ba5f-4c6b-a368-105257754fdc created
Booting instance...Creating floating ip...Port da35424f-3e59-4e87-a961-f94c0022e43b created
Booting instance...Creating floating ip...done
[root@os-controller python-files(kyst_adm)]# ping 10.0.1.5
PING 10.0.1.5 (10.0.1.5) 56(84) bytes of data.
64 bytes from 10.0.1.5: icmp_seq=1 ttl=61 time=4.61 ms
64 bytes from 10.0.1.5: icmp_seq=2 ttl=61 time=1.24 ms
64 bytes from 10.0.1.5: icmp_seq=3 ttl=61 time=1.42 ms

The OS image is got from internet (http://cloud.centos.org/centos/7/images/CentOS-7-x86_64-GenericCloud-1508.qcow2), and also nothing more is required for this python app than the basic stuff that is already loaded into the controller. Just be aware the VSD license is not expired. Once you run this app, you can use os-controller’s root private key to access any server thru their floating IPs (starting at 10.0.1.4 is you don’t use it before).

You will get four OpenStack managed private networks/subnets already connected to the router. All components can be managed by neutron after.

nuage openstack nuts python script

Enjoy and see you next time!

Installing OpenStack Kilo (Red Hat OSP7) LBaaS with @NuageNetworks VSP 3.2R4 (HAProxy)

Hi there. We can find hundreds of posts regarding how to install OpenStack LBaaS. This case I’ll bring an step-by-step guide to implement LBaaS with Nuage VSP 3.2.R4 into OpenStack Kilo OSP7 (Red Hat). Kilo uses the LBaaS API v2.

I suggest you to get “VSP OpenStack Kilo Neutron Plugin User Guide (Release 3.2.R5 (Issue 2))”. Most of this post is based on this guide and the section “Using OpenStack LBaaS with the Nuage Neutron Plugin”.

I want to say thanks to Claire. She’s given me a HUGE support.

I’ve tested all these commands into our lab called Nuts. Hussein/Remi made a great job providing this amazing resource (Thanks guys). A tool that I’ve used with many customers to show how great is Nuage working with OpenStack. Check details about it below.

nuts lab description


Nuage Virtualized Services Directory (VSD) is the brain serving “as a policy, business logic and analytics engine “and could be 100% managed through Jason format APIs. Of course, it gives you a GUI that I’ll show shortly. VSC programs every network function as the Datacenter network control plane. More details in my previous post and also at Nuage.

A consolidated OpenStack Controller/Network node called os-controller with projects like Neutron, Keystone and Glance. Two Nova nodes with KVM and Nuage VRS (based on OpenVSwitch).

os-controller is already configured with Nuage plugin for neutron. /etc/neutron/neutron.conf file contains the line:
core_plugin = neutron.plugins.nuage.plugin.NuagePlugin

And /etc/neutron/plugin.ini should be like this:

 
default_net_partition_name = OpenStack_Nuage_Lab
server = 10.0.0.2:8443
serverauth = osadmin:osadmin

### Do not change the below options for standard installs
organization = csp
auth_resource = /me
serverssl = True
base_uri = /nuage/api/v3_2
cms_id = 540d931d-0585-4fce-8c3d-064fb7f357e0

installing plug-in on controller node

Let’s start installing python-neutron-lbaas on controller node:
[root@os-controller ~(kyst_adm)]# yum install python-neutron-lbaas

Update service providers section into /etc/neutron/neutron.conf (don’t use lbaas_agent.ini)


[ service_providers ]
service_provider=LOADBALANCERV2:Haproxy:neutron_lbaas.drivers.haproxy.plugin_driver.HaproxyOnHostPluginDriver:default

Add service plugin for LBaaS API v2 under default section:


[DEFAULT]
service_plugins=neutron_lbaas.services.loadbalancer.plugin.LoadBalancerPluginv2

Restart neutron service:
[root@os-controller ~(kyst_adm)]# systemctl restart neutron-server.service

Let’s go now with the HAProxy and Neutron node Nuage Plugin installation

Installing HAProxy at network node

Install HAProxy it’s simple, just run: [root@os-controller ~(kyst_adm)]# yum install haproxy
However, TCP ports 80 and 8080 are being used by other processes in our lab (use netstat -anp to check that). Then I’ve change the port to 5000 and then I restarted the service. HAProxy file is the following (/etc/haproxy/haproxy.cfg):


global
    log         127.0.0.1 local2

    chroot      /var/lib/haproxy
    pidfile     /var/run/haproxy.pid
    maxconn     4000
    user        haproxy
    group       haproxy
    daemon

    # turn on stats unix socket
    stats socket /var/lib/haproxy/stats

defaults
    mode                    http
    log                     global
    option                  httplog
    option                  dontlognull
    option http-server-close
    option forwardfor       except 127.0.0.0/8
    option                  redispatch
    retries                 3
    timeout http-request    10s
    timeout queue           1m
    timeout connect         10s
    timeout client          1m
    timeout server          1m
    timeout http-keep-alive 10s
    timeout check           10s
    maxconn                 3000

frontend  main *:5000
    acl url_static       path_beg       -i /static /images /javascript /stylesheets
    acl url_static       path_end       -i .jpg .gif .png .css .js

    use_backend static          if url_static
    default_backend             app

backend static
    balance     roundrobin
    server      static 127.0.0.1:4331 check

backend app
    balance     roundrobin
    server  app1 127.0.0.1:5001 check
    server  app2 127.0.0.1:5002 check
    server  app3 127.0.0.1:5003 check
    server  app4 127.0.0.1:5004 check

Now, restart the service:systemctl restart haproxy.service

And check status of the service:


[root@os-controller etc]# service haproxy status
Redirecting to /bin/systemctl status  haproxy.service
● haproxy.service - HAProxy Load Balancer
   Loaded: loaded (/usr/lib/systemd/system/haproxy.service; disabled; vendor preset: disabled)
   Active: active (running) since Mon 2015-12-21 13:58:19 PST; 5s ago
 Main PID: 13746 (haproxy-systemd)
   CGroup: /system.slice/haproxy.service
           ├─13746 /usr/sbin/haproxy-systemd-wrapper -f /etc/haproxy/haproxy.cfg -p /run/haproxy.pid
           ├─13747 /usr/sbin/haproxy -f /etc/haproxy/haproxy.cfg -p /run/haproxy.pid -Ds
           └─13748 /usr/sbin/haproxy -f /etc/haproxy/haproxy.cfg -p /run/haproxy.pid -Ds

Dec 21 13:58:19 os-controller.novalocal systemd[1]: Started HAProxy Load Balancer.
Dec 21 13:58:19 os-controller.novalocal systemd[1]: Starting HAProxy Load Balancer...
Dec 21 13:58:19 os-controller.novalocal haproxy-systemd-wrapper[13746]: haproxy-systemd-wrapper: executing /usr/sbin/haproxy -f /etc/haproxy/haproxy.cfg -p /run/...pid -Ds
Hint: Some lines were ellipsized, use -l to show in full.

It’s time to install LBaaS plugin on the network node

Installing LBaaSv2 Plugin at Network node

Ok, just a reminder that you are already into an OpenStack instance with Nuage plugin perfectly working. If, this is not the case, you will have to install the Nuage plugin for neutron before go further.

We need to install VRS into our network node. VRS will be in charge to manage communication between Computes node and the LBaaS.

Installing VRS service into Network node

This case we are going to follow instructions from “VSP Install Guide Release 3.2R4” in the section “VRS AND VRS-G SOFTWARE INSTALLATION ON REDHAT AND UBUNTU”. This is a Linux Red Hat v7, then, we’ll follow the guidelines for this linux distro and version.

You will need the Nuage-VRS-3.2.4-133-el7.tar.gz file for later. Connect to support.alcatel-lucent.com and get it.

Let’s enable EPEL repository as our first action:rpm -Uvh http://mirror.pnl.gov/epel/7/x86_64/e/epel-release-7-5.noarch.rpm

Now, let enable the following repo at /etc/yum.repos.d/redhat.repo into the following section:


[rhel-7-server-optional-rpms]
metadata_expire = 86400
sslclientcert = /etc/pki/entitlement/7395579051263769833.pem
baseurl = https://cdn.redhat.com/content/dist/rhel/server/7/$releasever/$basearch/optional/os
ui_repoid_vars = releasever basearch
sslverify = 1
name = Red Hat Enterprise Linux 7 Server - Optional (RPMs)
sslclientkey = /etc/pki/entitlement/7395579051263769833-key.pem
gpgkey = file:///etc/pki/rpm-gpg/RPM-GPG-KEY-redhat-release
enabled = 1
sslcacert = /etc/rhsm/ca/redhat-uep.pem
gpgcheck = 1

Now, we have to run yum update
It’s time to go for cup of coffee. It’s going to take some time.

Install the following dependencies:


yum install libvirt
yum install python-twisted-core
yum install perl-JSON
yum install qemu-kvm
yum install vconfig

Let’s install our VRS packages that we’ve just got.


tar zxvf Nuage-VRS-3.2.4-133-el7.tar.gz
yum localinstall nuage-openvswitch-3.2.4-133.el7.x86_64.rpm
yum localinstall nuage-openvswitch-dkms-3.2.4-133.el7.x86_64.rpm

Now, let add the personality to our /etc/default/openvswitch file and the IP of the controller. The file states like this:


PERSONALITY=vrs
UUID=
CPE_ID=
DATAPATH_ID=
UPLINK_ID=
NETWORK_UPLINK_INTF=
NETWORK_NAMESPACE=
PLATFORM="kvm"
DEFAULT_BRIDGE=alubr0
GW_HB_BRIDGE=
GW_HB_VLAN=4094
GW_HB_TIMEOUT=2000
MGMT_ETH=
UPLINK_ETH=
GW_PEER_DATAPATH_ID=
GW_ROLE="backup"
CONN_TYPE=tcp

ACTIVE_CONTROLLER=10.0.0.3
SKB_LRO_MOD_ENABLED=no
DEFAULT_LOG_LEVEL=

Now, we need to take care of selinux or our openvswitch will failed. you have to either disable selinux or set it to permissive. You can just use the cli here and setenforce 0 and change the file /etc/selinux/config just in case of any later reboot. Use the command getenforce to check if the status is “Permissive”

Let’s restart openvswitch doing systemctl restart openvswitch.service

Now, let’s check if the service is working properly:

[root@os-controller ~(kyst_adm)]# ovs-vsctl show
4af4f578-7fbf-407c-b04a-8f00336421b1
    Bridge "alubr0"
        Controller "ctrl1"
            target: "tcp:10.0.0.3:6633"
            role: master
            is_connected: true
        Port "alubr0"
            Interface "alubr0"
                type: internal
        Port "svc-rl-tap1"
            Interface "svc-rl-tap1"
        Port "svc-rl-tap2"
            Interface "svc-rl-tap2"
        Port svc-pat-tap
            Interface svc-pat-tap
                type: internal
    ovs_version: "3.2.4-133-nuage"

Now we are ready to resume our plugin installation

Back again to install LBaaS v2 plugin on network node

Let’s add the following line to our /etc/neutron/neutron.conf file under the default section:


[DEFAULT]
ovs_integration_bridge = alubr0

Then /etc/neutron/neutron.conf will be as the following:


[DEFAULT]
service_plugins=neutron_lbaas.services.loadbalancer.plugin.LoadBalancerPluginv2
ovs_integration_bridge = alubr0
verbose = True
router_distributed = False
debug = False
state_path = /var/lib/neutron
use_syslog = False
log_dir =/var/log/neutron
bind_host = 0.0.0.0
bind_port = 9696
core_plugin = neutron.plugins.nuage.plugin.NuagePlugin
auth_strategy = keystone
base_mac = fa:16:3e:00:00:00
mac_generation_retries = 16
dhcp_lease_duration = 86400
dhcp_agent_notification = True
allow_bulk = True
allow_pagination = False
allow_sorting = False
allow_overlapping_ips = True
agent_down_time = 75
router_scheduler_driver = neutron.scheduler.l3_agent_scheduler.ChanceScheduler
allow_automatic_l3agent_failover = False
dhcp_agents_per_network = 1
l3_ha = False
api_workers = 4
rpc_workers = 4
use_ssl = False
notify_nova_on_port_status_changes = True
notify_nova_on_port_data_changes = True
nova_url = http://10.0.0.10:8774/v2
nova_region_name =RegionOne
nova_admin_username =nova
nova_admin_tenant_id =f33c6e3b0519478ab6e55fef9a1a3d1c
nova_admin_password =56415bf8a5444bb6
nova_admin_auth_url =http://10.0.0.10:5000/v2.0
send_events_interval = 2
rpc_backend=neutron.openstack.common.rpc.impl_kombu
control_exchange=neutron
lock_path=/var/lib/neutron/lock


[matchmaker_redis]

[matchmaker_ring]

[quotas]

[agent]
root_helper = sudo neutron-rootwrap /etc/neutron/rootwrap.conf
report_interval = 30

[keystone_authtoken]
auth_uri = http://10.0.0.10:5000/v2.0
identity_uri = http://10.0.0.10:35357
admin_tenant_name = services
admin_user = neutron
admin_password = 3045b48a69f340b0

[database]
connection = mysql://neutron:92ed70427a014077@10.0.0.10/neutron
max_retries = 10
retry_interval = 10
min_pool_size = 1
max_pool_size = 10
idle_timeout = 3600
max_overflow = 20

[nova]

[oslo_concurrency]

[oslo_policy]

[oslo_messaging_amqp]

[oslo_messaging_qpid]

[oslo_messaging_rabbit]

kombu_reconnect_delay = 1.0
rabbit_host = 10.0.0.10
rabbit_port = 5672
rabbit_hosts = 10.0.0.10:5672
rabbit_use_ssl = False
rabbit_userid = guest
rabbit_password = guest
rabbit_virtual_host = /
rabbit_ha_queues = False

[service_providers]
service_provider=LOADBALANCERV2:Haproxy:neutron_lbaas.drivers.haproxy.plugin_driver.HaproxyOnHostPluginDriver:default


Let’s configure the /etc/neutron/lbaas_agent.ini file as the following:


[DEFAULT]
ovs_use_veth=False
interface_driver=nuage_neutron.lbaas.agent.nuage_interface.NuageInterfaceDriver

[haproxy]

Finally, let’s start or LBaaS agent doing systemctl start neutron-lbaasv2-agent and we are done

We can start adding new load balancers at any moment

Playing with LBaaS

Sadly horizon doesn’t support all panels for LBaaSv2, then you will have to use Neutron APIs instead (please, don’t blame Nuage or me for that). Liberty is solving this out anyway (I didn’t test it yet). I suggest you to start through command-line as I’m showing in the following lines:


[root@os-controller ~(kyst_adm)]# neutron net-list
+--------------------------------------+------------------+------------------------------------------------------+
| id                                   | name             | subnets                                              |
+--------------------------------------+------------------+------------------------------------------------------+
| 24b003ec-d666-4814-9c55-5cb14d65a065 | adm.priv2        | f5944244-4e12-4c8a-a748-0326e8a015e8 192.168.52.0/24 |
| 2f61f543-214f-462f-afb7-182ec816abe9 | external_network | 8f73aa92-e8af-454b-bffe-55c72257453b 10.0.1.0/24     |
| 562972a3-3403-49a3-87aa-d2c9a714a0fd | adm.priv4        | c317c461-7da7-45b9-b1f0-ce45f0acfafa 192.168.54.0/24 |
| 7080b26f-e556-4207-8c5a-e403865dcc30 | adm.priv1        | f3355820-69bc-40c6-bfe2-e6c07df24d30 192.168.51.0/24 |
| b1a4897a-d6e8-4a0f-ae13-41a6bc40cea5 | private          | 45916c43-0f29-48bf-9fdd-332a2c99be5f 172.16.1.0/24   |
| b3631409-eace-4ae1-81b4-499fb0ce3104 | adm.priv3        | a7304423-2193-4f0c-8e95-9868cc329698 192.168.53.0/24 |
| eb0b7fc6-efd7-469d-9b6d-e0188719f5b1 | t-system01       | ff71594b-1e4e-4fdb-ac79-e71cf444bac2 169.87.23.0/24  |
+--------------------------------------+------------------+------------------------------------------------------+

[root@os-controller ~(kyst_adm)]# neutron lbaas-loadbalancer-create --name lb3 45916c43-0f29-48bf-9fdd-332a2c99be5f
Created a new loadbalancer:
+---------------------+--------------------------------------+
| Field               | Value                                |
+---------------------+--------------------------------------+
| admin_state_up      | True                                 |
| description         |                                      |
| id                  | c5e548b9-6936-435d-b468-0aa4b9fcd08a |
| listeners           |                                      |
| name                | lb3                                  |
| operating_status    | ONLINE                               |
| provider            | haproxy                              |
| provisioning_status | ACTIVE                               |
| tenant_id           | 63d41744393243b6a51a95c6063fe4c1     |
| vip_address         | 172.16.1.4                           |
| vip_port_id         | b13807f4-371d-4df4-9e70-6c4db70e6f49 |
| vip_subnet_id       | 45916c43-0f29-48bf-9fdd-332a2c99be5f |
+---------------------+--------------------------------------+

If you want to see these load balancers properly from the nuage console. You will have to create a listener as the the following:


[root@os-controller ~(kyst_adm)]# neutron lbaas-loadbalancer-list
+--------------------------------------+------+---------------+---------------------+----------+
| id                                   | name | vip_address   | provisioning_status | provider |
+--------------------------------------+------+---------------+---------------------+----------+
| a986bead-2fe5-4f53-a607-0c197565a1b3 | lb1  | 192.168.51.14 | ACTIVE              | haproxy  |
| b1bd8993-acc7-484d-ba93-b5ce185510b4 | lb0  | 192.168.51.13 | ACTIVE              | haproxy  |
| c5e548b9-6936-435d-b468-0aa4b9fcd08a | lb3  | 172.16.1.4    | ACTIVE              | haproxy  |
+--------------------------------------+------+---------------+---------------------+----------+
[root@os-controller ~(kyst_adm)]# neutron lbaas-listener-create --loadbalancer lb3 --protocol HTTP --protocol-port 80 --name listernerlb3
Created a new listener:
+--------------------------+------------------------------------------------+
| Field                    | Value                                          |
+--------------------------+------------------------------------------------+
| admin_state_up           | True                                           |
| connection_limit         | -1                                             |
| default_pool_id          |                                                |
| default_tls_container_id |                                                |
| description              |                                                |
| id                       | d0fb168b-008b-44b8-9bbc-b59d4ada021e           |
| loadbalancers            | {"id": "c5e548b9-6936-435d-b468-0aa4b9fcd08a"} |
| name                     | listernerlb3                                   |
| protocol                 | HTTP                                           |
| protocol_port            | 80                                             |
| sni_container_ids        |                                                |
| tenant_id                | 63d41744393243b6a51a95c6063fe4c1               |
+--------------------------+------------------------------------------------+
[root@os-controller ~(kyst_adm)]# neutron lbaas-listener-list
+--------------------------------------+-----------------+--------------+----------+---------------+----------------+
| id                                   | default_pool_id | name         | protocol | protocol_port | admin_state_up |
+--------------------------------------+-----------------+--------------+----------+---------------+----------------+
| d0fb168b-008b-44b8-9bbc-b59d4ada021e |                 | listernerlb3 | HTTP     |            80 | True           |
| b5c02849-a247-48ad-909d-cccbcbe4b367 |                 | listernerlb0 | HTTP     |            80 | True           |
| 0c061dcf-006f-4283-a88c-c14ce2f0096a |                 | listernerlb1 | HTTP     |            80 | True           |
+--------------------------------------+-----------------+--------------+----------+---------------+----------------+

This will come up into the VSD console as the next picture:

nuage networks sdn plugin lbaas haproxy kilo red hat openstack neutron

Check the namespaces that you’ve just created:


[root@os-controller ~(kyst_adm)]# ip netns list
qlbaas-c5e548b9-6936-435d-b468-0aa4b9fcd08a
qlbaas-a986bead-2fe5-4f53-a607-0c197565a1b3
qlbaas-b1bd8993-acc7-484d-ba93-b5ce185510b4

Let’s create now a pool


[root@os-controller ~(kyst_adm)]# neutron lbaas-pool-create --lb-algorithm ROUND_ROBIN --listener listernerlb3 --protocol HTTP --name pool1
Created a new pool:
+---------------------+------------------------------------------------+
| Field               | Value                                          |
+---------------------+------------------------------------------------+
| admin_state_up      | True                                           |
| description         |                                                |
| healthmonitor_id    |                                                |
| id                  | 4fc8f356-01bf-4aa2-8fcb-afa5b49d8ef3           |
| lb_algorithm        | ROUND_ROBIN                                    |
| listeners           | {"id": "d0fb168b-008b-44b8-9bbc-b59d4ada021e"} |
| members             |                                                |
| name                | pool1                                          |
| protocol            | HTTP                                           |
| session_persistence |                                                |
| tenant_id           | 63d41744393243b6a51a95c6063fe4c1               |
+---------------------+------------------------------------------------+

Now I will add a couple of servers from different subnets (why not?)


[root@os-controller ~(kyst_adm)]# nova list
+--------------------------------------+--------------------+--------+------------+-------------+----------------------------------+
| ID                                   | Name               | Status | Task State | Power State | Networks                         |
+--------------------------------------+--------------------+--------+------------+-------------+----------------------------------+
| 7fc236ab-f43e-418e-b44a-f40da53a8256 | adm.priv1.inst_fip | ACTIVE | -          | Running     | adm.priv1=192.168.51.2, 10.0.1.7 |
| ff4c0705-73bc-467b-bbbf-f16a6795a53a | adm.priv2.inst_fip | ACTIVE | -          | Running     | adm.priv2=192.168.52.2, 10.0.1.5 |
| aa189578-28c6-4e97-bf4f-a432cd62c0a9 | adm.priv3.inst_fip | ACTIVE | -          | Running     | adm.priv3=192.168.53.2, 10.0.1.8 |
| 598e3ce8-aea1-4d74-aa88-6a94a7cb668d | adm.priv4.inst_fip | ACTIVE | -          | Running     | adm.priv4=192.168.54.2, 10.0.1.6 |
| 642dd34b-ddc5-4c38-a3bd-9697ee9ca81f | test01             | ACTIVE | -          | Running     | private=172.16.1.3, 10.0.1.4     |
| eb4602cd-8614-4ccb-96d2-23dbc2bde2d7 | tsystems01         | ACTIVE | -          | Running     | t-system01=169.87.23.2           |
+--------------------------------------+--------------------+--------+------------+-------------+----------------------------------+
[root@os-controller ~(kyst_adm)]# neutron lbaas-member-create --subnet adm.priv1 --address 192.168.51.2 --protocol-port 80 pool1
Created a new member:
+----------------+--------------------------------------+
| Field          | Value                                |
+----------------+--------------------------------------+
| address        | 192.168.51.2                         |
| admin_state_up | True                                 |
| id             | 0f172e78-02f3-4046-8b16-9670b4d3bbb4 |
| protocol_port  | 80                                   |
| subnet_id      | f3355820-69bc-40c6-bfe2-e6c07df24d30 |
| tenant_id      | 63d41744393243b6a51a95c6063fe4c1     |
| weight         | 1                                    |
+----------------+--------------------------------------+
[root@os-controller ~(kyst_adm)]# neutron lbaas-member-create --subnet adm.priv2 --address 192.168.52.2 --protocol-port 80 pool1
Created a new member:
+----------------+--------------------------------------+
| Field          | Value                                |
+----------------+--------------------------------------+
| address        | 192.168.52.2                         |
| admin_state_up | True                                 |
| id             | 6f124fce-f44e-45d0-b49e-69cddb93f894 |
| protocol_port  | 80                                   |
| subnet_id      | f5944244-4e12-4c8a-a748-0326e8a015e8 |
| tenant_id      | 63d41744393243b6a51a95c6063fe4c1     |
| weight         | 1                                    |
+----------------+--------------------------------------+

Let’s try if our load balancer is working out. I will create a index.html file with the content “I am into server ONE!” and a HTTP server into the pool’s member 192.168.51.2. Now I’ll try to access this from the load balancer 172.16.1.4.


[centos@adm ~]$ ifconfig -a
eth0: flags=4163<UP,BROADCAST,RUNNING,MULTICAST>  mtu 1500
        inet 192.168.51.2  netmask 255.255.255.0  broadcast 192.168.51.255
        inet6 fe80::f816:3eff:fe6b:db0b  prefixlen 64  scopeid 0x20
        ether fa:16:3e:6b:db:0b  txqueuelen 1000  (Ethernet)
        RX packets 10442  bytes 7627092 (7.2 MiB)
        RX errors 0  dropped 0  overruns 0  frame 0
        TX packets 7828  bytes 657499 (642.0 KiB)
        TX errors 0  dropped 0 overruns 0  carrier 0  collisions 0

lo: flags=73<UP,LOOPBACK,RUNNING>  mtu 65536
        inet 127.0.0.1  netmask 255.0.0.0
        inet6 ::1  prefixlen 128  scopeid 0x10
        loop  txqueuelen 0  (Local Loopback)
        RX packets 21498  bytes 1868738 (1.7 MiB)
        RX errors 0  dropped 0  overruns 0  frame 0
        TX packets 21498  bytes 1868738 (1.7 MiB)
        TX errors 0  dropped 0 overruns 0  carrier 0  collisions 0

[centos@adm ~]$ cat index.html 
I am into server ONE!
[centos@adm ~]$ sudo python -m SimpleHTTPServer 80 &
[1] 21508
[centos@adm ~]$ Serving HTTP on 0.0.0.0 port 80 ...

[centos@adm ~]$ telnet 172.16.1.4 80
Trying 172.16.1.4...
Connected to 172.16.1.4.
Escape character is '^]'.
GET /index.html
172.16.1.4 - - [22/Dec/2015 16:35:50] "GET /index.html HTTP/1.0" 200 -
HTTP/1.0 200 OK
Server: SimpleHTTP/0.6 Python/2.7.5
Date: Tue, 22 Dec 2015 16:35:50 GMT
Content-type: text/html
Content-Length: 22
Last-Modified: Tue, 22 Dec 2015 16:35:04 GMT

I am into server ONE!
Connection closed by foreign host.
[centos@adm ~]$ 


Well, and we’re done!
See you soon!